
IntroductionThis guide covers the steps that are required to create a killfont for W3D Engine games. There are a number of steps, and it will require a bit of art skill, as well as some specialised software for this task. This tutorial will not go into setting up the kill messages, as tutorials already exist for this.
Required Software
- 3DS Max. (Can be optional, depending on how you want to create the art for the kill icons).
-
Bitmap art program.
- This can be Photoshop, paint.net, GIMP or any other program of this sort. I will use Photoshop, but the techniques are the same, and do not rely on anything in Photoshop.
-
Vector art program.
- This can be Illustrator, Inkscape, or any other vector art program, as long as it can save SVG format files. In this tutorial, I will use Inkscape.
- FontForge (this application creates the font)
Prepare the art for the iconThe first thing you will need to do is create the vector art for the icon. This has a number of steps, and can be done many different ways. I will use the Harkonnen SMG from Battle for Dune as an example for the method I use for this.
Step 1: Render a silhouette of the object
The first step in this method requires you to render a silhouette of the object in question. The angle of the image can vary, it can be a side view, it can be a forward view, or even a top view. What is required for this stage is a silhouette that is recognizable as the object in question, and for firearms, that view is best gotten from a side view.
For my method in 3DS Max, I first create a Standard material, I set the diffuse and ambient colours to pure white, and I set the self-illumination to 100. This will allow me to create a good, clean sillhouette.
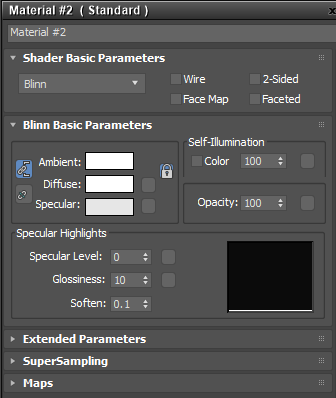
Fig. 1: Material settings for a silhouette material.
Apply this material to the meshes of the gun. If the weapon is already rigged for W3D, hide any bones that may get in the way of the render, such as Muzzle bones or eject bones.
Position the gun in the middle of an orthographic view, side on. Make sure the gun fits in the width of the viewport.
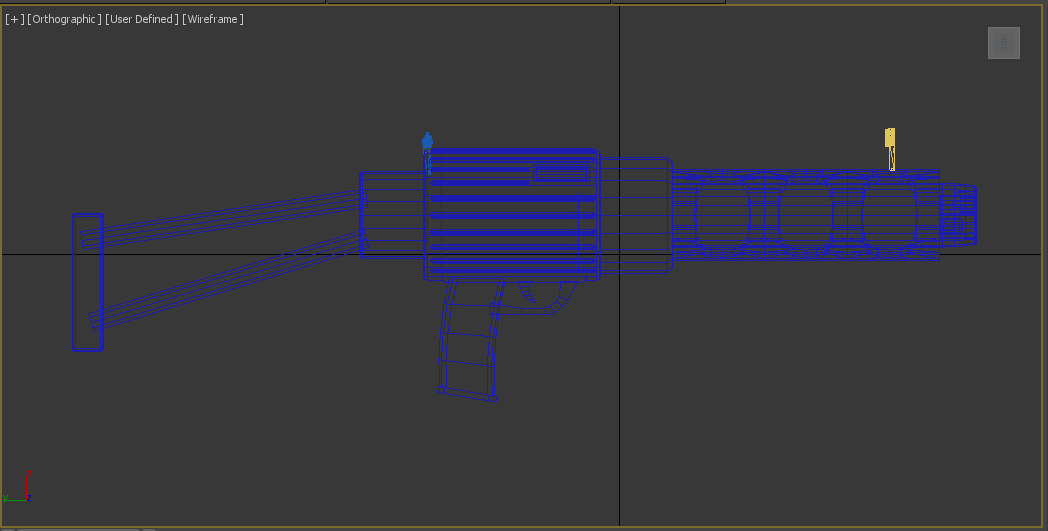
Fig. 2: Gun model positioned correctly in an orthographic viewport.
Once both of these have been done, go to the Render Setup window. This can be accessed via the Rendering menu, or by pressing F10, or by pressing the Render Setup button on the Max Toolbar (![]() ).
).
Once that window has opened, change the Output Size to 512 pixels wide and 512 pixels high.
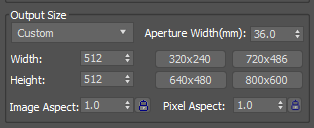
Fig. 3: Output size.
Once that is done, click render. A window with the side on silhouette should have been rendered. Save that render to a folder with other renders for the killfont. Save it as a 24 bit PNG, and make sure the alpha channel box is ticked.

Fig. 4: Settings for saving the weapon render.
Once this step is done, you can close 3DS Max at this point, as you are finished with that application.
Step 2: Cleaning the Silhouette up
Open up the silhouette you just created in the art package of choice.
The first thing you want to do is invert the image, making the white silhouette black.
Then, you need to clean the artwork up. This stage is more subjective, but essentially, you need to remove, or make more chunky, any small detail in the weapon's silhouette. Small detail will disappear or distort the vector version of the art, so making sure the art is chunky is key.
As an example, here is the Harkonnen SMG before and after cleanup.
Before: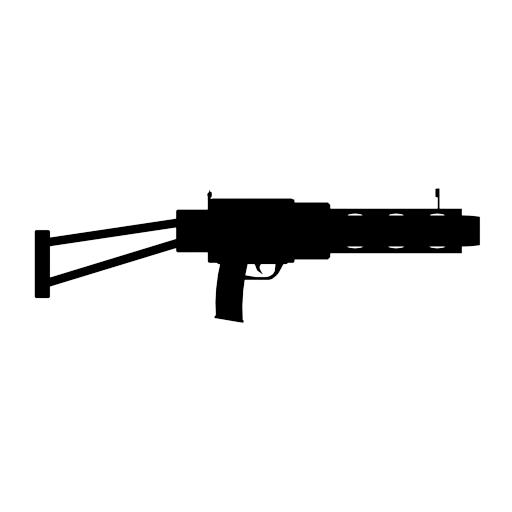 After:
Fig. 5: Before and after of the Harkonnen SMG PNGs.
Notice how I removed the holes in the gun's front, and made the ironsights chunkier. Things like that go a long way to making a clean kill icon, especially as these will only be as small as the text in game. Make sure you zoom out every now and again to see how it looks small.
Once this is done, save the png again and close the image editor.
Step 3: VectorizationThis step is the simplest step, and I recommend doing it in Inkscape even if you have Illustrator. Open Inkscape, drag the PNG into the new document, then right click the PNG and hit "Trace Bitmap..."
This will open the trace bitmap settings.
You shouldn't have to change any settings except for one: Make sure "Remove background" is ticked. You can use the preview window to check what the traced image will look like. Hit OK once you are happy with it.
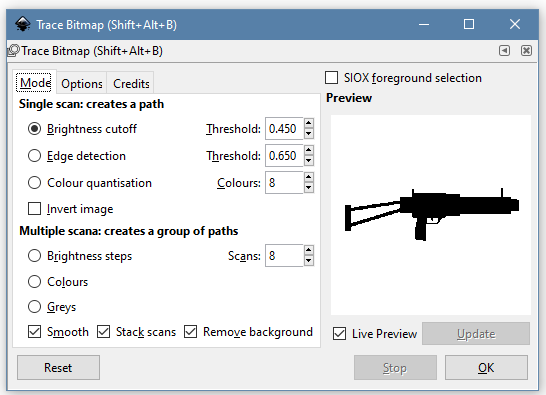
Fig. 6: Trace Bitmap window in Inkscape. Note that "Remove background" is ticked!
Next, delete the PNG weapon image. You may have to move the new vector image off of the top of it. At this stage, save the vector version to the same folder as the PNG image, and then close Inkscape.
Step 4: Font CreationThis is the trickiest part of the process. Open FontForge. For this example, I will be editing an existing font, Arial MT. Included in this tutorial is a copy of that font in FontForge SFD format as a base. Download it here: ArialMT_BFD.sfd
Open that SFD file in FontForge, and it will show you the main font "chart" window:
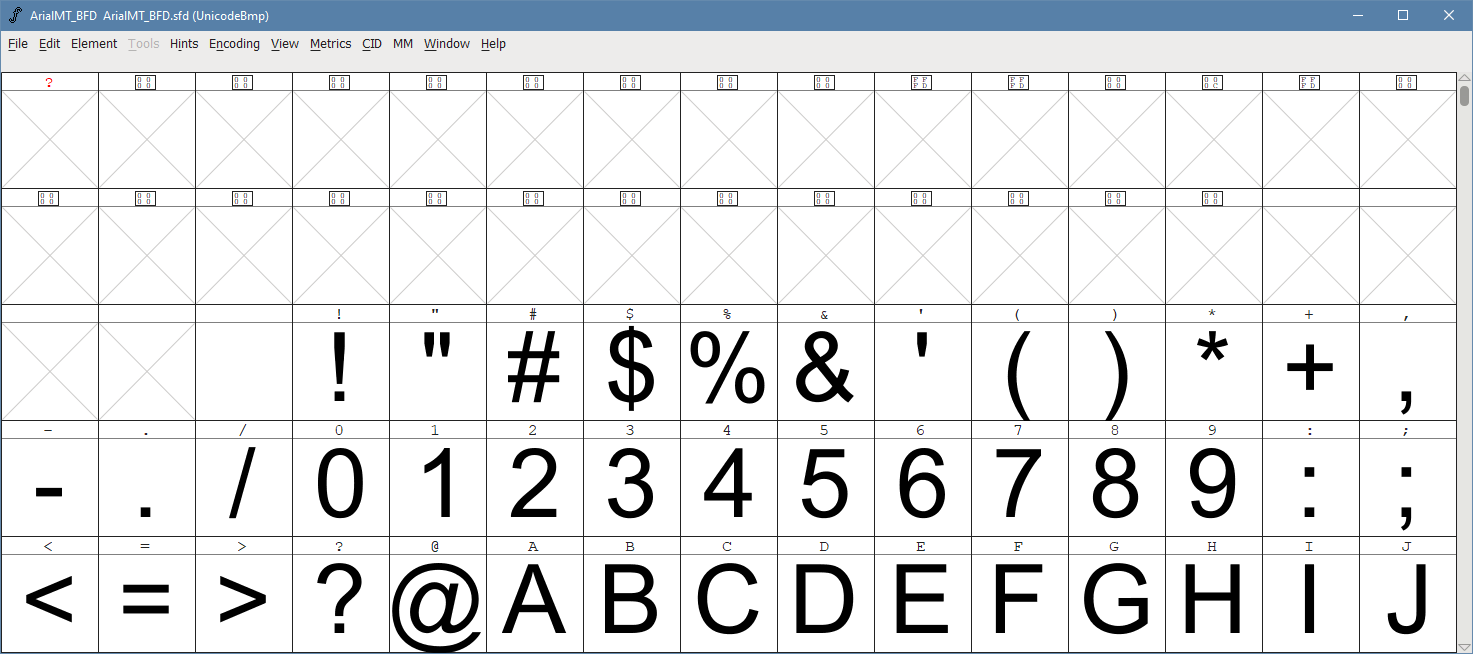
Fig. 7: FontForge main window.
When creating a W3D killfont, we need the font "glyphs" (the actual character images in the font) to be in a certain place, the Private Use Area. This area in a font is for whatever the font designer wants to use it for, and is not replacing any existing characters that have a proper meaning in one language or another.
To get to that area, go to the View Menu, and hit "Goto". It will pop open a small window. Hit the arrow on the side of the side of the text entry box, and choose "Private Use Area", then hit OK.

Fig. 8: The Goto window.
This will take you down to a bunch of empty font squares. with names like E000, etc. These are the Private Use Area characters, and they are what we will use for our killicons.
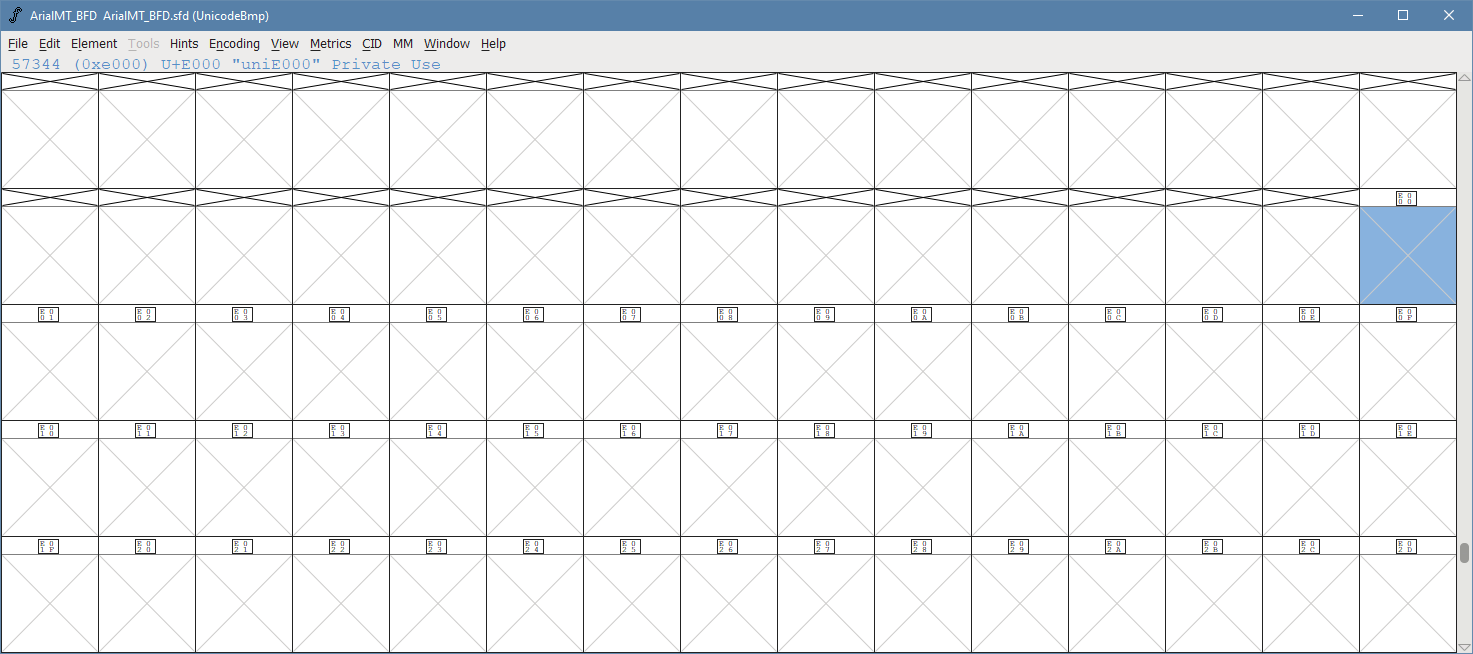
Fig. 9: The Private Use Area. E000 is selected, and is the first PUA character in the font.
Double click that E000 character box, and it will open the Glyph Editor window.
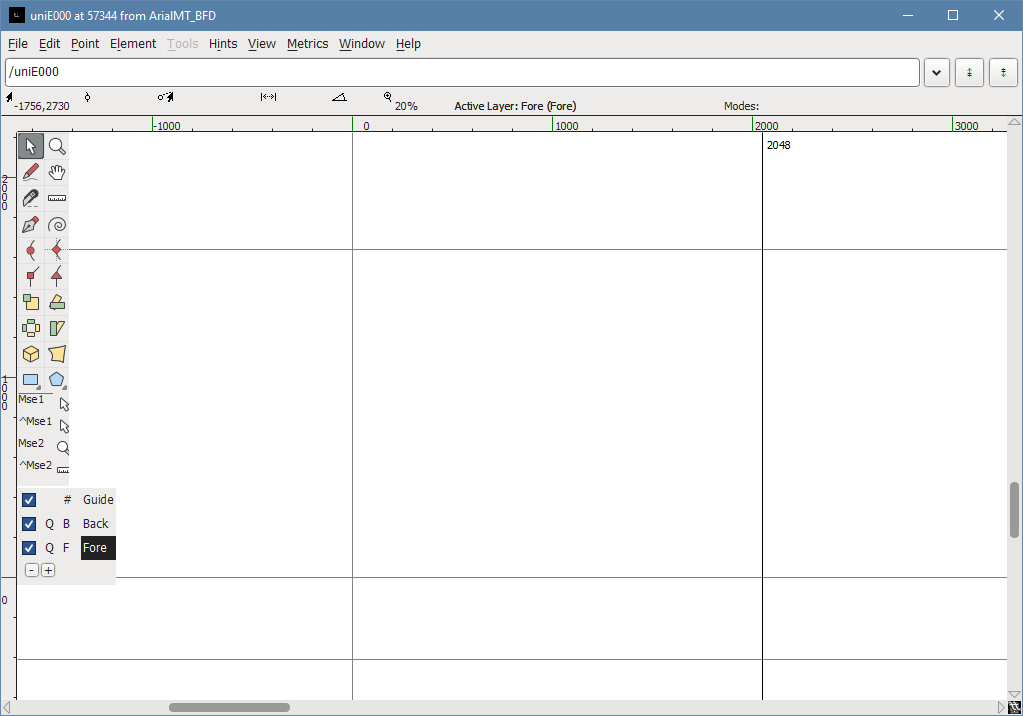
Fig. 10: The Glyph Editor window.
At this point, we want to import our SVG icon into the font. Go to File > Import. Change the Format to SVG, and go to where the SVG you created is, and select it. Then, hit Import.
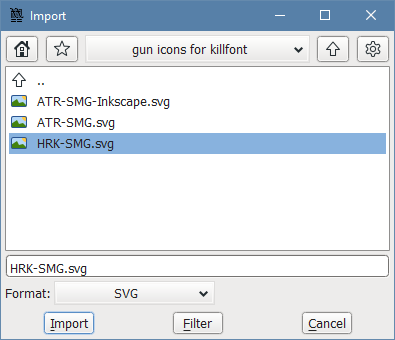
Fig. 11: The Import dialog
At this point, the icon should be in the glyph editor, but it is a little small. We need the icon to fit inbetween the top and bottom lines, with the "middle" of the gun just a little bit off the middle line (as the middle line is where the "bottom" of a letter without a descender sits.)
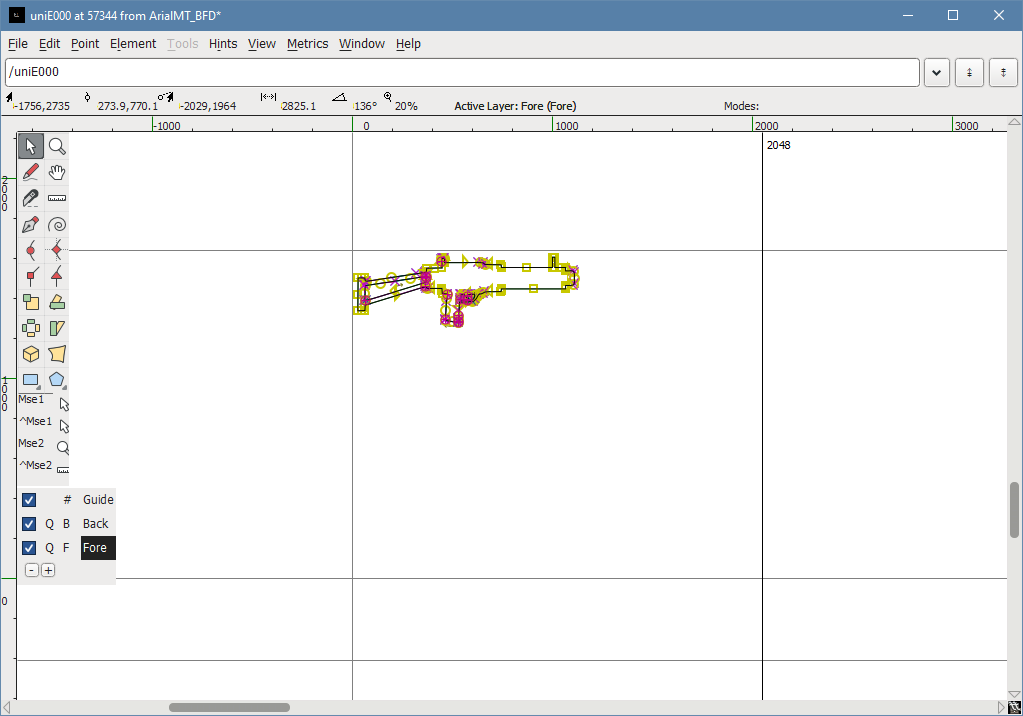
Fig. 12: Our icon, but too small.
Drag a selection box around the icon, then go to Element > Transformations > Transform. Set the transformation to Scale Uniformly, and set the scale to something around 400-425%. Hit apply to see a preview, and if it looks about right, then hit OK.
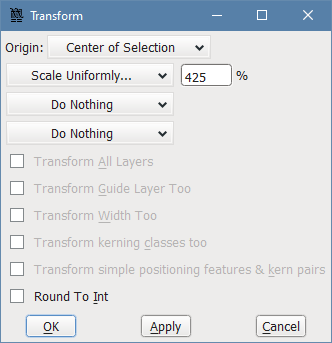
Fig. 13: The Transform dialog, with proper settings.
Once that is done, it's time to position it. Drag the icon so it sits roughly in the middle of the top and middle lines in the glyph editor, like this:
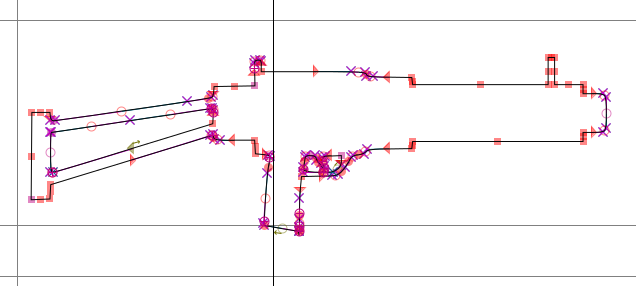
Fig. 14: Good icon positioning.
Finally, drag the rightmost line to just after the end of the icon, so that there's a small gap between it and the gun icon, like so:
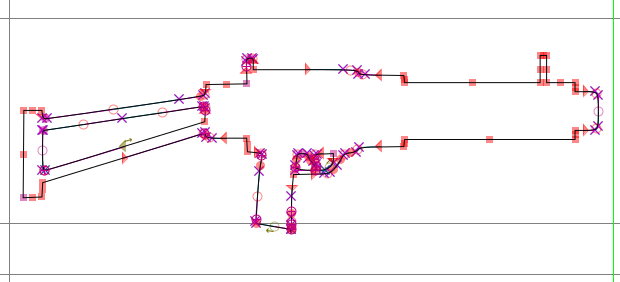
Fig. 15: Good spacing (the font term for this is kerning, fyi!)
This will make sure the spacing between the icon and the text is correct when being used in game. Now close the glyph editor. You should see your new icon in the font.
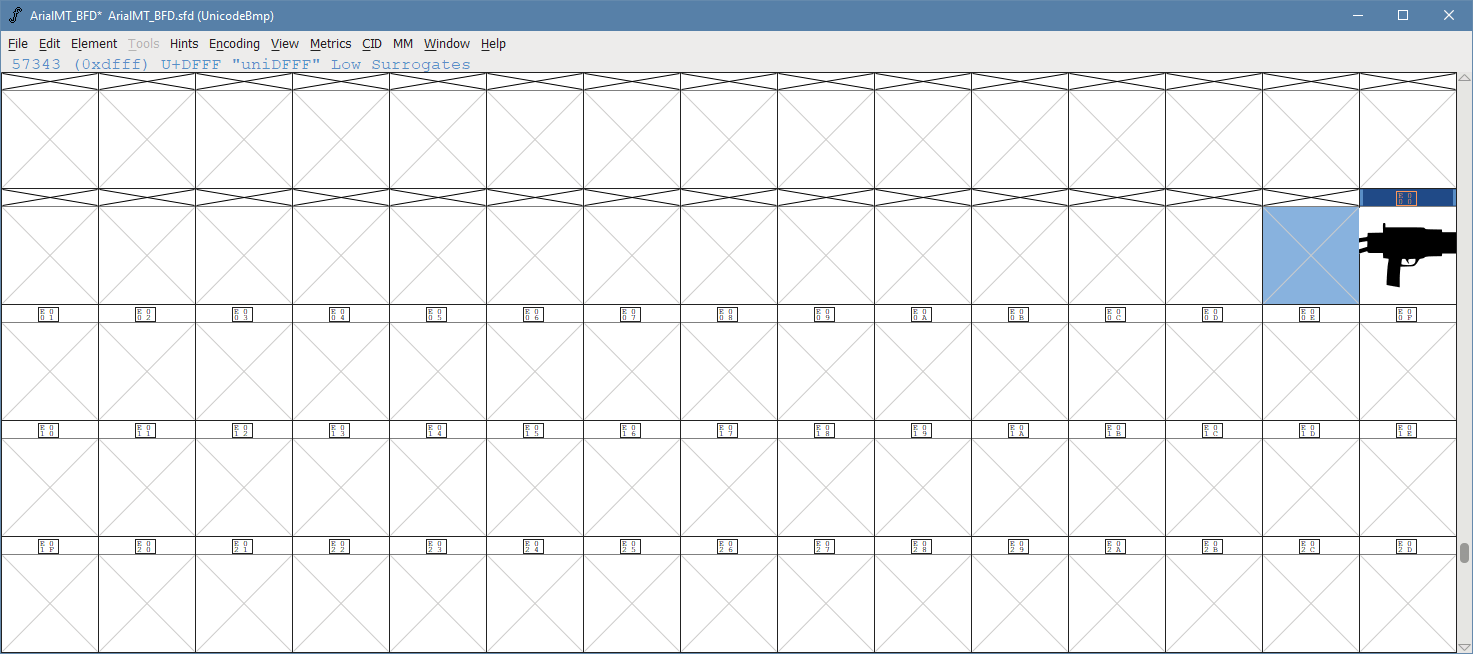
Fig. 16: Our new icon in the font!
Save the SFD at this point, we don't want to lose any work.
To test the font, we can export it and have Windows install it as a font. Go to File > Generate Fonts..., and then set the type to "TrueType". The font should be generated by default in the same folder as the SFD. Hit OK to generate the font.

Fig. 17: Generation
Once the font is generated, go to the folder with the font, right click it, and click Install. If you've regenerated the font and are reinstalling the new version, Windows may ask you if you want to overwrite the font.
At this point, we can quickly check our new icon in the Windows Character Map program. If all has gone right, the new icon should be towards the bottom of the font:
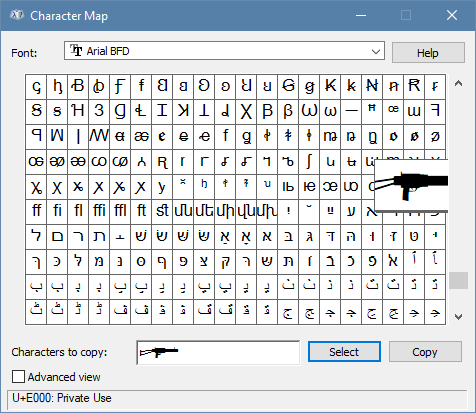
Fig. 18: Our new icon, in the actual font, ready for use.
At this point, you can continue making icons to fill up the whole font! Good luck, and have fun!


Recommended Comments
There are no comments to display.
Join the conversation
You can post now and register later. If you have an account, sign in now to post with your account.