Leaderboard


Popular Content
Showing most liked content on 03/03/2021 in all areas
-
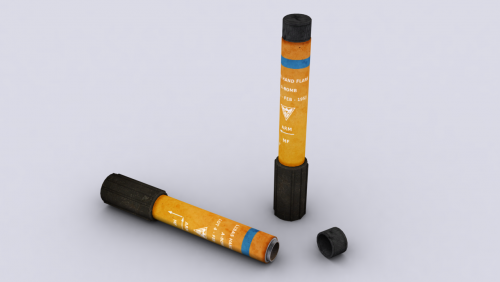
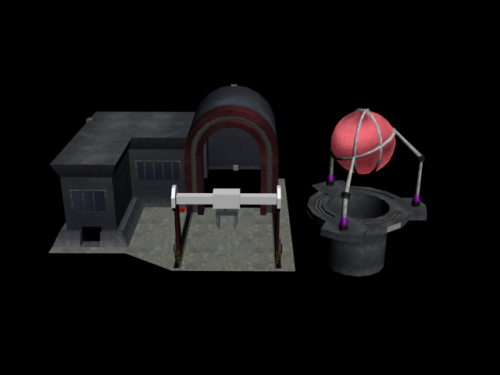
Much Signal Flares, such Iron Curtain Allied & Soviet Signal Flares @Kane000 has been going crazy recently with lots of development updates! Today we’re showing off WIP of both the Allied and Soviet Signal Flares. These items have needed an update for many years, so he decided to knock this out very quickly. We'll hopefully bring this to you in a future update coming soon! Soviet Iron Curtain It’s finally happening! We’re getting closer to testing the waters with super weapons. Here’s a shot from our recently modeled Iron Curtain by user Tumamaloca! We’ve been brainstorming ideas for how to implement the secondary super weapons, but realized we needed a newer model for the Iron Curtain before we considered adding it (the older one was heavily outdated).


 2 likes
 -
I started working on Sole Survivor a while back. It poses some interesting challenges because it is of a unique construction, like no other renegade mod. SomeRhino did much of this customization to make it behave like a standalone game, while still piggybacking on renegade. I have made some good progress, but there is still plenty to do. I've made a couple videos that you can find on youtube and see the beginning stages. I need to make another video to show the current progress. But yes, it is being worked on. The download that Moonsense linked up there contains only the original files, which only work with stock renegade (you can not use any of the TT updates or it will break it). Hopefully we can have it running on a modern version of the engine soon! Thanks for your interest!2 likes
-
EDITS? IN MY MAFIA THREAD?! It's more likely than you think!2 likes
-
Screams in .9925 losing the popular vote This is fake news.2 likes
-
Or something like "I want to be an anime girl" would work as well2 likes
-
2 likes
-
Version 93575221.211 like
-
So it even mimicked Soul Survivor (the actual game) down the playerbase size you could almost say :P1 like
-
Yes. It had a lot of pretty interesting game modes, and the combat was decently fun at the time. The game suffered from not having a lot of members in the community, and most of them were making their way over to APB/Reborn not long after it released.1 like
-
What is this sole survivor mod even? Does it try to mimick like the actual sole survivor game (but in FPS style ofc), or something entirely different?1 like
-
I'm just making fun of you for posting a broken gif. I wanted to see what it was!1 like
-
He's got competition now it seems if Coolrock's gif game is any indication.1 like
-
zunnie ported it back in the day. His most infamous contribution being the several hundred MB music file he included with it, but it was otherwise authentic.1 like
-
What if I told you that Gamma is almost 10 years old?1 like
-
1 like
-
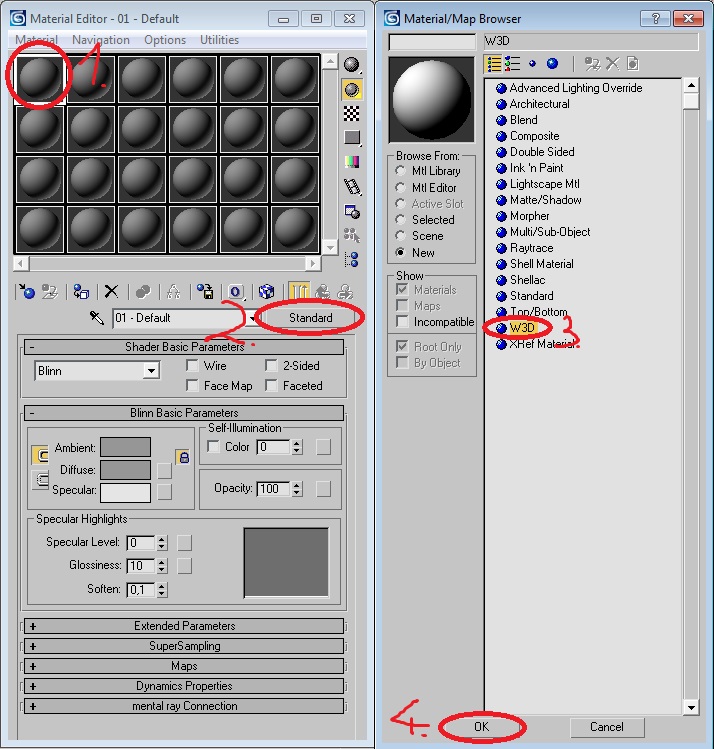
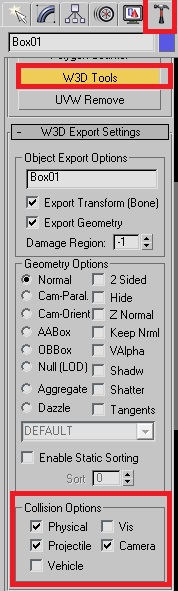
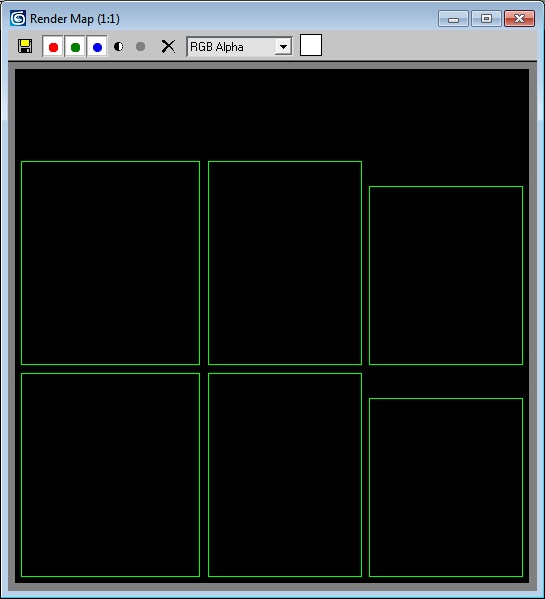
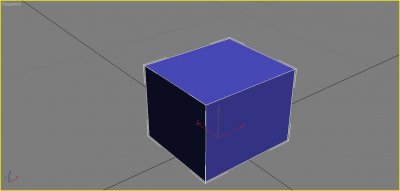
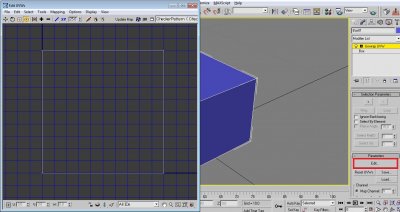
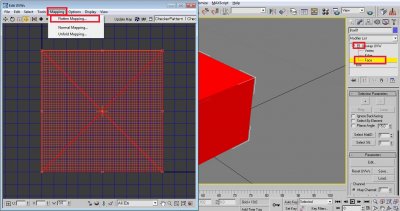
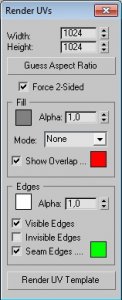
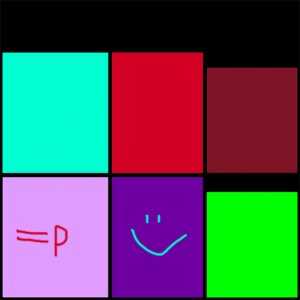
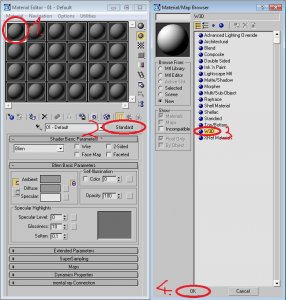
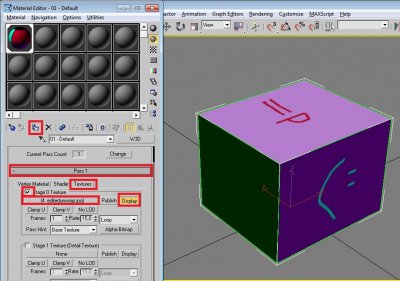
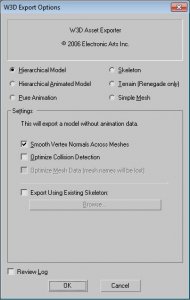
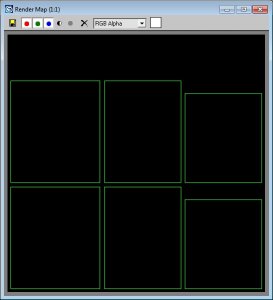
Author: moonsense715 Skill level: 2 Ever wondered how to connect modeling, unwrapping and texturing together? How an unwrap gets into photo editors and then comes back to the modeling software? Then this tutorial is for you. 1. Create your model To keep this tutorial simple, I will demonstrate the workflow on (you guessed it) a box, but it works for almost anything. So in 3ds Max, get your model complete, here's my box (size: 3.5 x 4.0 x 3.0): 2. Unwrap your model The next step is, unwrapping your model. Apply the UVW Unwrap modifier onto your model (make sure it is selected): Now on the right side panel, you will see "Parameters" and under that a big "Edit" button. Click that and the Edit UVWs window will pop up: Now on the right panel, expand Unwrap UVW and select Face. Hit CTRL + A to select all the faces. On the Edit UVWs window, click Mapping and choose Flatten Mapping. On the popup window, just hit OK. The unwrapping for this box is complete as it is a very simple model. For more complicated models, the unwrap will most likely look very unoptimized and scattered all around. You can learn more about unwrapping HERE. For now, let's continue using the unwrap in the texturing phase. 3. Get your unwrap ready for an image editor Before you close the Edit UVWs window, we need it for one more thing. Click Tools and select "Render UVW Template". The following dialog should appear: Play around with the settings if you like or leave it as default and hit "Render UV Template". An unwrap image will render. Click the save icon save it as a PNG or TGA filetype, whichever you can open with your image editor software such as Photoshop, Gimp or even MS Paint if you just want to try out this tutorial. 4. Use the unwrap in the image editor Open the picture you rendered with an image editor software. Edit it to your liking, the unwrap lines help you as they show where to draw on the image. If you are unsure which part of the unwrap is which, you can check it on your Edit UVWs window. Select a face and it will be highlighted in all your open camera views. This is an example I came up with: Save the image. 5. Apply the new texture to your model Back in 3ds Max 8, open your material editor by hitting "M". Select any material slot (big grey ball) and click Standard. Change it to W3D and hit OK. Under Pass 1, switch to the Textures tab. Tick Stage 0 Texture and click on None. Browse for the texture file you just created and hit OK. Click Display and Assign Material Selection on your selected model. The texture should appear on it. 6. Export the model and finish In normal cases, you should tick Physical, Projectile and Camera collisions on your mesh on the Utilities (hammer) tab under W3D Tools so you can collide with it, shoot it and your camera will not go through it. This does not apply to characters and vehicles in W3D, you need to rig those in a special way. See the other tutorials for them. As for this box model tutorial, now click File -> Export. Filetype should be W3D Asset, give it any name. On the export options, choose Hierarchical Model and change nothing else. Now your asset is ready to be used in the W3D engine. Open it with W3D View to look at it or add it as a preset in Level Edit to use it. Tutorial source files Here are the files used by this tutorial, feel free to look at it to check as reference: GenericAssetWorkflow.zip


 1 like