Vertex Material: |
|
 This
is the Standard material or texture for the geometry in your scene.
It's important to realize that many items in here are co-dependant
on each other, some things only work when others are enabled and
to best get acquainted with it, experiment around to find the most
useful combinations. This
is the Standard material or texture for the geometry in your scene.
It's important to realize that many items in here are co-dependant
on each other, some things only work when others are enabled and
to best get acquainted with it, experiment around to find the most
useful combinations.
The "Args:"
(Arguments) window allows you to enter in specific information that
you'd want the mapper to do. When you see the Arguments listed in
here for each type, do not include the "( )" parenthesis
in your actual argument and the types are as follows:
(float) - any real number, ex: 1.8
(int) - any integer, e.g:: -.5
(bool) - either TRUE or FALSE
|
|
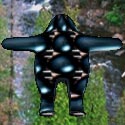
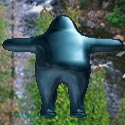
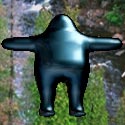
Ambient:
|
Ambient
color is the color of the object's shaded portion. |
| |
| Diffuse:
|
The
diffuse color is the color that the object reflects when illuminated
by lighting, the base color of the object. |
| |
|
Specular:
|
Disabled |
| |
|
Emissive:
|
Acts
as the base of the alpha levels in a map, however, It wont
be effected by light, similar to a self illumination shader in max.
 NOTE: For in-game vertice coloring;
If emissive is any color other than black, ambient and diffuse have
to be black.
If emissive is black, ambient and diffuse may be any color, but the
colors must be the same color. |
| |
|
Opacity:
|
Sets
the opacity of the mesh, 1 = 100% opaque, and 0 = completely transparent.
NOTE: Doesn't work with the shader
blending mode "opaque". Also note; when used in conjunction
with the "alpha test" shader blending mode, the texture
map you choose must have an alpha channel in it, for this to display
correctly. |
| |
|
Translucency:
|
Disabled |
| |
|
Shininess:
|
Disabled:
Controls the tightness of the specular highlights. |
| |
|
Specular
to Diffuse:
|
Obsolete |
| |
| Stage
0 Mapping: |
This area
is where you select the way the mesh will display in its environment.
Refer to the Shader tab (blend area) to adjust more properties and
to load a bitmap. |
 A
note about mappers: A
note about mappers:
When creating a Texture map for use with any type except "UV",
you must flip your map vertically so that it will appear upside down
in order for it to work correctly. |
|
Stage
0 Mapping types:
|
Also known
as "Mappers", Blending modes for the mesh in it's environment. |
UV:
 |
For
use with UV Mapping coordinates |
Environment:
 |
Uses
the normals to look up the environment map. Hotspot of light always
comes from top right no matter which direction the object or camera
is facing.
Artist
Notes: It has a couple downsides. It
doesn't show the graduation of light across a flat surface as well
as a World Space environmental and when used in conjunction with camera
tracking the object, it wont appear to be as real because the light
source remains constant. |
Classic Environment:
|
Similar to
Environment; uses the reflection to look up the environment map, overall
object has more contrast, (better for simulating metallic objects) |
Screen:
|
Takes the screen coordinate and uses that
as the UV coordinate, this makes the map always facing the camera.
Args:
UScale=(float)
e.g: 3.0
VScale=(float) e.g: 0.5
UPerSec=(float) e.g: -0.1
VPerSec=(float) e.g: 1.0
|
Linear Offset:
 |
Same
mapping type as "UV" except it allows you to make the texture
scroll across the map at a speed specified in the arguments box. The
Scrolling speed works on 1 unit per second basis. U is for horizontal,
positive values
move it left while (-) negative values move it right (based
on UV mapping coordinates).
V is for vertical, positive
values move it down while (-) negative values move it up(based
on UV mapping coordinates)
.
Args:
UPerSec=(float) e.g: -0.3
VPerSec=(float) e.g: 5.0 |
Silhouette:
 |
Obsolete,
not supported |
Scale: NEW
|
Scales
the UV coordinates, useful for detail mapping.
Args:
UScale=(float) e.g: 3.0
VScale=(float) e.g: 0.5 |
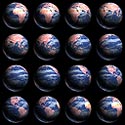
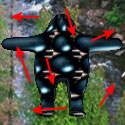
Grid: NEW
(e.g. Of a Grid Map)
|
For use with a "Grid
Bitmap" Similar to how the "Frame / UCoordinate"
works in the emitter system;
A grid bitmap is divided into
individual frames that the computer reads as a grid,
left to right, top to bottom, one
frame at a time and displays each section of the grid as a single
frame, then the next frame then so on, until it cycles through back
to the beginning. This effect creates an animated map. You can Adjust
the speed of your map in frames per second (FPS).
Args:
FPS=(float) e.g: 29.5
Log2Width=(int) e.g: 2
Grid Map creation parameters:
(for use with all "grid" type maps.)
1 = 2 X 2 (2
frames across 2 frames down)
2 = 4 X 4 (4
frames across 4 frames down)
4 = 8 X 8 (8
frames across 8 frames down)
8 = 16 X 16 (16
frames across 16 frames down)
|
Rotate:
NEW

|
Rotates a texture map
about a specified center. The speed of the rotation is measured
in radians per second, (e.g: 2 = 2 full rotations per second). Positive
values rotate counter clockwise while negative rotate the map clockwise.
Note: by default the mapping coordinates center starts at the top
left corner of the map. To make it start in the center of the map,
make the UCenter and VCenter values of "0.5".
Args:
Speed=(float) e.g: 2
UCenter=(float) e.g: 0.5
VCenter=(float) e.g: 0.5
|
Sine: NEW
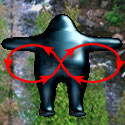 |
Moves
the texture map around in the shape of a lissajous figure. (You can
create figure 8's and such)
Args:
UAmp=(float) e.g. 1
UFreq=(float) e.g: 2
UPhase=(float) e.g: 1
VAmp=(float)
e.g. 1
VFreq=(float) e.g: 2
VPhase=(float) e.g: 1
|
Step: NEW
 |
Similar
to Linear Offset but jumps the map from location to location rather
than the smooth scrolling motion of linear offset. (Doesn't interpolate
between steps) SPS = steps per second.
Args:
UStep=(float) e.g: 1.0
VStep=(float)
e.g: 1.0
SPS=(float)
e.g: 1.0
|
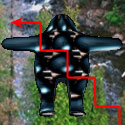
Zigzag:
NEW
|
Similar
to linear offset but reverses direction periodically.
Args:
UPerSec=(float) e.g: -0.3
VPerSec=(float) e.g: 5.0
|
WS Classic Environment:
NEW
|
World
Space normal environment map. Map
coordinates generated procedurally.
Similar to World Space Environment mapper. |
WS Environment:
NEW
|
World
Space reflection environment map.
Artist Preferred over the environment mapper for the
following reasons:
Good for use in scenes with camera tracking.
Better with flat surfaces.
|
Grid Classic Environment:
NEW
|
Animated
normal environment map.
Uses a "Grid
Bitmap" for animation. This Combines the "Grid"
type mapper, with the "Classic Environment" type mapper.
Map coordinates generated procedurally.
Args:
FPS=(float) e.g: 29.5
Log2Width=(int) e.g: 2
|
Grid Environment:
NEW
|
Animated
reflection environment map. Works similar to "Grid Classic Environment"
but different.
Uses
a "Grid Bitmap" for animation. This Combines the "Grid"
type mapper, with the "Environment" type mapper.
Args:
FPS=(float) e.g: 29.5
Log2Width=(int) e.g: 2
|
Random: NEW
|
Offsets
and rotates coordinates at random in a "step" like fashion,.
useful for trying to make a map "shake".
Args:
UPerSec=(float) e.g: -0.3
VPerSec=(float) e.g: 5.0
|
Edge: NEW
 |
Gives off
Fuzzy edges, can be used as a glow as well. Uses the "Classic
Environment" mapping style but takes the top row of pixels in
the bitmap and looks only at that to produce its fuzzy edge effect.
Artist tip: You can adjust
the VPerSec argument to create an nice "pulsing" effect.
Args:
UseReflect=(bool) e.g: true
VPerSec=(float) e.g: 2.0
|
| |
| UV
Channel: |
Select
the UV channel to use. |
| |
| Args: |
The "Args:" (Arguments) window allows you to enter in specific
information that you'd want the mapper to do. When you see the Arguments
listed in here for each type, do not include the "( )" parenthesis
in your actual argument and the types are as follows:
(float) - any real number, ex: 1.8
(int) - any integer, er: -.5
(bool) - either TRUE or FALSE
NOTE:
Only specific functions will work with certain
mapping types, (see the mapping types for a list of the arguments
allowed for that type). All arguments are CAse SENSitiVe, they have
to be typed in exactly as shown.
New mappers will only work on the DX8 and WW3D2. Pre-DX8 viewers
will not work. |
| |
|
Stage
1 Mapping:
|
Same
properties as stage 0 mapping but Adds another stage so that you may
overlay and combine the two mappers. Stage 1 is considered to be the
"detailer" because it is usually used when extra detail
is needed. The advanced controls for Stage 1 Mapping are located in
the advanced section of the shader tab. |
| |