Search the Community
Showing results for tags '3dsmax8'.
-
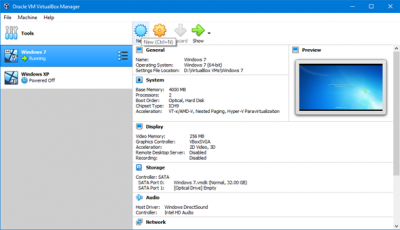
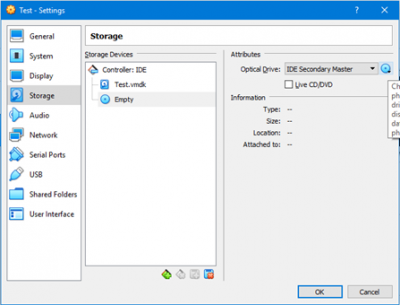
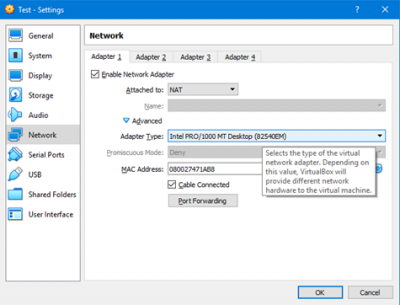
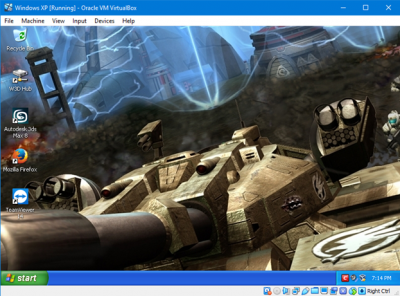
VirtualBox Setup Guide Introduction VirtualBox is a free virtualization software by Oracle and is often used to run legacy programs that either don’t run on Windows 10 or have problems running smoothly. In W3D Hub’s case, it’s fantastic for ensuring 3DS Max 8 and legacy LevelEdit don’t give you a bad time when you’ve just nearly completed that new fancy model. Following this guide is entirely optional and is not required to do any w3d modding work, but it can make life easier! You Will Need: -A processor on your host PC capable of virtualization technology (look for VT-x in BIOS and enable it) -A copy of Windows XP -At least 4GB of RAM (the host PC will be running at the same time as the virtual machine) Preparing VirtualBox Assuming you followed directions and enabled VT-x and have a copy of Windows XP at the ready, you can install virtualbox via the hyperlink above. Choose the installer for your host OS (Windows, Linux, and Mac OSX are supported) and also download the VirtualBox Extension Pack. The extension pack enables support for USB devices (seamless mouse and keyboard), which is pretty important. Go ahead and fire up VirtualBox and click the New button to add a new virtual machine. Name your machine and select Microsoft Windows XP (32 or 64-bits whichever you have) from the Type and Version dropdown menus. Click Next and you’ll be asked to choose how much RAM to allocate. Windows XP recommends a minimum of 128MB of RAM for the operating system itself, while 3DS Max 8 recommends an additional 512 MB of RAM. Given the probable multitasking you’ll be doing, your minimum RAM allocation should be 1000 MB (1 GB). Remember, the Mammoth editor uses Scripts 5.0, which doesn’t support Windows XP, so you won’t need to worry about having enough RAM to test anything in APB within your virtual machine. On the next screen, you’ll need to select the middle option – create a virtual hard disk now. Click Create, then click VMDK. Make it dynamically allocated, give it the same name as your virtual machine for consistency, and give it 16-32 GB of storage. Your machine will appear in the main menu. Right click it and go to Settings, and then go to the System tab. You can edit your base memory here if need be, but for now change the chipset to ICH9 and check the box to enable I/O APIC. Use the arrow buttons to rearrange the boot order, ensuring CD comes before Floppy. Click the processor tab, give it 2 processors, and in the acceleration tab check both boxes. Go to the Display tab and up the video memory to 64GB. You can add monitors if you have more than one. Check the two boxes for 3D and 2D acceleration and then move on to the Storage tab. You’ll notice your .vmdk file is already there. It’s essentially a blank hard drive, so we need to put Windows XP on it. Click the empty CD drive icon and on the right side of the window you’ll see a smaller icon near the dropdown menu. Click on it and either select your .iso file or if you’re using a live disc, put it in your CD drive now and select your CD drive. Check the Passthrough checkbox if you’re using a physical disk. Go to the Network tab now and ensure the Adapter Type is set to the following: This enables internet on your virtual machine, which is handy in most cases. In the USB tab, enable the USB 2.0 controller (3.0 isn’t supported in XP natively), and in the Shared Folders tab you can add any folders form your host machine that you want your virtual machine to be able to access. Click OK to submit your changes to the settings, it’s time to fire up that machine! While Windows XP is doing its initial setup, download the Ethernet adapter driver you’ll need (it’s specific to XP) and put the .exe in a shared folder. If you didn’t make a shared folder, you can use the File Manager in the Machine dropdown from the main toolbar. Once Windows XP is booted to the desktop, install the Ethernet driver to gain internet access. You can go ahead and install any remaining windows updates as well at this time. The version of internet explorer that comes with Windows XP is outdated, so you may wish to find and install Firefox 52.9 ESR (the last version to support XP) or a different supported web browser. Click the Devices dropdown in the main toolbar and at the bottom, click on Insert Guest Additions CD image. This adds some extra features and stability to your virtual machine, so if something isn’t quite working correctly, try this first. Once you have everything completed, don’t forget to remove your Windows XP .iso or live disk from the machine. You can now boot into Windows XP without any further hassle. Now you can follow the guides to get 3DS Max 8 up and w3d-ready. Congrats on your more stable w3d modding machine! Troubleshooting/FAQ My mouse and keyboard aren't being recognized by the VM! If your peripherals are USB-based, odds are you didn't install the VirtualBox Extension Pack. I can't get my mouse back, it's locked to the virtual machine! The default "host button", which swaps the mouse between the host and guest machines, is Right-Ctrl. Press it and move your mouse outside of the VM window. My machine won't recognize my USB Drive! Assuming you have the VirtualBox Extension Pack installed, I can't help you there. I use a network-mapped drive for this setup, so I'm afraid I don't have experience in troubleshooting the problem. Try the Insert Guest Additions CD image option explained above, and also unplug and re-plug your drive while the machine is running. How do I get my files out of the VM and into my host system? A network-mapped drive or a shared folder accomplishes this, but if you have neither, you can use the File Manager in the Machine dropdown menu option. My issue isn't listed! Try googling the problem, there's a huge audience for VirtualBox and as a result a lot of problems and solutions out there. You can also try asking in the #tech-support channel in our Discord.
