

Madin
-
Posts
49 -
Joined
-
Last visited
-
Days Won
4 -
Donations
0.00 USD
Content Type
Profiles
Forums
Events
Documentation
Bug Tracker
Downloads
Posts posted by Madin
-
-
The previous structure was completed as a test structure to lead into this, the main event!
I wanted it to have minimum repetition.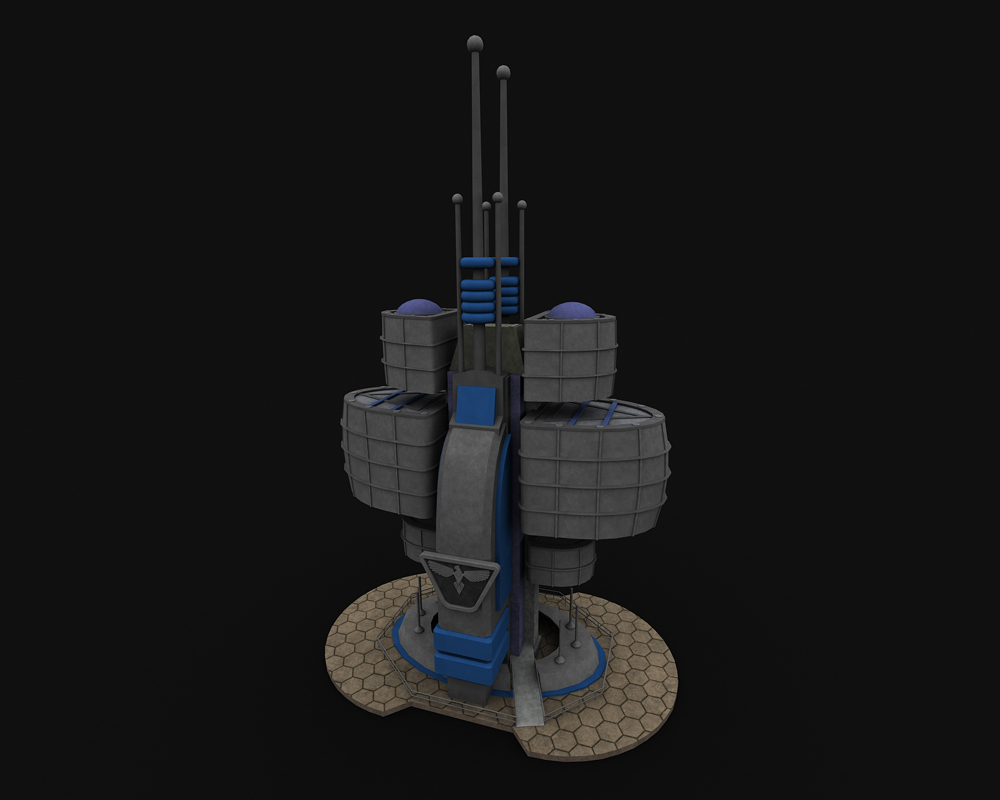
This is with no detail added to the textures, the 'bird' is modeled.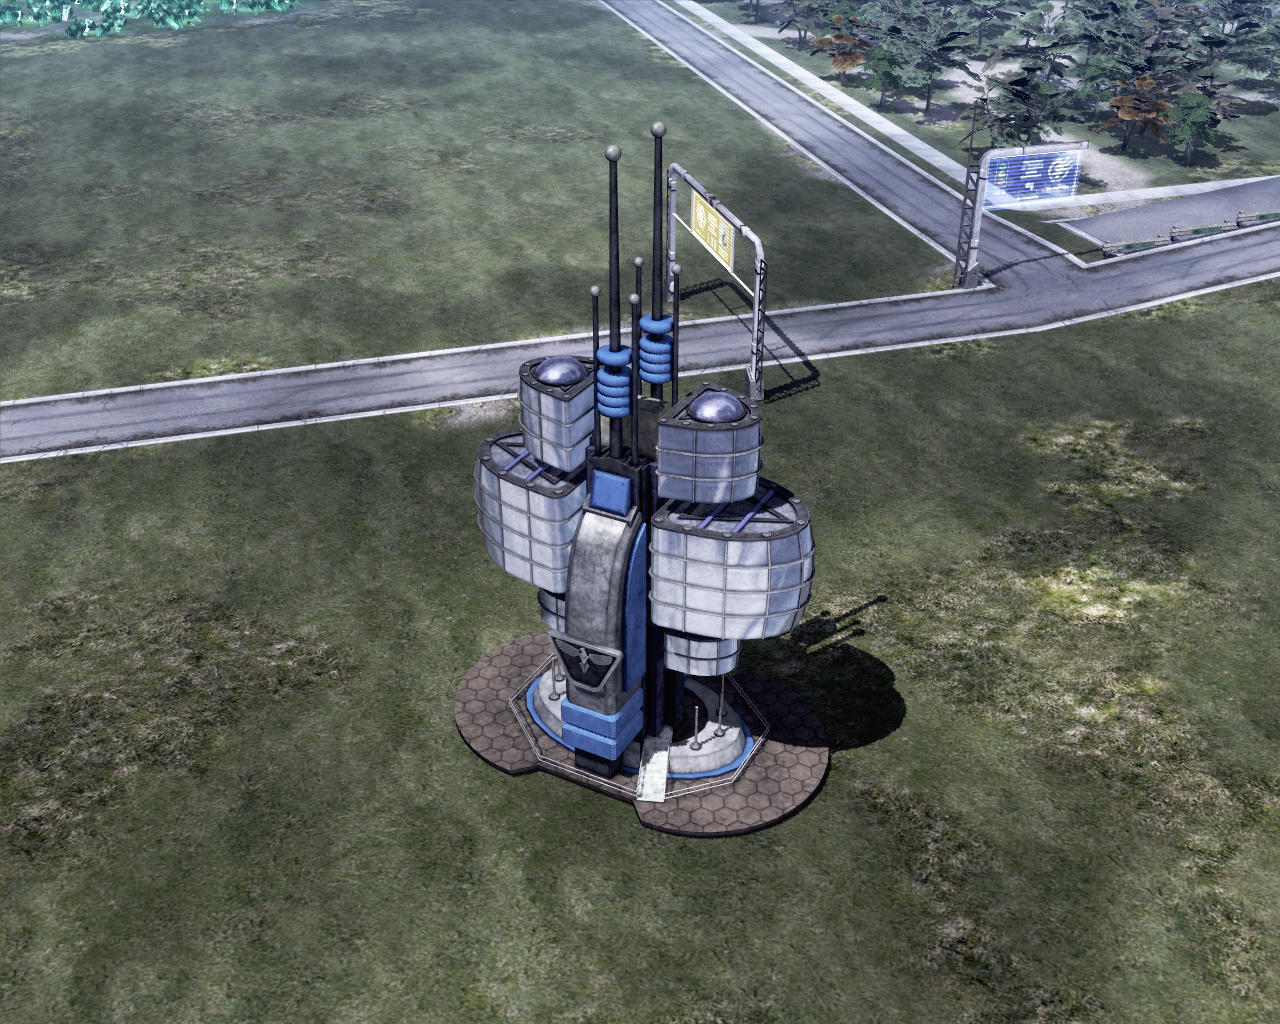
This is before any modeled emissive lighting was added, and I had not modeled any of the outer floor areas.Here is a look at a more complete version which has the Tiberium Wars style upgrade models, in place of the 'stuff' that was around the outer floor areas in RA2:
3 -
22 hours ago, FRAYDO said:
I never knew about the Alpha design. It's a nice look!
Thanks for your comment!
0 -
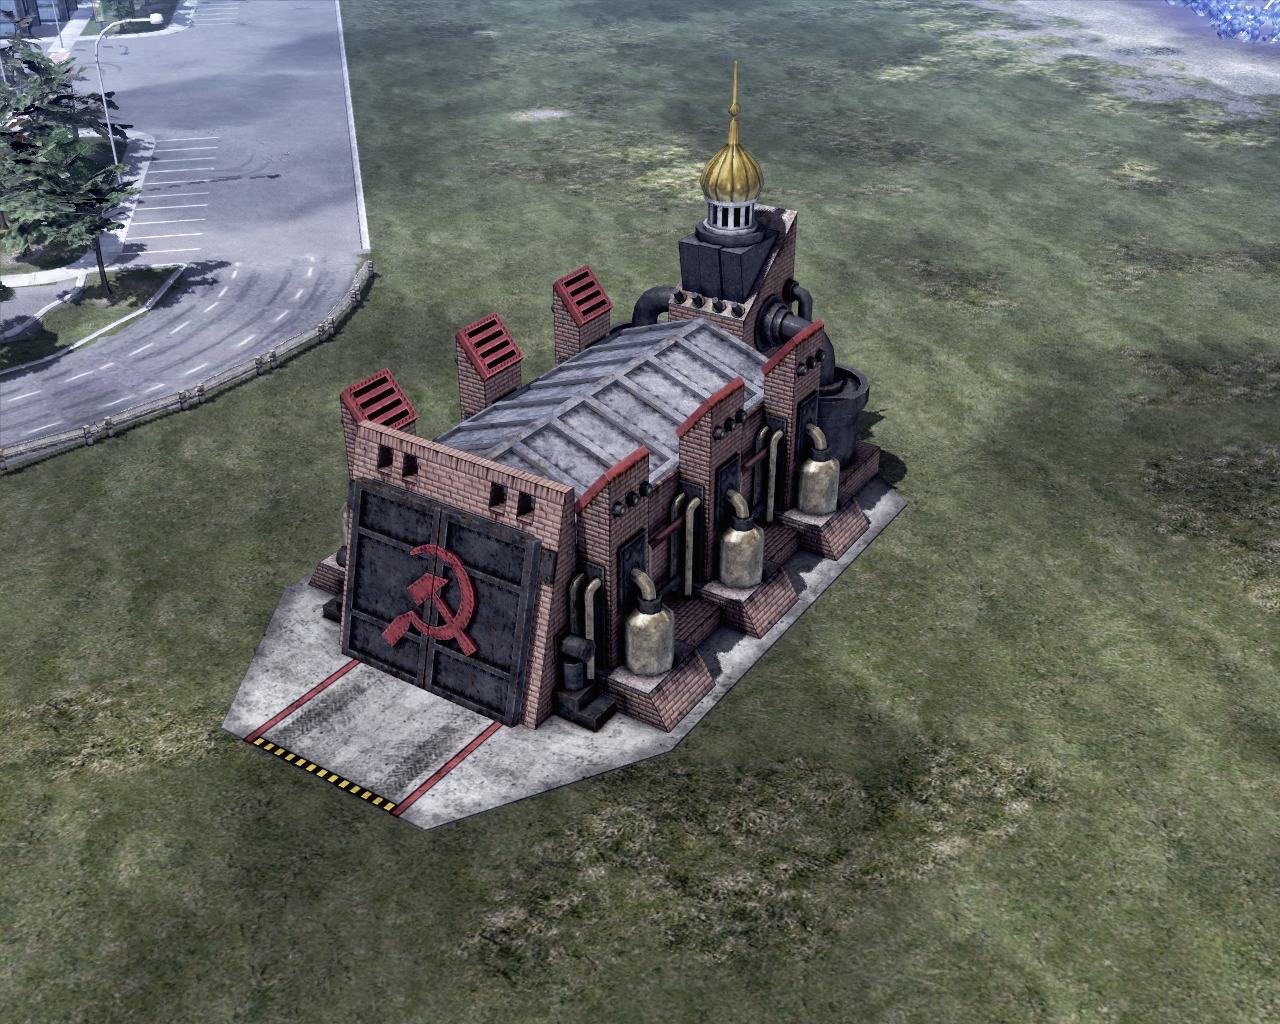
Here is my take on the Soviet battle lab from the RA2 alpha screenshots:
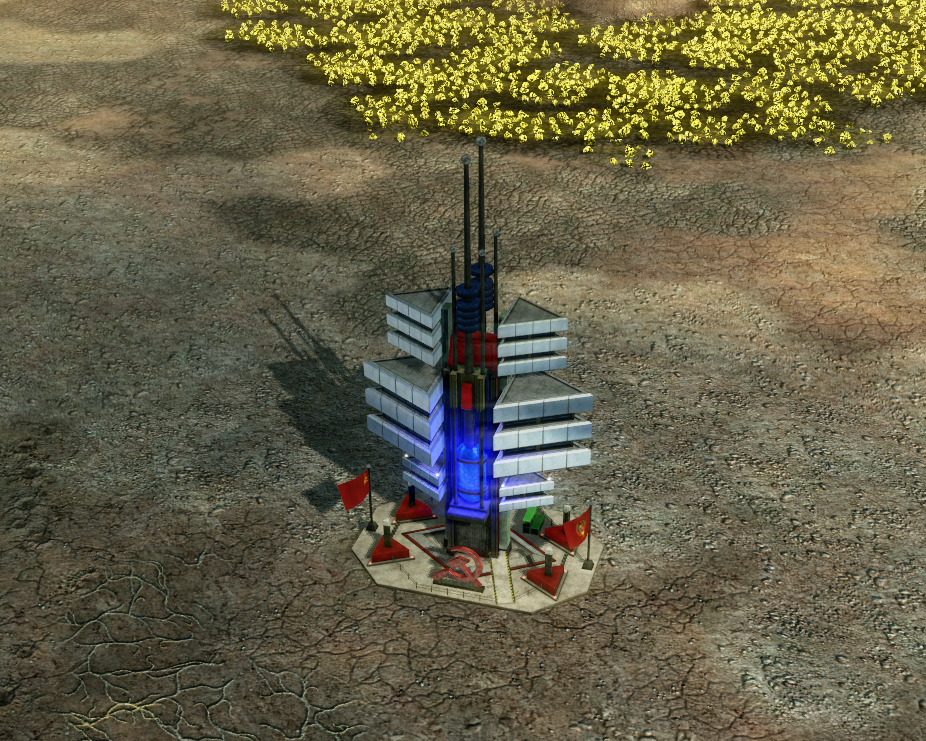
I added the flags and the classic hammer sickle to add more interest.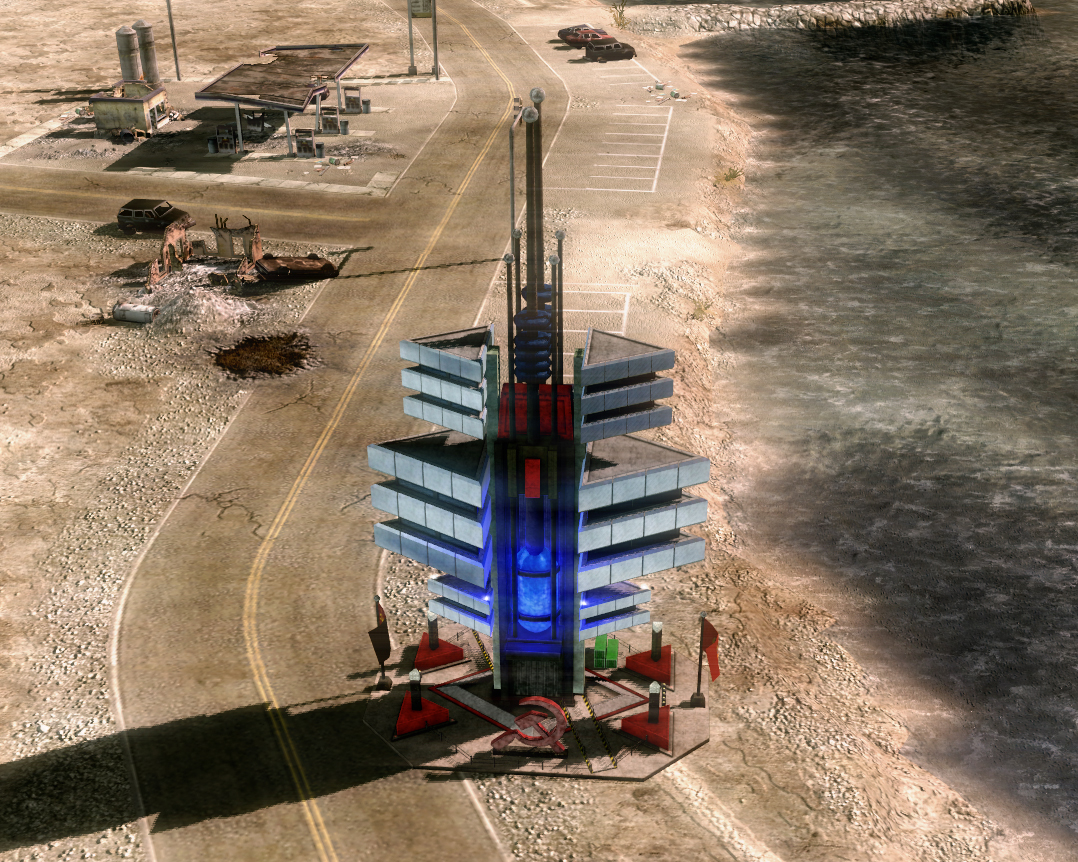
As usual I was indifferent with how this turned out.
3 -
Thanks for the comment!
1 -
- Popular Post
- Popular Post
Here is something that the Reborn crowd will be familiar with, the GDI Mobile EMP:
This is not textured in this imageHere is a GIF showing in game screens:
3 Stage GIFI am indifferent with how this turned out.
6 -
18 hours ago, NodGuy said:
I really like the blackbird. What is the logo on the inside of the tail (or whatever it's called)?
Thanks! Er, I do not know what it is!
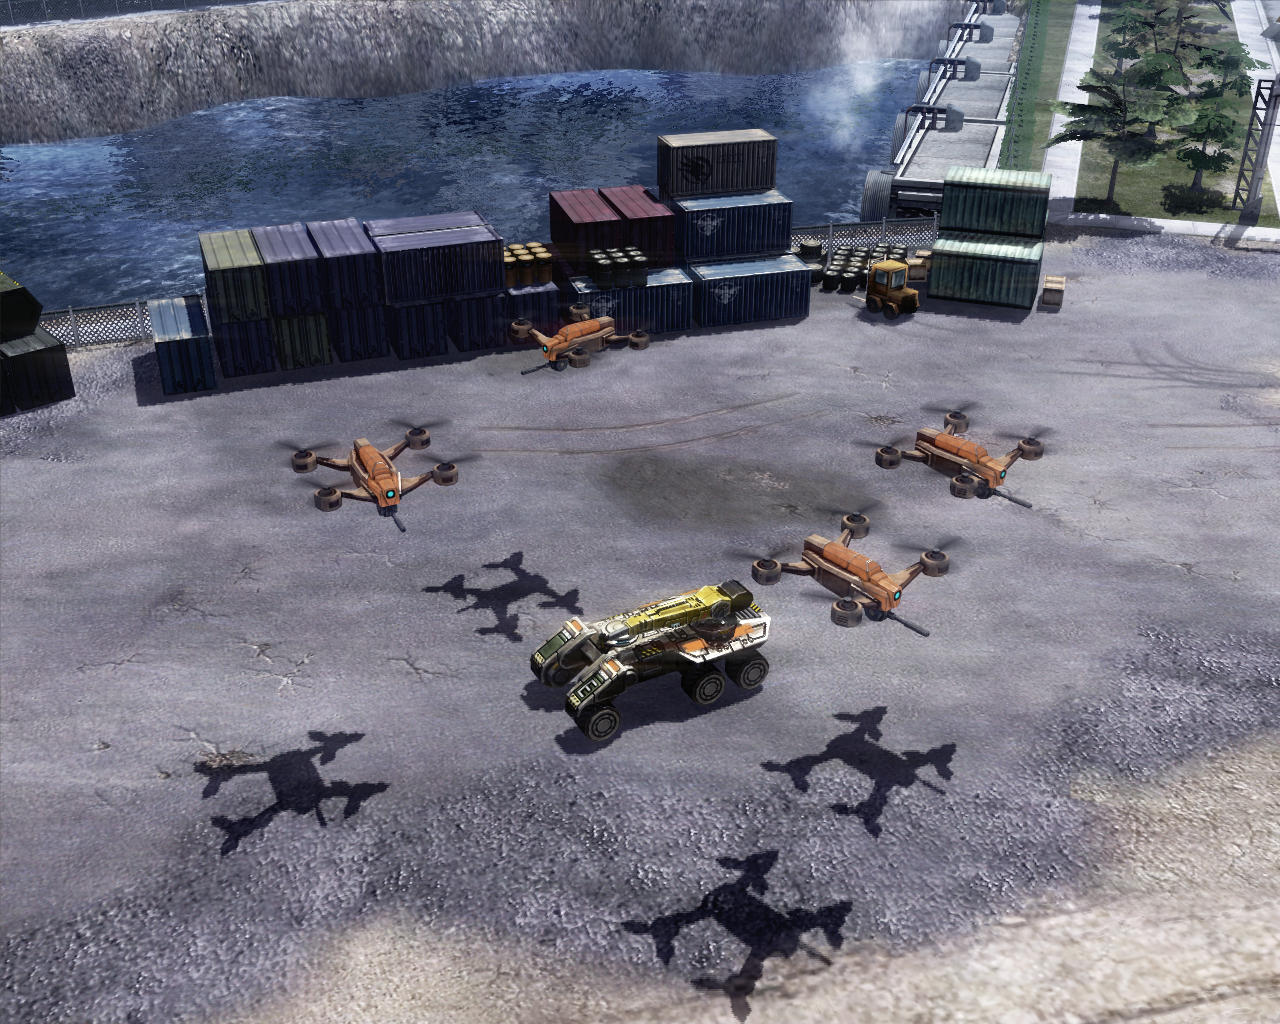
13 hours ago, Cat said:I like that Rivals Drone Swarm ^^
Thanks for the comment!
0 -
First off is my attempt at a Nod badged Blackbird:
There are extensive topology issues, and I am not really happy with it at all.
Next is my take on the C&C Rivals Drone Swarm:
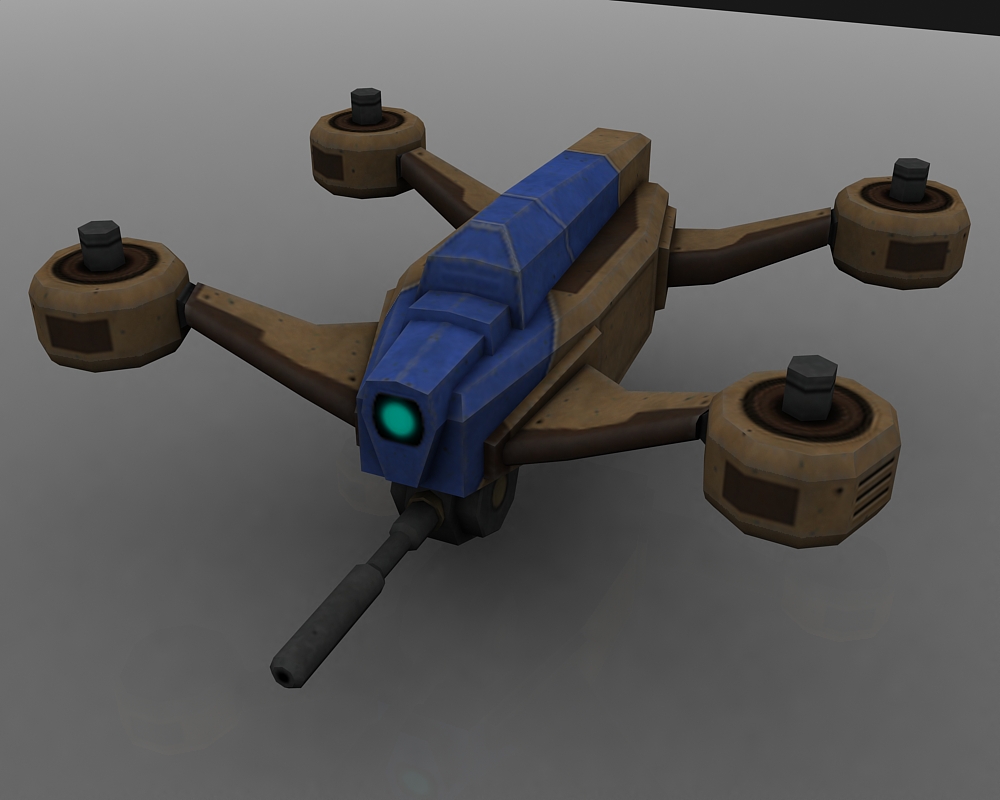
No Rotors yet!Here is an in game screen using EALA's Repair APC as a drone controller!:
It is a bit of a nothing model, but it was interesting to complete.
1 -
16 hours ago, NodGuy said:
I will say that the spot where the missile/rocket for the stealth tank is looks off. Don't know why.
I agree with you, it is something that I will have to think about it in the future.
Thanks to everyone for the comments!
0 -
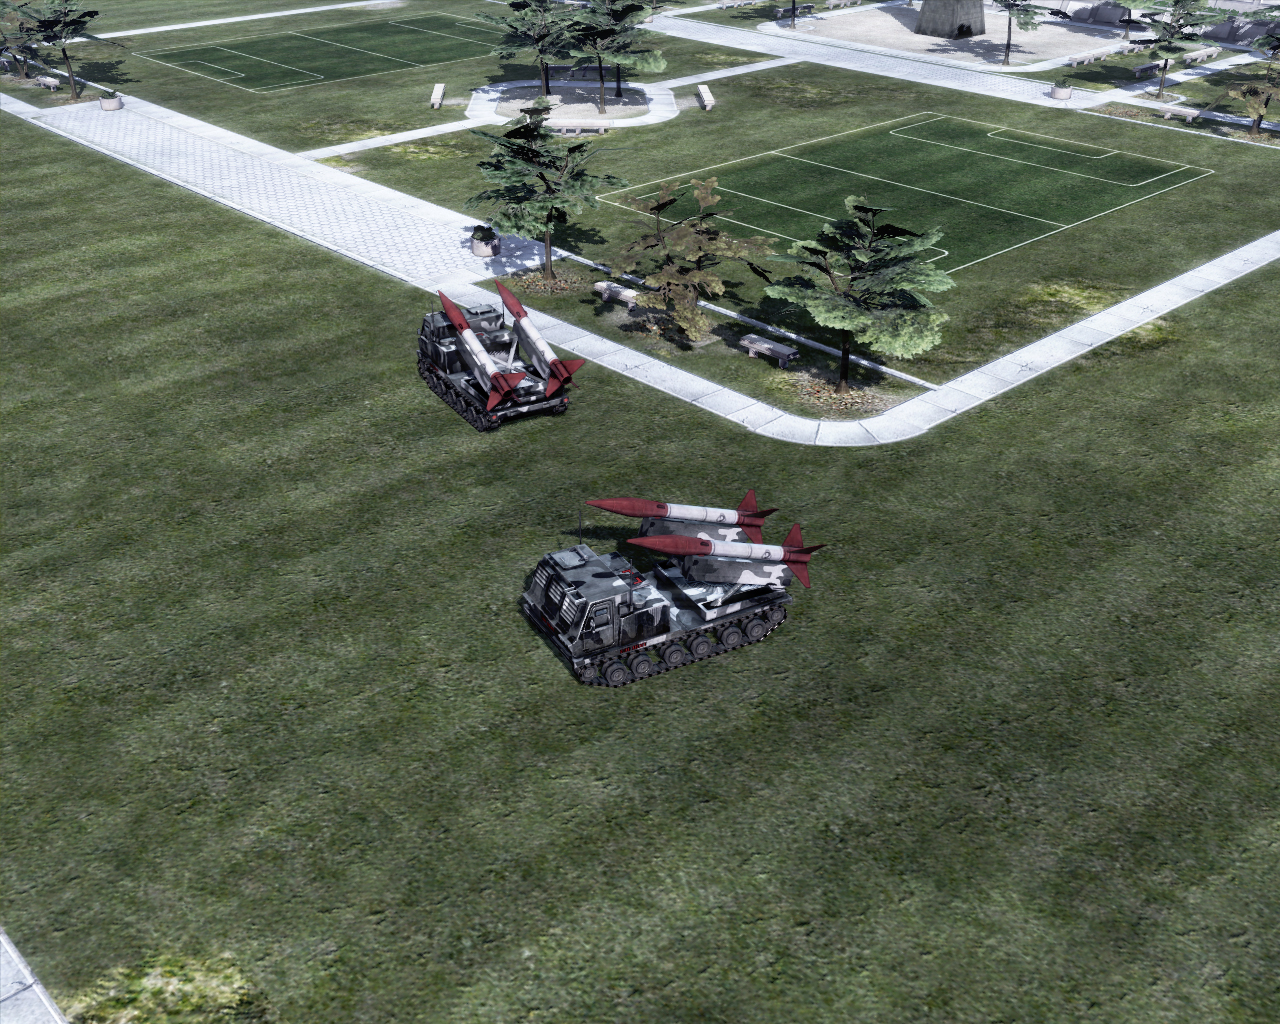
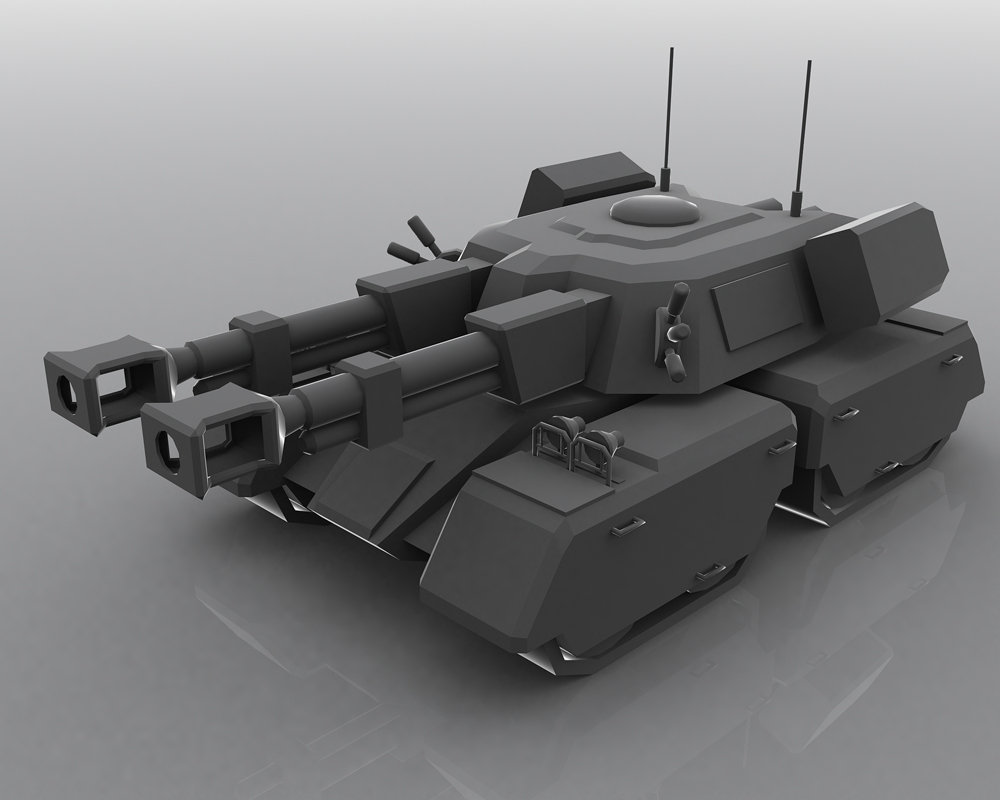
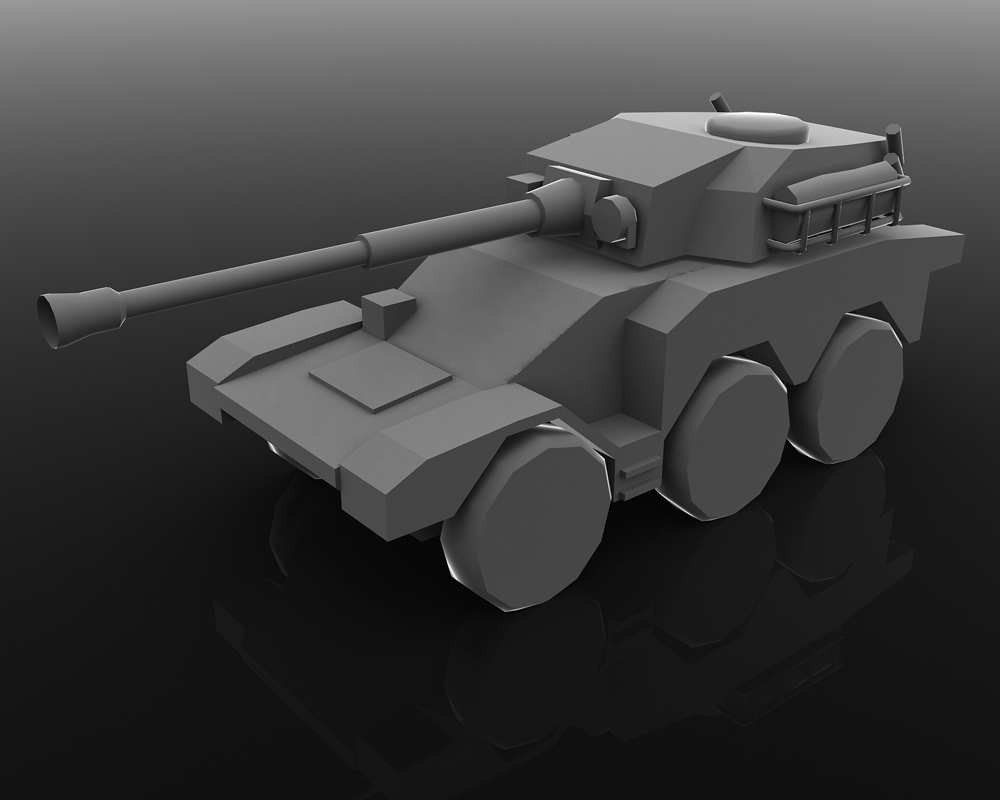
First project is an SSM redux. This is not a completely original project, rather it is a reskin of an MLRS I did a while ago, with the missiles that I did recently.
Next project is a rather stocky stealth tank:
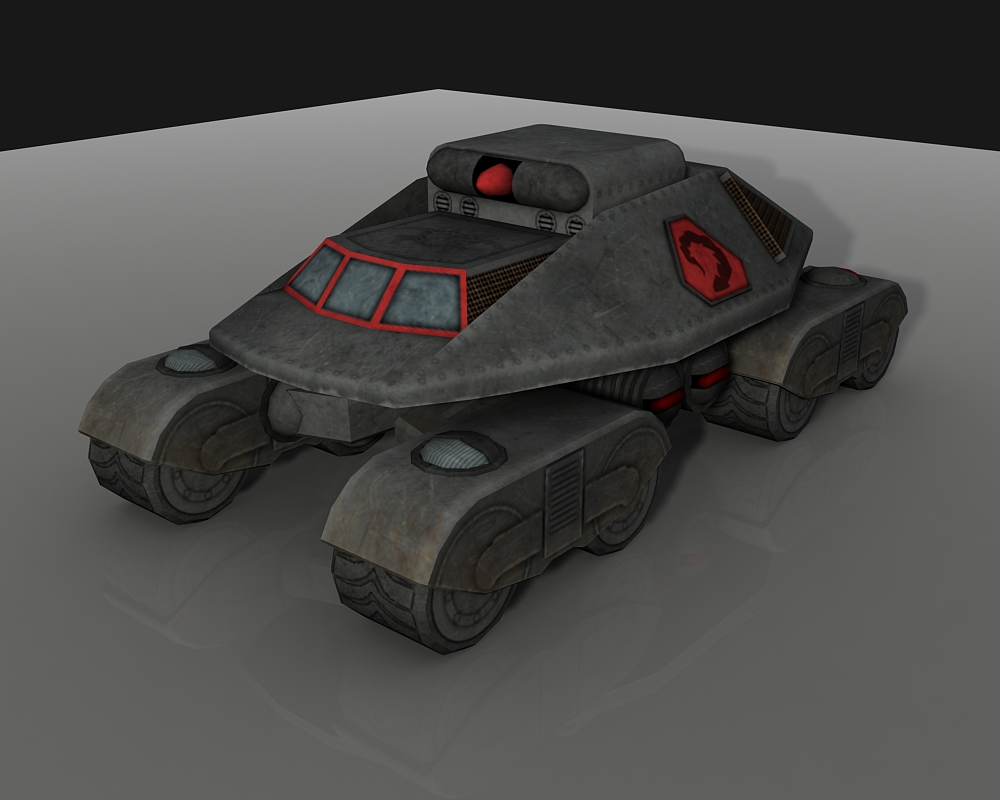
I tried to add some contrast using the launcher, but I might just darken it, have not fully decided yet.
 4
4 -
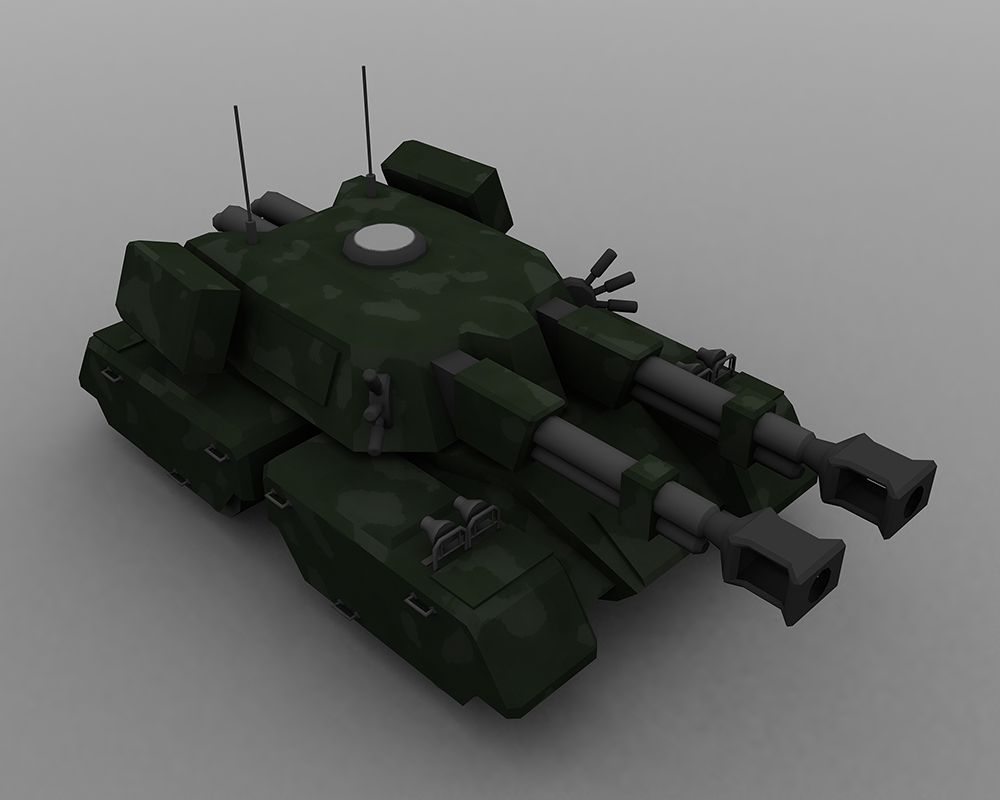
20 hours ago, Ice said:
Looks pretty cool! Would love to see a solid-colour version of it as well which would fit into the RA1 time period better, like a Dunkelgrau Allied version or a Protective Green 4BO Soviet version.

Removing the 'camo' would be pretty simple. as would doing alternative colours.
Thanks to all for the comments!
0 -
So here is one familiar to APB fans, the Demo truck!
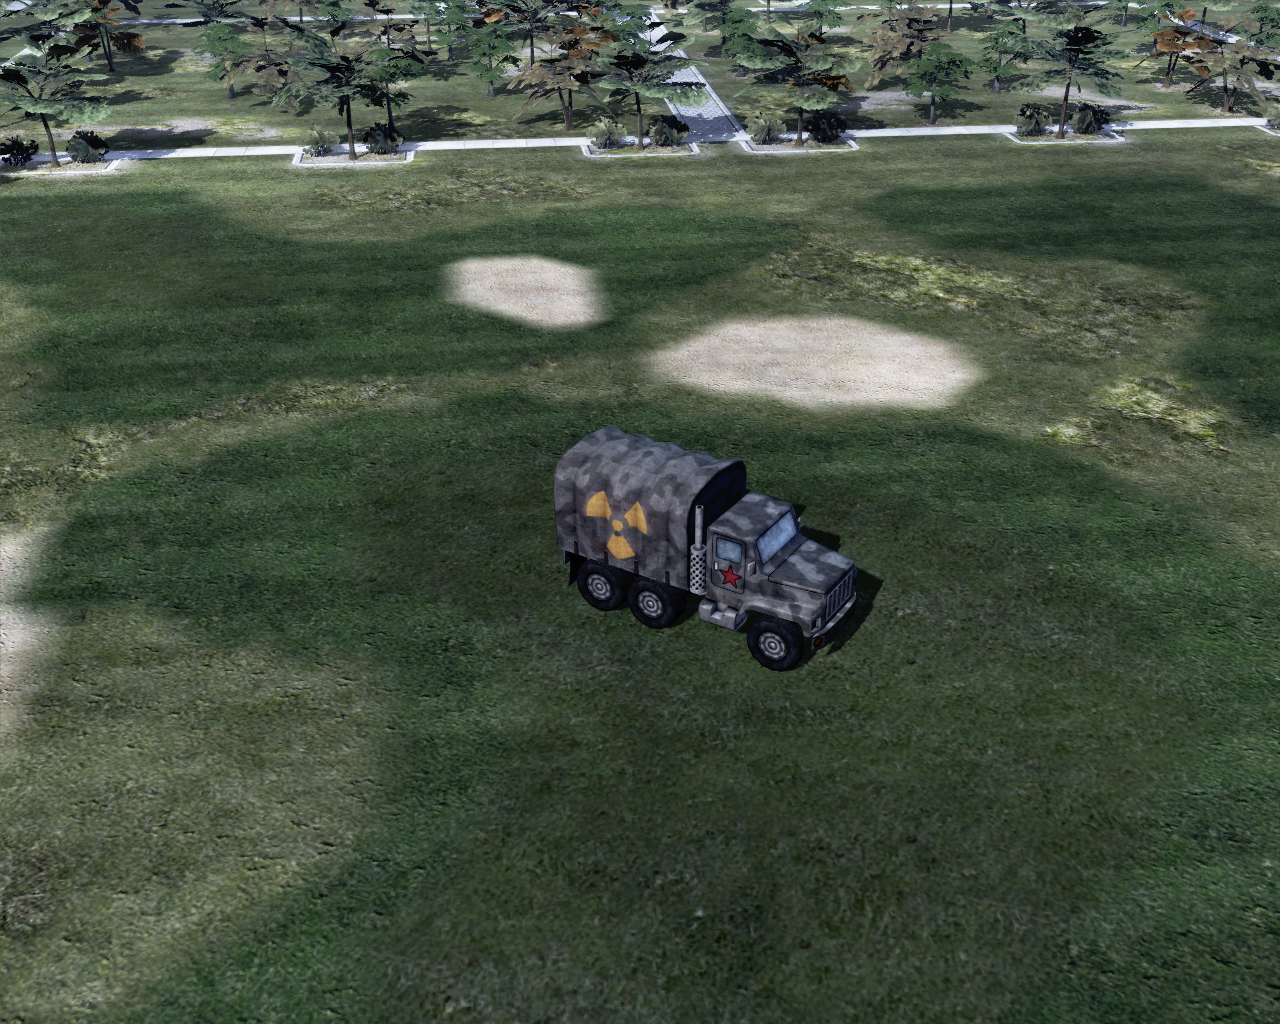
I have since made the tires lighterOverall I am disappointed with how this turned out, it looks like a toy (even allowing for low quality RTS assets). I only wanted a Soviet badged version, but it is obviously trivial to have an Allied or neutral version if desired at a later date.
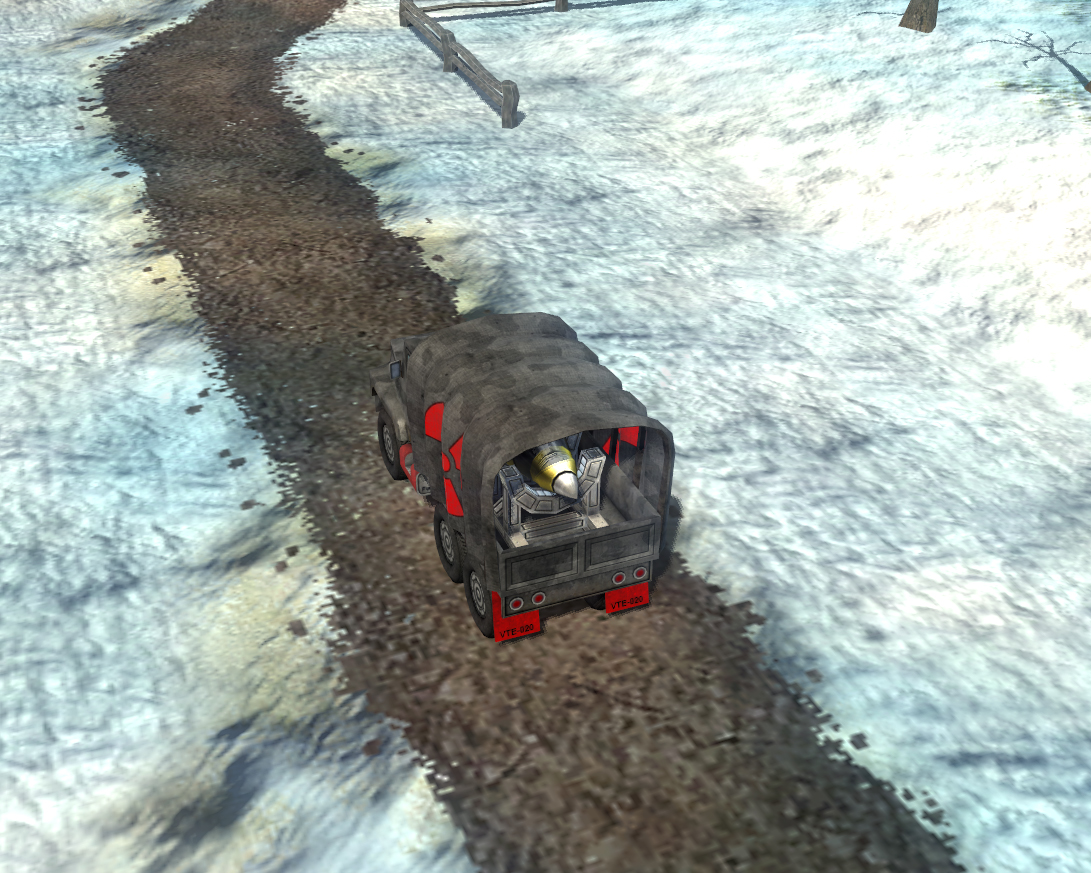
The actual nuke warhead is an EALA asset from C&C 3.
1 -
On 4/30/2020 at 9:35 PM, FRAYDO said:
I like it! If there was one thing I would critique, I would say the War Factory should be made a bit wider to accommodate the increased height. I understand though that doing so would make the structure require more space to build so it works as-is for gameplay.
Thanks for your comment. It does look a bit odd with the extra height. Even more 'boxy'!
0 -
- Popular Post
- Popular Post
So this is my take on the War Factory from RA1. I made a number of changes for gameplay reasons (the height of the structure is again so vehicles can exit without clipping the top frame), and also to make my life easier during unwrapping and texturing.
First example is me making the front face symmetrical (it is not in RA1), so I could split the main building down the middle for unwrapping and texturing purposes:
For the rear I decided to have some fans (done using alpha texturing) to have some movement, and also to have some detail for a player to look at.
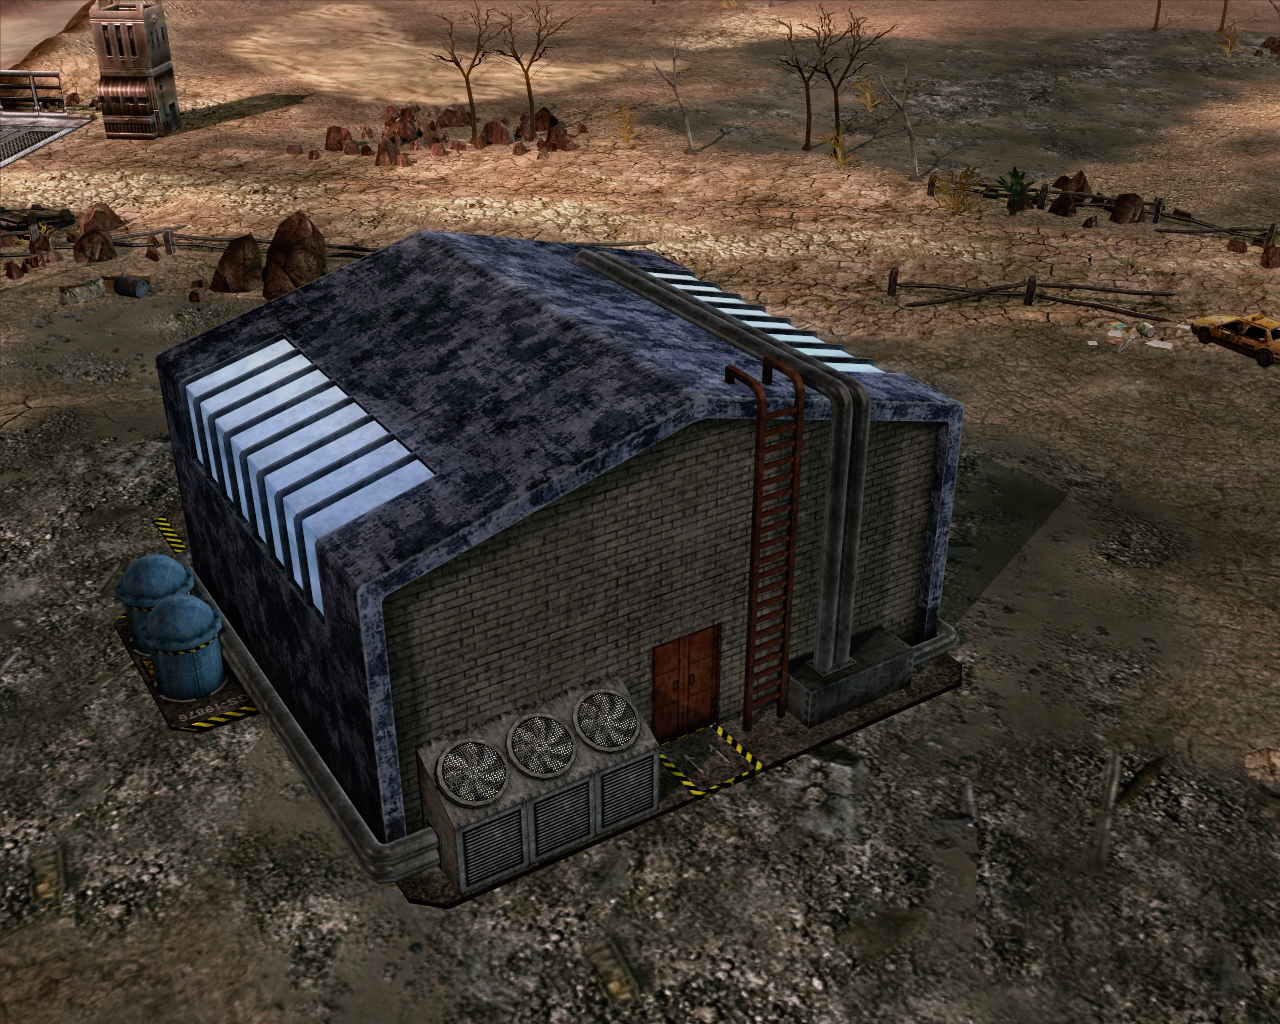
While I was struggling in the early part of this structure, and also really struggled with the texture (C&C3 has no proper shader for glass, and getting the right balance for large areas of glass can be tough), I really like this a lot!
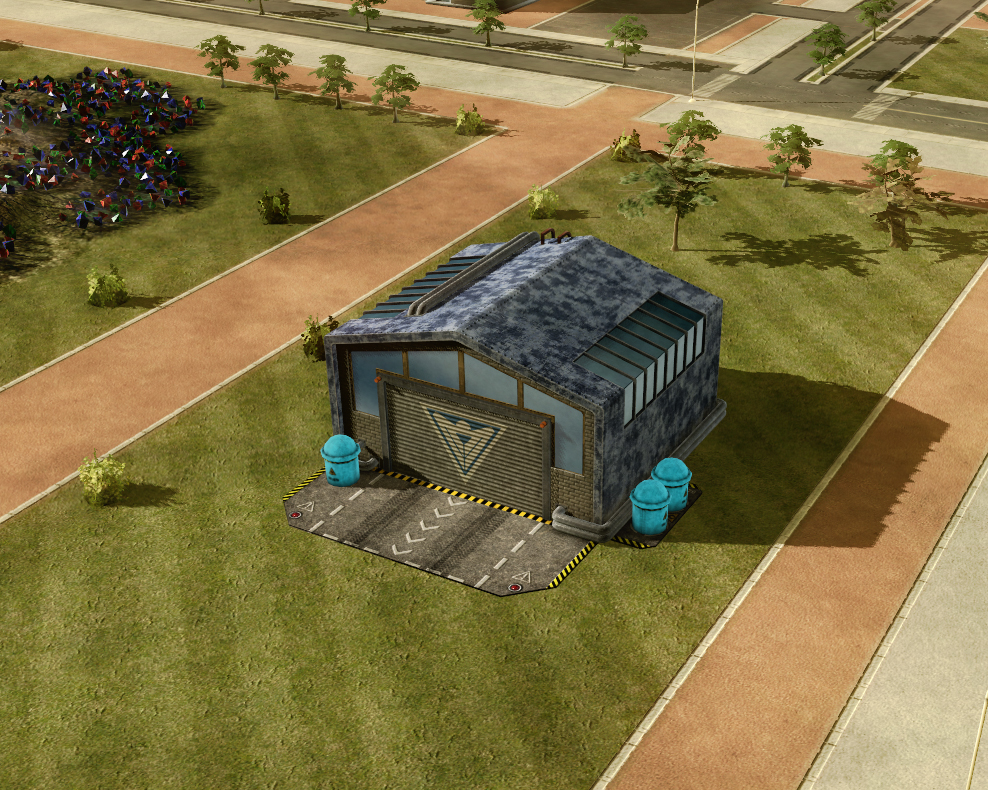
Here is a look at the structure in motion:
6 -
This is a RA 2 styled Oil Derrick that I modelled and textured. Once it came time for the animations, I messed up (probably should have come here first), so the animation is off. At some future date I will redo the model rig, and have another try.
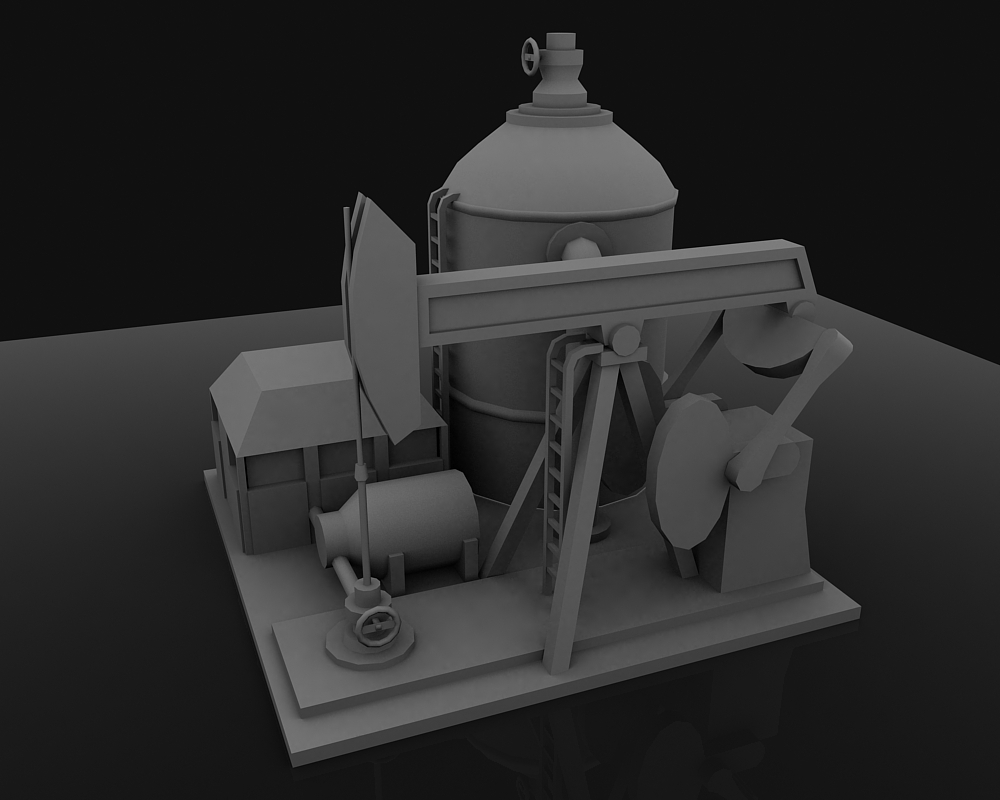
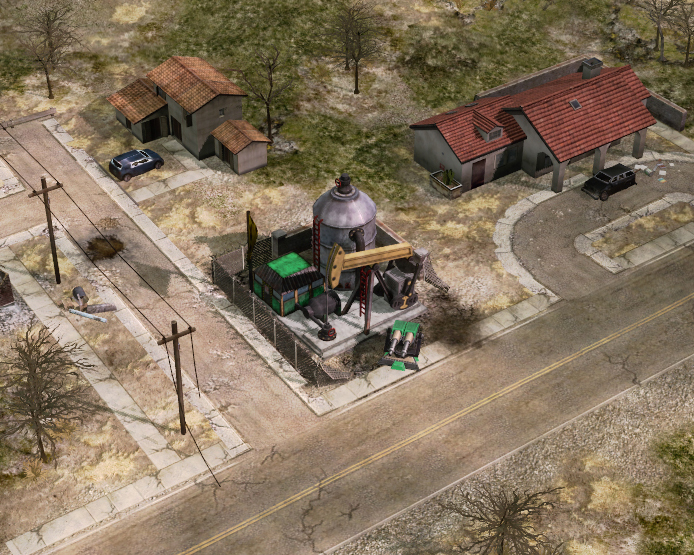
There are some bland sections, but for an RTS, I feel it will do.
3 -
I really like the ORCA.
0 -
Thanks for the comments!
0 -
I'M BAAACK!!
I was rather pleased with this model, because I do not often get a good result when I model structures. If the proportions seem off, this is because they were adjusted so that the vehicle models that I had at the time could physically exit the factory, whilst also ensuring that the amount of space required to place the structure in a base was not too prohibitive.
 3
3 -
28 minutes ago, moonsense715 said:
Revealing things you did long ago, with a few days pause between the topics?
This ^.
This is catch up, as I got a bit behind with posting here.
0 -
Here is another vehicle model and texture. This time I used the Soviet Mammoth that I had done earlier as a base, and made the necessary adjustments.
 0
0 -
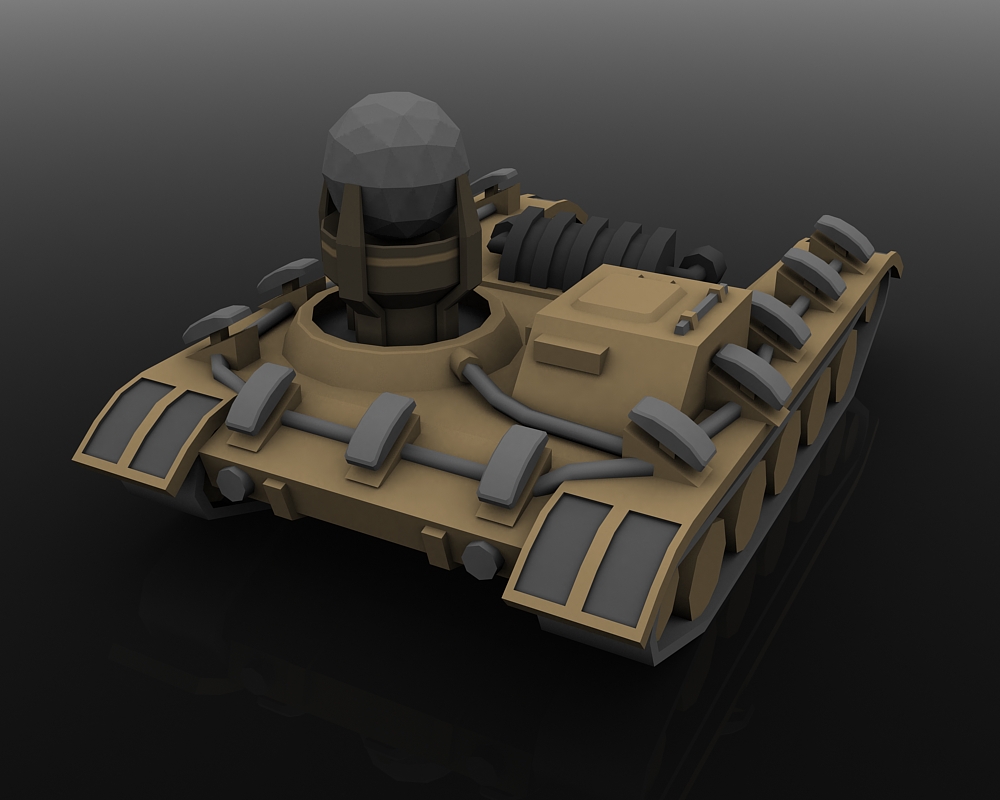
Here is a model that I did based on one of the images in a RA2 concept sketch. This turned out pretty bland. It would probably help if there was more going on on he top of the turret (in terms of model detail or texturing).
 0
0 -
1 hour ago, Ice said:
I'm sure this has been asked before, but do you intend on eventually making every building/vehicle from all the classic C&C games, or perhaps even an entire mod? Or just certain ones which you're interested in? Your work looks really good and would look amazing in its own RTS.
I only do selected items that interest me.
0 -
7 hours ago, Ice said:
That looks awesome!
")
Thanks for your comment!
0 -
This is a copy of a blog that I recently done. Do not worry as this will not be a regular occurrence, I only do blogs once every 2 or 3 years!
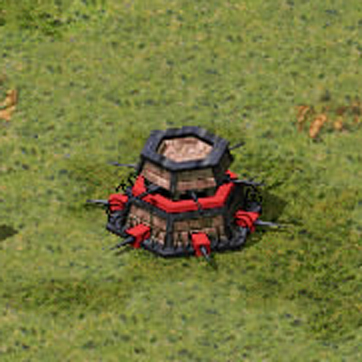
Soviet Bunker series: 3 of 3
It is time to end the Bunker series. It has only taken over 8 years to complete 3 simple models...
2009The first bunker in the series was one of my earliest models and textures. It is pretty bad, and you might be able to tell that I still did not understand how the W3X exporter required that all surfaces have a smoothing group, or else the exporter would assign its own!
At the time I really liked it!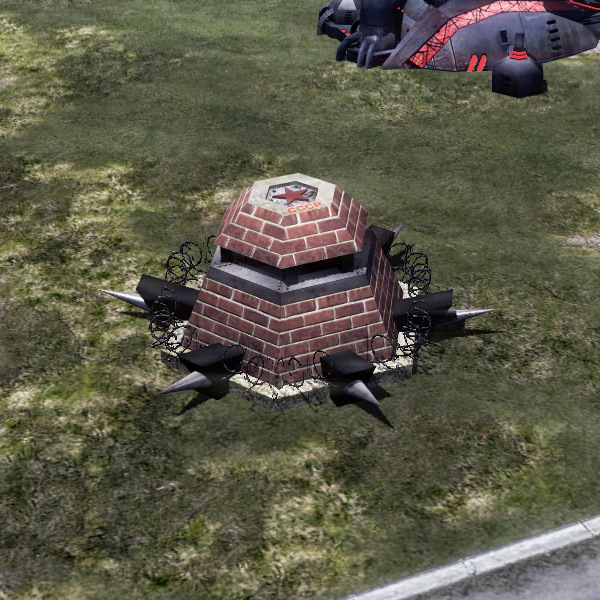
2011By the time I got around to the second bunker, I had done a bit more modelling and texturing. My unwrapping was a lot better by this time, and I was more efficient in my texture space usage.
I still like this bunker to this day!= = = = = = = = = = = = = = = =
As I stated in the past, the final bunker in the series will be the actual YR bunker.
With the 2nd bunker in the series, I opted for a sensible alpha mapped based barbed wire. This obviously saved a lot of polygons, however, I never really liked how it looked.
So, stupidly, I plan on modelling the barbed wire this time! Trying to control the poly count will be next to impossible, but I do not intend on using this bunker, so I will press on.The only major thing that I do now that I never did during the making of the 2nd bunker in the series, is the use of ambient occlusion. This certainly saves a lot of manual shading work, and adds a lot to a texture for very little effort.
= = = = = = = = = = = = = = = =
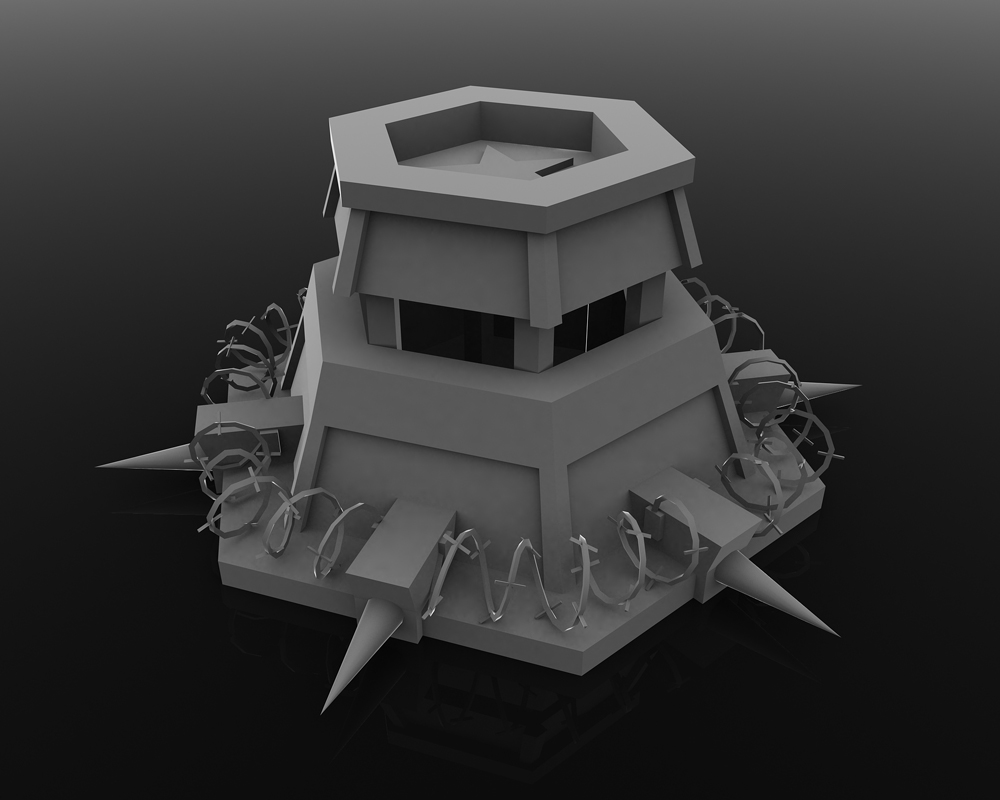
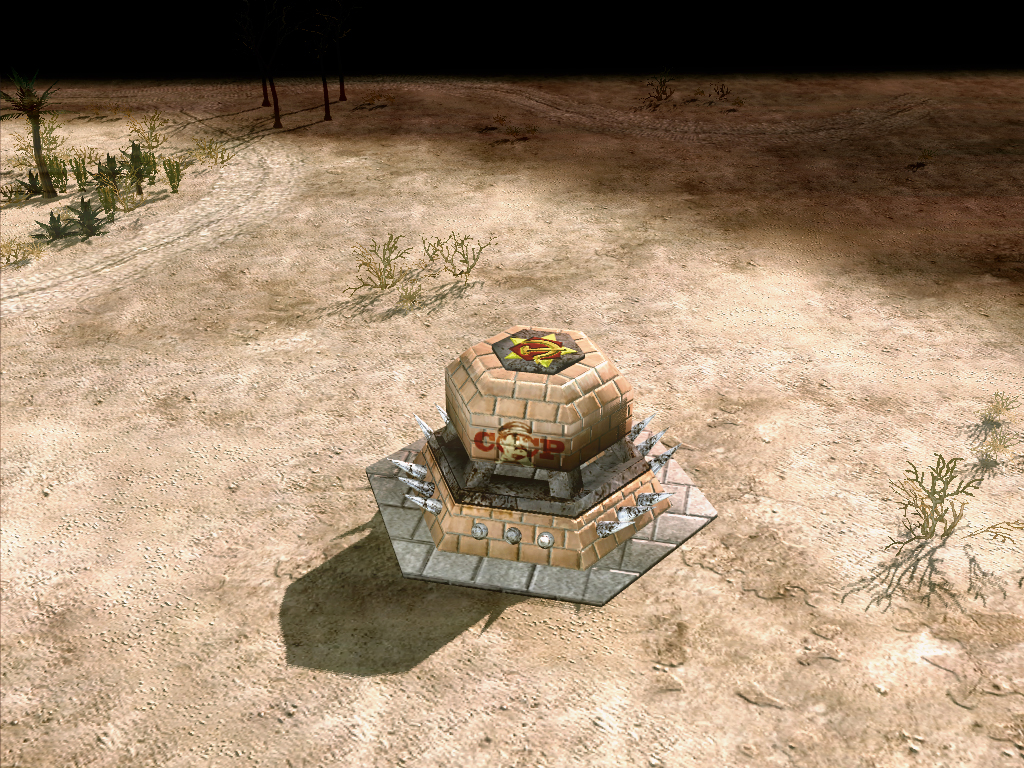
So before I get to the barbed wire, you can see that as usual I have added a star (on the roof of the bunker). I did the same thing with the second bunker I modelled, it breaks up the roof area, uses a small amount of polygons, and is easy to remove if it bothers anybody down the line.
The barbed wire is obviously taking up most of the polygon count (the helix twirl is 2,244 triangles, the 'spikes' 720!). I will probably smooth the helix later on.
Unwrapping will be easy, I will explain once I get the process done and the screen up!
= = = = = = = = = = = = = = = =
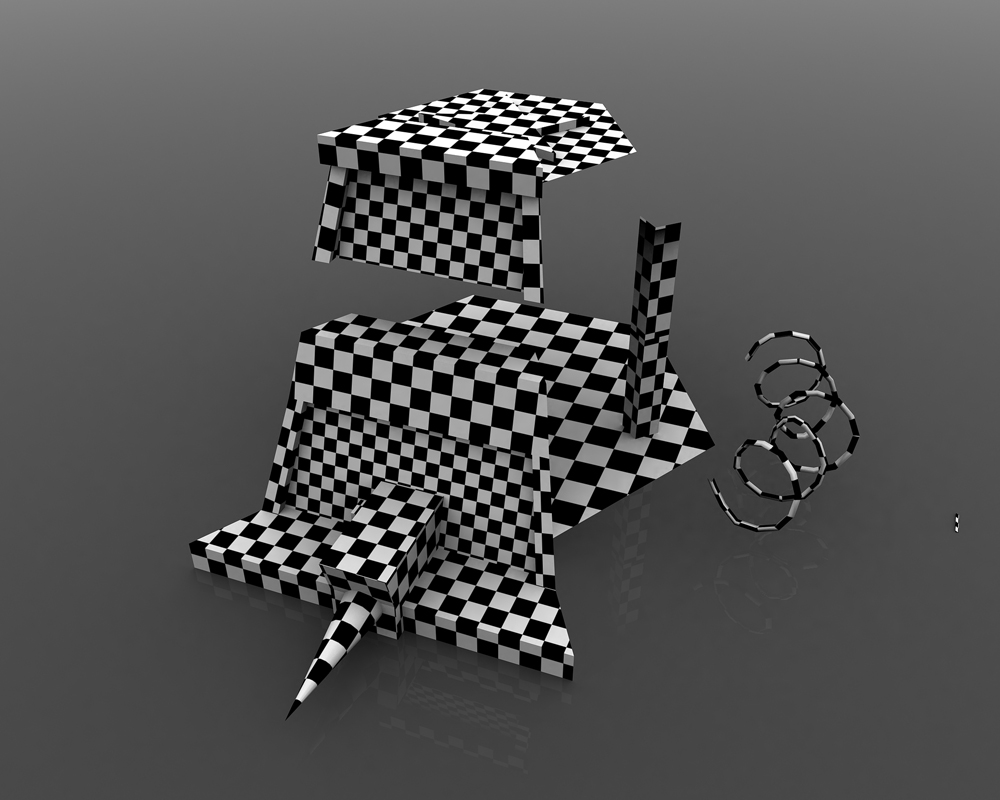
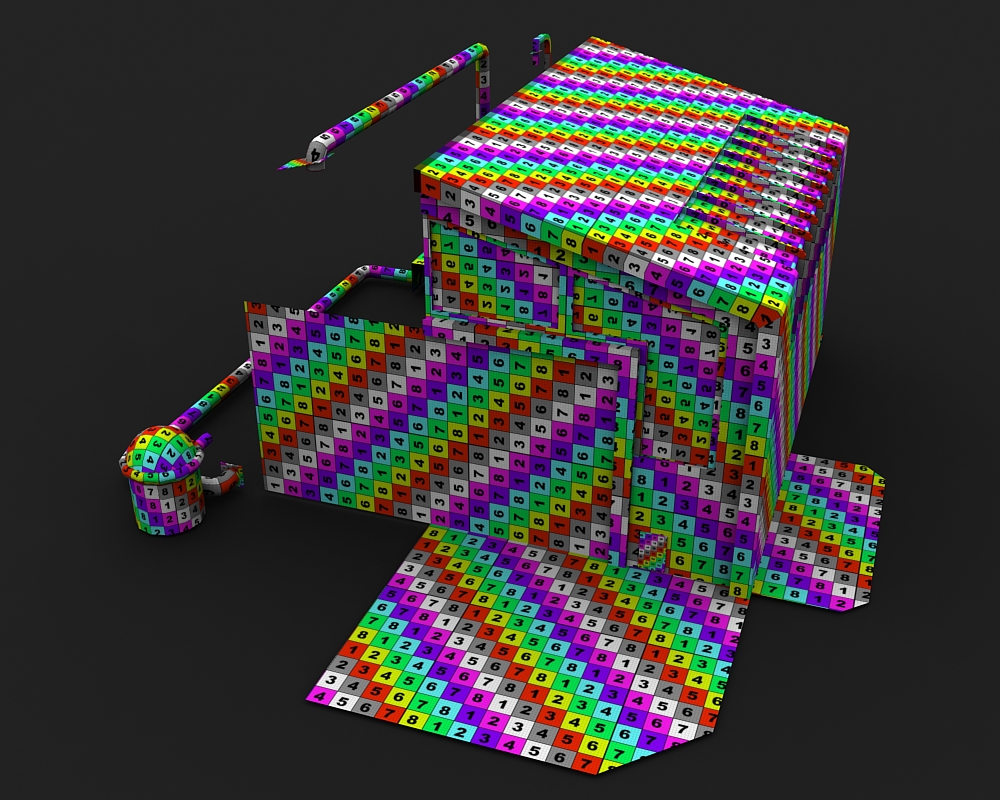
Of course the Hexagon shape meant that dividing the model up to be unwrapped was very simple. The key thing to notice is that the 'spikes' was simplified to only one spike. Nobody would want to go through the chore of unwrapping and stacking 90(!) individual spikes, and that is were using the 3D Max spacing tool comes in handy. It was the spacing tool that I used to place the spikes along the barbed wire helix shape in the first place.
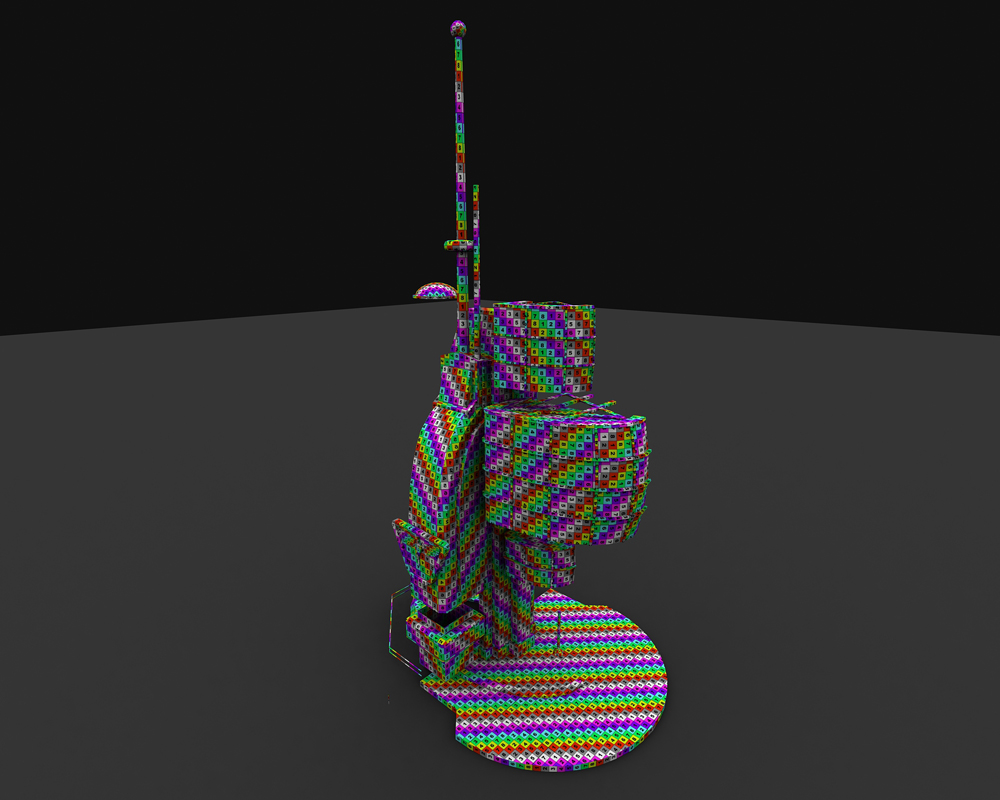
By saving a copy of the helix 'shape', I can use it to replace the spikes in the same position they were in before (you can see the single spike in the right of the image).In the unwrapped image above, a smaller scale checker pattern means that the unwrapped area is getting a higher ratio of texture space, and the inverse is true of any larger scale checker pattern.
So from this information you will see that brick area is getting more texture space relative to the metal areas.
Because it is a completely different material type, I am OK with this (generally speaking you are encouraged to keep as many things at the same scale, I.e. the same checker pattern size, as possible).
The inner floor area that is quite large, and seems to be getting a lower ratio of texture space, is due to the fact that it has been stacked on top of the roof UV island (which means that when I texture this, the floor area will have the same texture as the roof!).
The reason that I consider this OK is because it will be nearly impossible to see the inner floor area, so giving it its own space on the texture would have been a waste in my opinion (this is part of the whole, using the texture space more efficiently that I mentioned earlier).I will next either do some greyscale work in preparation for building a normal map. Or I will do a colour and material block-out.
Before I do that though I will have to rebuild the model (which is simple enough).= = = = = = = = = = = = = = = =
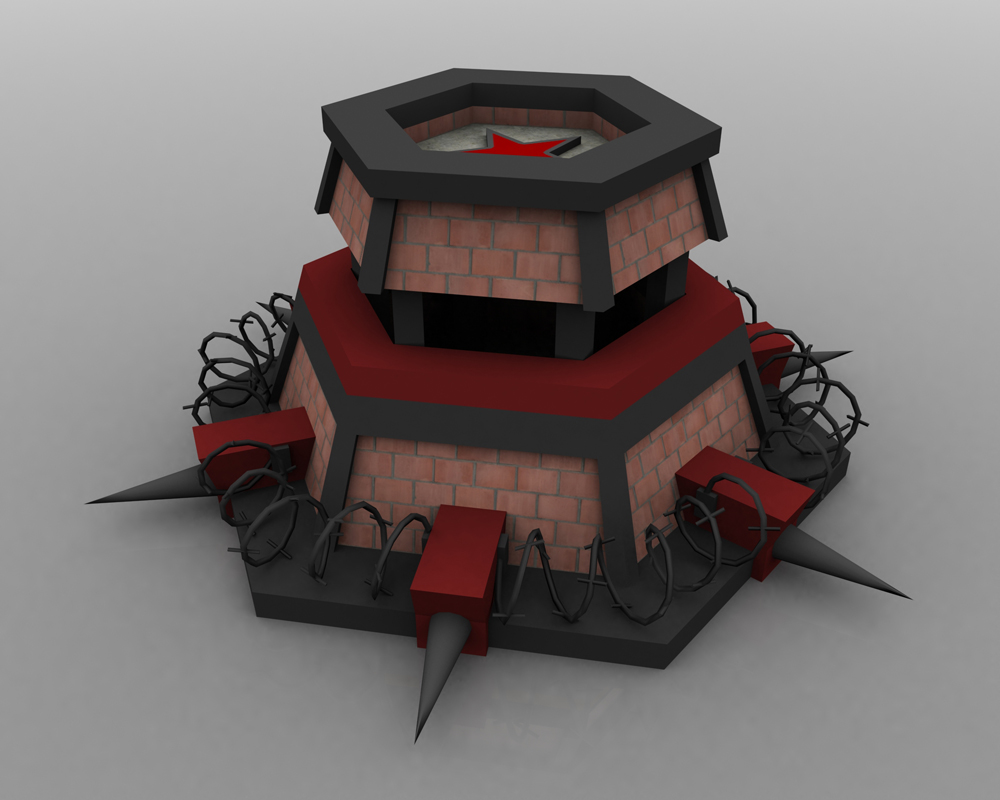
So as you can see the model has been rebuilt, and the basic colours and materials are down.
You can see that I have smoothed the barbed wire.As always the brick texture is taken from CG-textures website. I never hand 'paint' bricks or concrete textures, I always get them from the mentioned website. Conversely I almost always hand 'paint' metal, and metal edge rust.
This already looks promising, but there is still plenty to do!
= = = = = = = = = = = = = = = =
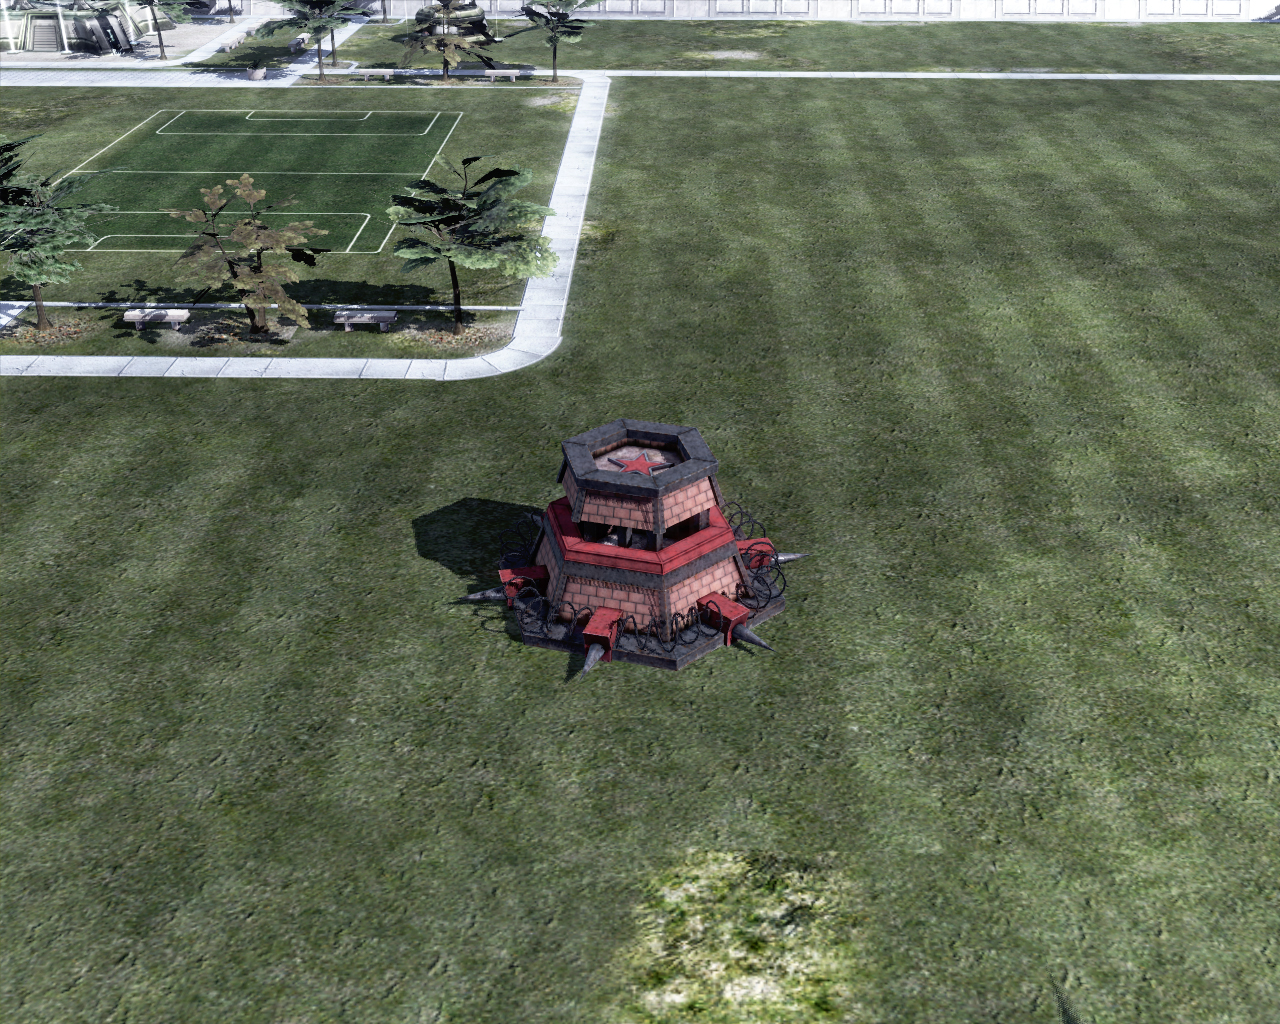
I have say that I do not like the dark barbed wire, it is too difficult to see. Making it more of a dark grey would work better I think.
Of course this is one of those (many) times when I go against the source material!Other than that I quite like this. I still prefer the 2nd in the bunker series though.
As you can see it is very difficult to make out the barbed wire at default height, not good at all.
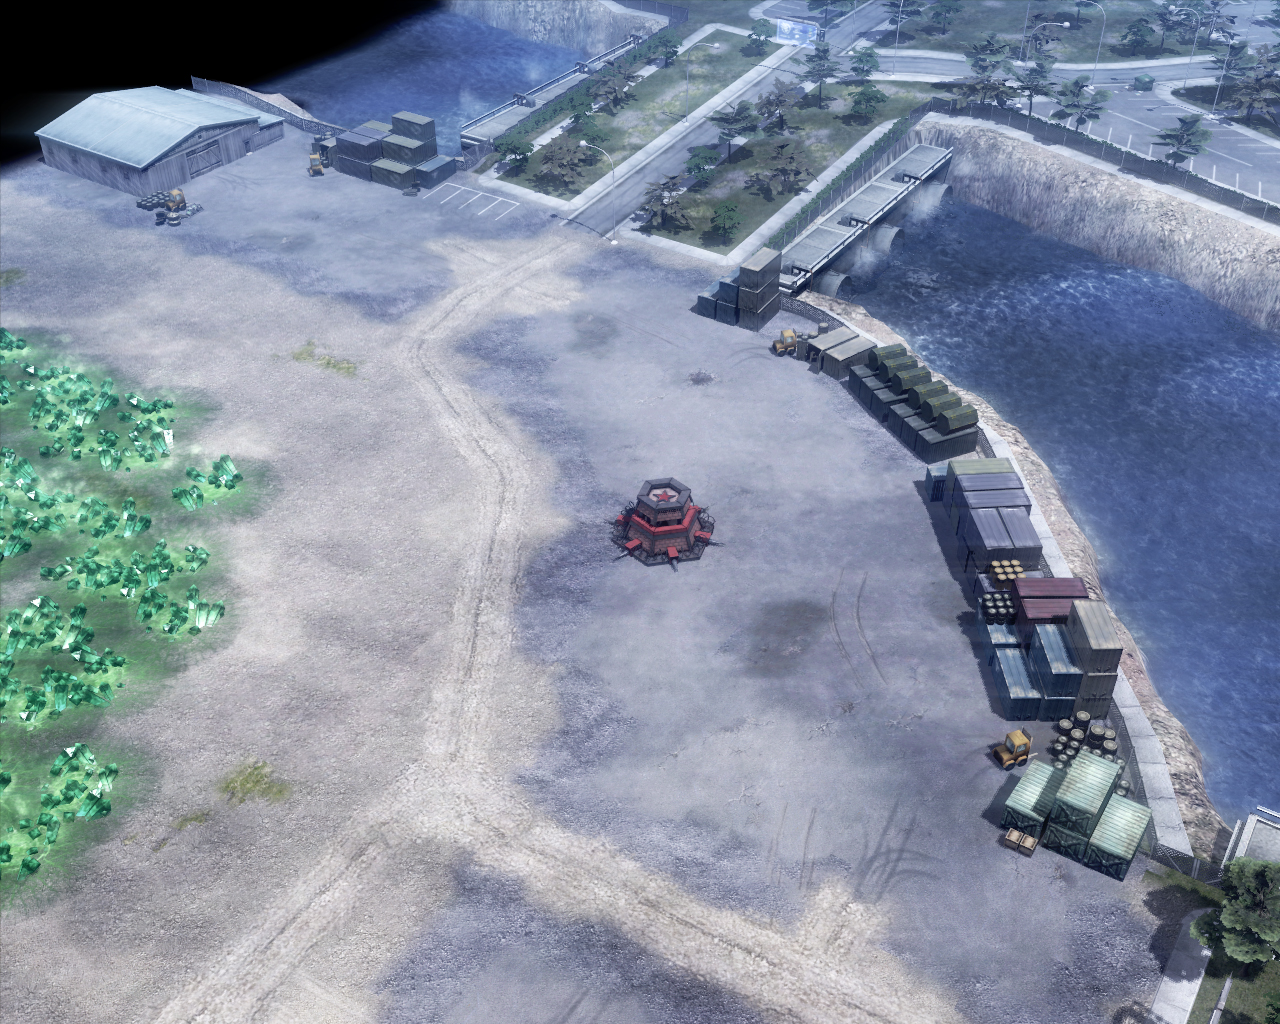
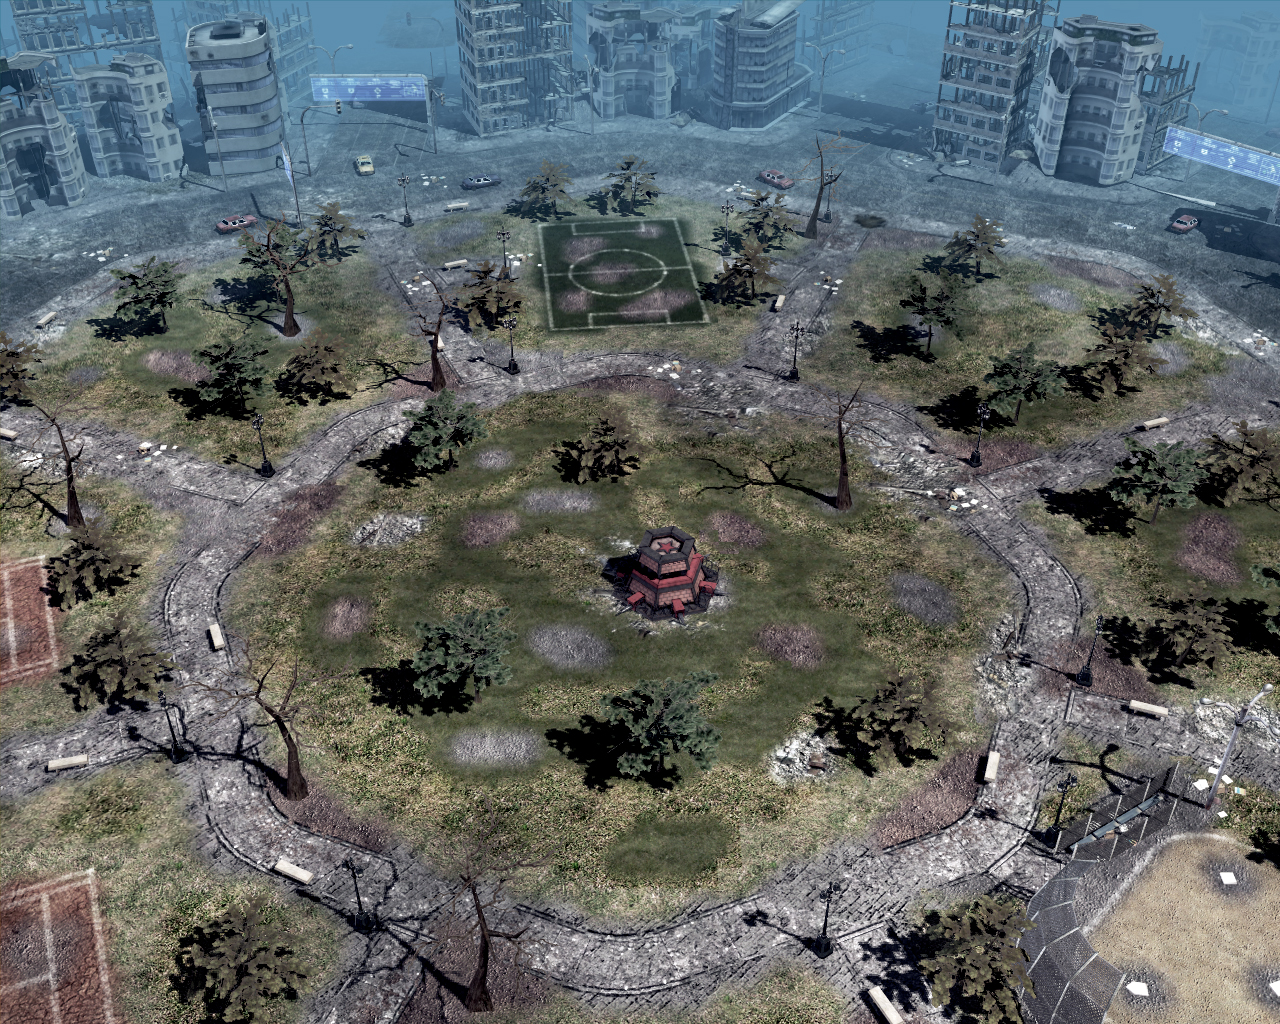
Well here is the usual GIF to round off the bunker series, thanks for your participation!
 1
1 -
13 hours ago, OWA said:
Nice cubemap!
I cannot take credit for that, it is the standard tiberian Wars cubemap.
0
Battle Lab
in Community Creations
Posted
Thanks for the comments!