Step 1: make sure Unreal Engine 4 is downloaded. The project was made in UE4.24.3, but it should work in any future engine version.
Step 2: Download the project "here". Once it's done downloading, unzip it to a directory of your choice.
Step 3: Open the project. Press "More", then "Browse...", then find where you unzipped it, go into the W3D Texture Baker folder, then open "W3DTextureBaker.uproject".
Step 4: Once the project is open, go into the TextureAssets folder, and create a new material (right click in the Content Browser, then select material).
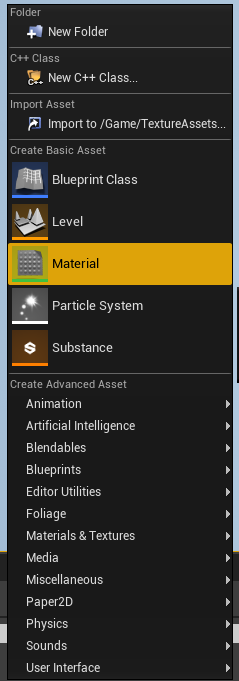
Give it an appropriate name, so that you'll remember it. Then, right click in the Content Browser again, and choose "Import Texture Assets".
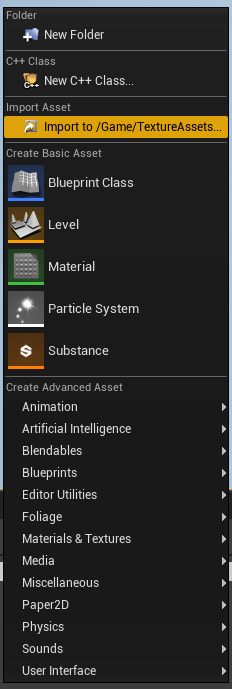
Then, select all the various components for the texture. Ideally, you can just use Albedo, AO, Roughness and Normal for a non metallic texture. For metallic textures, I recommend also importing the Metalness map.
Step 5: Set up the material. See UE4 documentation for more details.
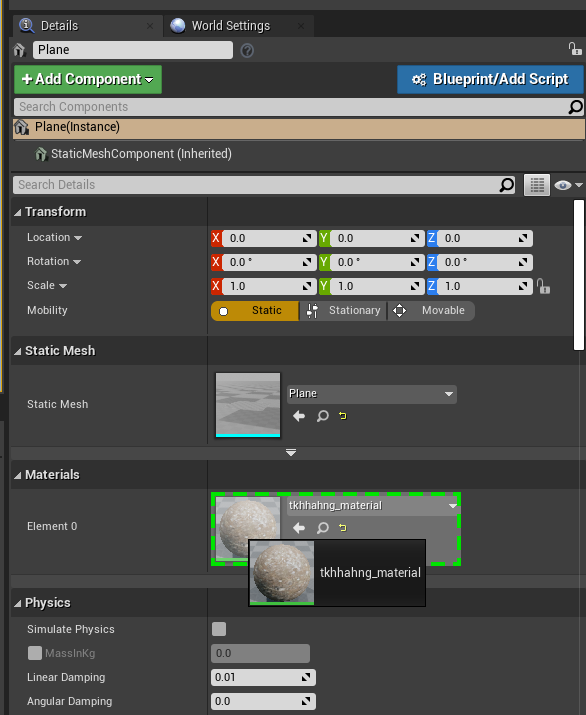
Step 6: Select the Plane that is in the world, then drag your new material from the Content Browser into the Element 0 box in the Materials section of the inspector. There'll
Step 7: Go up one level in the Content Browser, then right click the "Render Texture" object. o to "Asset Actions", and then "Export".
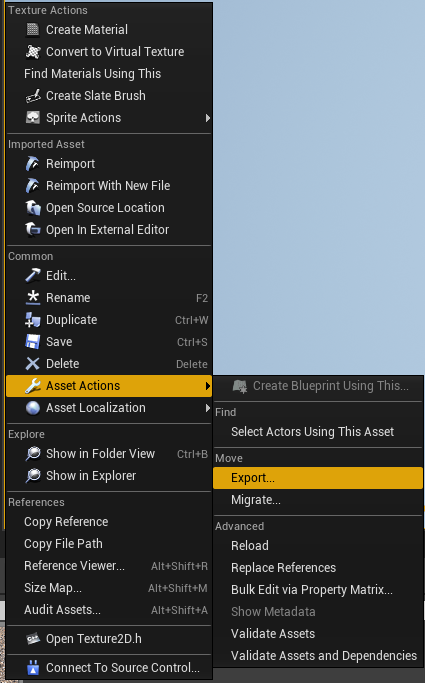
Save it where ever. It is in HDR format, so open up Photoshop/GIMP.
Step 8PS: Open the HDR image, then set the mode to 8 Bits per Channel. It will open up the HDR toning dialog, I usually use the Equalise Histogram method, but experiment to get the best results.
Step 8GIMP: Open the HDR image, then set precision to 8 bits per pixel. Use perceptual gamma (sRGB).
Step 9: It's ready now to become a DDS file that W3D can use.







Recommended Comments
There are no comments to display.
Join the conversation
You can post now and register later. If you have an account, sign in now to post with your account.
Note: Your post will require moderator approval before it will be visible.