Search the Community
Showing results for tags '2 - Novice'.
-
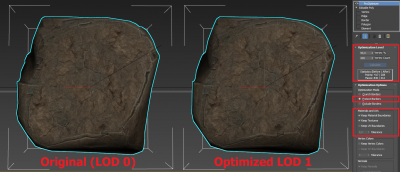
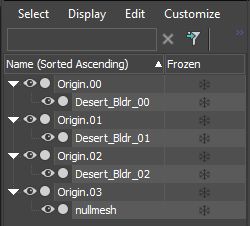
Here is a quick guide on how to properly add LOD to an asset for use in W3D, using the latest available tools. What you need for this guide: 3DS Max 2017 with W3D plugin. The latest version of W3D Viewer. A completed level art asset, for example a rock. In the viewport, enable statistics. (Right click on the [ + ] sign, go to xView and Enable Statistics) Step 1: Understanding How LOD Works Level of Detail (LOD) is a way to scale the detail based on the distance an object is from the player. It is an essential component in optimizing your game for players, and it should be employed frequently, on most art assets not considered part of the "main terrain mesh". For each LOD stage we require, we need a gradually lower detail art asset. Generally speaking we will need 3 versions of the art assets, but you can get away with just 2 for really small objects. Here is how this is supposed to look with 4 LOD stages: LOD 0: This is your main art asset, we will not be touching the art of this one past this point since this is the model players will see in close proximity. LOD 1: This is the next step, here we will tune the art asset with a first pass of ProOptimizer. This initial pass should see a big gain in terms of polygon count reduction while not visibly being too different. LOD 2: Here we continue the gradual quality reduction of the art asset, keep in mind that players should not be seeing these models up close, so you do get a small margin of error worth of breathing space here, since players will not spot the occasional texture seam. LOD 3: This is the null-LOD. This final stage must always exist as a safety-net. This stage does NOT use a clone of your art asset. Ensure you name your assets to something logical, I recommend adding a suffix to each such as "_00" or "_01" to refer to what stage the art object is supposed to be. Step 2: Creating LOD Stages Open your art asset in 3DS Max 2017. Note: If your art asset is made up out of several objects, you should group them before proceeding. Select your art asset, now clone it. This new clone is going to be our LOD 1 art asset. On the Modify tab of your newly cloned art asset, look for and apply the ProOptimizer modifier. This is the modifier we will use to generate LOD assets. For the first optimization pass, we want a result that reduces the polygon count by about 50%, the exact result will vary since it is up to you to determine if the LOD 1 stage looks like not too significant a departure from the original model. In general the main things you should be looking for are whether the outline of your LOD 1 art asset is still looking close to the original (LOD 0) art asset, and making sure no significant texture seams show up. Note: Please be aware that if your art asset uses vertex painting, you will be forced to undo that in order to prevent either really bad results, or barely any results. You will then have to redo the vertex painting on collapsed LOD art stages (never apply vertex paint on an object with an active ProOptimizer modifier in the stack). To get to 50% reduction, you will need to play with these settings (Click to enlarge): As you can see, the visible effect on the model and texture is very minimal. The outcome varies per art asset however, and if you get errors in certain spots, I recommend playing with both the percentage target, as well as the "Tolerance" value. Tip: To assist in comparing before/after, use the display toggle next to ProOptimizer (the eye icon), this will help you spot the differences without having to alter the ProOptimiser values back-and-forth. Next, clone the newly optimized LOD 1 art asset, this will become our LOD 2 asset. Pay attention that you continue to name these logically. Take another look at the ProOptimiser values, for this next asset we will want to hang around 20% budget. Repeat the process as described above and feel free to tweak the values to your liking. For LOD 3, the null-LOD, will will handle this in the next part. Note: If you spotted some smoothing issues in your asset post-optimization, you can collapse the modifier stack (so that the only thing you see on it is Editable Poly), and then apply a traditional Smooth modifier onto it, this will correct a lot of edge weirdness that your model may or may not be having. Step 3: Rigging the LOD Asset - 3DS Max Once your 'artistic' side has been completed, we need to ensure we rig the the asset in a way that W3D can understand what it is. Worry not, as this process is fairly straight forward. Select all your art assets, from all LOD stages. Go to the W3D properties located in the Utilities tab, and uncheck "Export Transform (Bone)". In regards to other W3D properties, please keep this in mind: LOD assets in W3D inherent their collision information from the LOD 0 stage. This means your LOD 0 asset should have the proper collisions applied. It is possible to use a separate collision mesh as well, as long as this is hooked into the LOD 0 stage down below. Other settings such as VAlpha should be applied to all art assets of all stages. For each LOD stage, we will need to create a special bone. Create a small 1m box, and center it in the scene. We will call this box Origin.00. With Origin.00 selected, go to the W3D properties located in the Utilities tab, and uncheck "Export Geometry". Now clone this box 4 times so that you have 5 boxes in total, for LOD stages 0 through 3, and one more for the final null-LOD. Select the 5th box and rename it to Nullmesh, then go to the W3D properties, disable "Export Transform (Bone)" and re-enable "Export Geometry", and below Geometry Options check "Null (LOD)". With all the pieces created in the scene, we will now link them up. Select your art asset, and using the "Select and Link" tool located in the top menu next to the undo and redo buttons, link the art assets to their respective Origin bones. You can most easily do this by selecting them through the "Select by Name" dialog, also located near "Select and Link" at the top menu. So if done correctly, the LOD 0 art will be linked to Origin.00, and the Nullmesh should be linked to Origin.03. If in doubt, your hierarchy tree should look like this: Now be sure you followed these steps correctly, always double-check. Save your scene and export it as Hierarchial Model with both Smooth Vertex and Optimize Collisions enabled. ___________________________ Update: The next part of the tutorial is obsolete. Instead, Max Screen Size values are applied within 3DS Max, by using the new MaxScreenSize input option in the W3D properties panel. Recommended average screen size values: LOD0: 1.0 LOD1: 0.3 LOD2: 0.2 LOD3: 0.1 LOD4: 0.03 (null) You will have to tinker with the values depending on the asset. The general rule is, small objects should LOD earlier than larger ones. ___________________________ Bonus Tip: LODed presets are excellent for usage with proxies. So all the time you spent creating this LOD asset, can be earned back by populating your level with this asset in 3DS Max via proxy. To make a proxy, create a preset in Mammoth containing the LOD W3D file, for example FancyRock1. In Max, open your LOD file and save the LOD 2 art asset as a separate file. Within this new file ensure it is not linked to any Origin bones. Remove all materials and merge all meshes, and ensure the pivot (not the mesh) is located at 0,0,0 of your new singular scene object. Name this object FancyRock1~01. You can now place this object around your level, and once loaded in Mammoth, all objects called FancyRock1~## will be replaced with the preset named FancyRock1, using the position and orientation from the proxy mesh. Once your project has a whole library of LOD assets available, creating new levels will take much less time. Hopefully this will help some people understand how to create LOD assets using the latest tools for W3D. If there are any questions, ask them below.
-

2 - Novice DDS Files and DXT Compression
Maraneshi posted a topic in Modelling, Unwrapping & Texturing
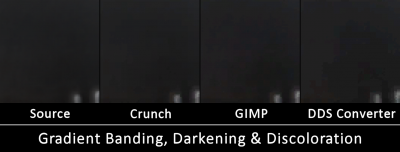
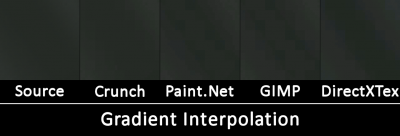
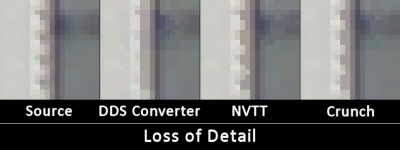
In this tutorial I want to teach you how to get the best quality out of your textures when compressing them. What is DXT? DDS is a container format designed for texture data and can have different amounts of compression applied (including none). There are 3 major compression formats defined in the Direct3D 6 standard: DXT1, DXT3 and DXT5. These are also called BC1/2/3 ("Block Compression") respectively. Later versions added BC4/5 (D3D10) and BC6/7 (D3D11). Each of these have their own use cases and advantages, so higher numbers are not just "better" versions. The advantage of these compression formats compared to something more common like JPEG is that they can be uploaded to the GPU directly and always stay fully compressed in GPU memory. With hundreds of megabytes of textures this adds up quickly and allows us to improve performance (less memory bandwidth used) and target lower end/older GPUs with less VRAM. The decompression is implemented directly in hardware and happens transparently on memory access. The key ingredient for this to work is that the format is made out of independent 4x4 blocks of pixels that can be decompressed individually instead of the entire texture at once. A more thorough look at the details of the compression formats can be found here: http://www.reedbeta.com/blog/understanding-bcn-texture-compression-formats/ Which Format to Use? The DXT-Formats mostly differ in their handling of the alpha channel (usually used for transparency). Use BC1/DXT1 for pure RGB textures or hard "cut outs" which only need one bit of alpha (fully opaque or fully transparent; note that some tools have a separate mode for this called "DXT1A") Use BC2/DXT3 for RGBA textures with discrete "hard" alpha transitions (this format has 4 bits of alpha per pixel, so 16 different levels of transparency) Use BC3/DXT5 for RGBA textures with smooth interpolated alpha (use this over BC2 unless you're certain) The data rate is constant regardless of image content: 4 bits per pixel for BC1 and BC4 and 8 bits per pixel for every other format. This means that BC1 should be used where applicable to save memory, don't forget the 1 bit of alpha comes (almost) free! BC2 use cases are rare, usually you probably want BC3. A nice overview of features and use cases for all BCn formats can be found here. Missing in this table is a particular trick for using DXT5 for better quality normal or bump maps explained here, also called DXT5nm or DXT5-xGxR and has direct support by a few tools (e.g. NVTT, see below). The more modern BC4-7 formats should generally be avoided for now since the older Renegade-compatible W3D engine can't load them at all, W3D 5.0 (APB, AR and BFD) can't load them yet (though afaik it would be trivial to add support) and most importantly, 3ds Max and many other programs cannot open them (BCn App Support). Nevertheless, we might have a specific need for one of these formats in the future that warrants their use despite the tooling issues and we can always just use the uncompressed source texture for the .max files. At some point in the future, I will specifically take a look at BC5 for optimum quality normal maps and general BC7 vs. BC3 quality since it should be tremendously better in most use cases at the same size. BC7 instead of BC1 should not be used frivolously due to being twice the size and also less amenable to further compression (e.g. zip) since it actually carries so much more information, but when you really need a near-lossless result, this will do it. Since the BC7 format is so much more complex, some encoders can take many hours for a single texture at high quality, but there are some faster ones out there (see below, so far I only tried Compressonator for BC7, will revisit this at some point). Which Exporter to Use? This is where we get the reason why I wrote this post in the first place. I noticed some textures looking awfully blocky ingame with obviously off-color artifacts, which was caused by an extremely bad DXT encoder. I then set out to compare different compressors and stared at textures for hours (I also used PSNR metrics, but visual inspection was much more useful). In total I tested 7 different tools with two DXT1 textures we had uncompressed sources for. First of all here's my personal ranking in terms of output quality: Crunch (download can be found here in the "bin" folder) tied with Nvidia Texture Tools (NVTT, download from "releases") Compressonator (download from "releases", also see here for Win7/8 issues) Nvidia Texture Tools for Adobe Photoshop (https://developer.nvidia.com/nvidia-texture-tools-adobe-photoshop) Paint.Net (https://www.getpaint.net/) ISPC Texture Compressor / Intel Texture Works Plugin for Photoshop (https://github.com/GameTechDev/ISPCTextureCompressor / https://github.com/GameTechDev/Intel-Texture-Works-Plugin) GIMP with DDS plug-in (https://www.gimp.org/ and https://code.google.com/archive/p/gimp-dds/downloads) DirectXTex (download from "releases") DDS Converter (http://www.ddsconverter.com/, but I'd rather you throw it deep into the sea) To motivate you to switch from a different tool, let me detail the issues encountered with the different encoders (comparison images are in the spoiler below). Edit: No matter which tool you use, make sure it generates mipmaps unless it's a UI texture. Some will do this by default, some don't (Compressonator). Some tools also offer the ability to specify gamma/sRGB for mipmap generation. This should be set to sRGB/2.2 (default for most tools). If you're unsure about gamma, use a checkerboard texture to replace a terrain texture ingame, disable anisotropic filtering and look off into the distance, with proper gamma it should look about medium gray (with lighting taken into account), otherwise it will look darker (like here). Edit2: If you're working with tiled textures (terrain, walls), make sure you're telling the compressor so it doesn't break the smooth tiling (e.g. -wrap for Crunch, -repeat for NVTT), though the difference is usually minimal. Crunch was originally developed for a more advanced purpose, so make sure you only use the command line options that produce a "normal" non-clustered output (in particular, do not use -bitrate or -quality). In terms of visual quality, it particularly excels at gradients and dark areas. NVTT is very close overall, with Crunch displaying better performance on gradients, while NVTT beats it at high-frequency detail. Note: Do not use this tool for BC7, unless you want to literally wait for days for a single texture even with the "fast" encoding option. Compressonator is one of the few tools to feature both a GUI and a command line interface, although the GUI can a bit weird to use. Make sure you generate mipmaps explicitly and set the quality to 1.0. In my experience the quality is always slightly behind Crunch/NVTT, but it's definitely not bad and it has been recommended a lot in the past. It can also compress to BC7 within a reasonable amount of time (35 seconds for a 4k texture with quality=0.05, though without comparison I can't speak for its visual quality). Nvidia's Photoshop plugin for some reason continues to use a very old version of their texture tools (NVTT is basically a complete rewrite). It generally looks most similar to Crunch, suggesting a commonality in the algorithm used. However, it tends to produce some additional block artifacts on hard edges and has some more trouble with darker gradients. Overall it's still good enough to be okay to recommend, I'm just slightly disappointed that Nvidia doesn't update this plugin anymore. Paint.Net is not terrible but very clearly behind the other options. Gradients and dark areas suffer from banding and block artifacts and some areas appear darker than in the source or have their hue shifted to a different color. The uneven gradients make the "block" structure of the compression very visible. ISPC was a total disappointment. I thought it to be among the top tools, but on gradients (in particular darker ones) it just flat out fails and produces results comparable to the worst ones out of all tools with very extreme discoloration. Upsides are that it has good BC6/7 support and is very fast, so it may still be useful for these modes. GIMP first disappoints with a "use perceptual error metric" option, which for unknown reasons makes the output worse rather than better. The output doesn't impress either way though, with even worse gradients and random hue shifts than Paint.Net. Surprisingly, it does fairly well at high-frequency detail, but that in no way makes up for its general poor performance. DirectXTex from Microsoft may sound like a natural pick, but sadly it is one of the worst encoders I have seen so far. Simple flat areas turn into a blocky mess of different colors that weren't in the source at all, gradients look horrible, etc. As with GIMP, it does fairly well at high-frequency detail, but in doing so it introduces severe noise across the entire texture, sometimes looking a little bit like the JPEG artifacts we all know and love. This compressor also supports BC7, so I may come back to it in the future. DDS Converter I haven't tested directly, but it was the source of the problems that caused me to investigate this issue in the first place. The quality is just godawful, in some parts it almost feels like the texture is lower resolution than it really is because entire 4x4 blocks share the same color for no particular reason, and it's not even the correct color! In addition, some detail introduces harsh artifacts and noise. I weep for all the people googling for "dds converter" and having to put up with shit quality textures because of this tool. Comparison images in spoiler (Open up in full size! Note that some issues like darkening and discoloration are more visible in context): There's probably a lot more stuff I could talk about, but for now I've run out of gas. Any questions/suggestions are welcome. -
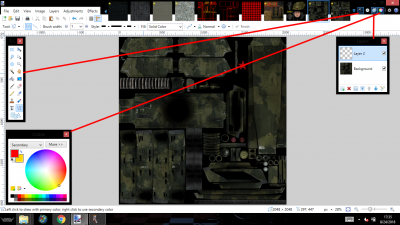
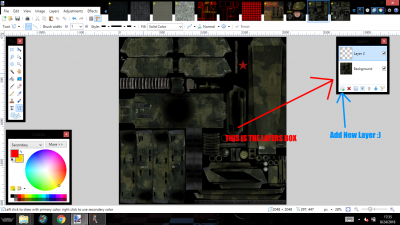
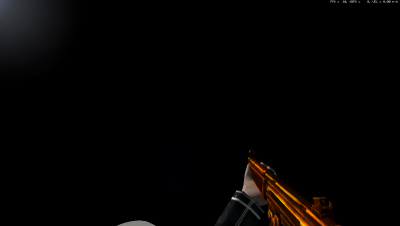
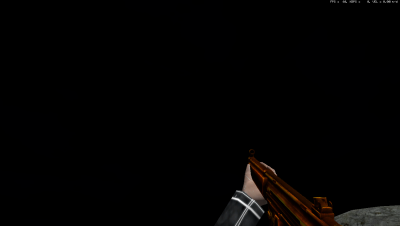
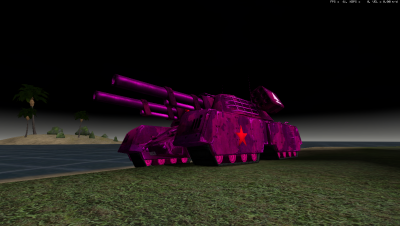
Author: Threve Skill level: 2 Good Evening all. Ever wanted to change the color of a Tank or create the V2 Missle into a Carola Crayon? This is the tutorial for you! Give me 20 minutes of your time and I will show you how to change the color of anything easily along with giving you knowledge skills in editing APB. I will also be including an advanced tutorial that will show you how to go further in-depth and really create some crazy cool shit if you'd like. I will also do my best to keep it as simple and straightforward as possible so you're not here forever. But first thing is first.. Part 1 (Introduction and Tools) Part 2 (Getting and extracting the shit that we need) Part 3 (Editing the actual file and uploading it to your game) Part 4 (The Finish) Now do keep in mind that there is an endless world of possibilities to editing textures. If you would like to make one part yellow and another purple you can simply select half the picture and paint it purple then the other half yellow. To make specific part a different color you just simply select that part on the texture and paint it like so. It may be a bit difficult to tell whats what on the file because everything is sort of just exploded so you make have to make a part yellow then test it out in-game and see where it lands or what part was colored. However, working with paint.net constantly will allow you to experiment new things and also do it alot faster. This may have taken you 15 minutes or so but after a while it'll be cut down to 2 minutes. Practice makes perfect. Part 5 (After some basic practice. Let's turn it up a notch and make some really crazy cool stuff) APB_Editing_Tools.7z
-
2 - Novice Shiny Texture in RenX/3ds Max
moonsense715 posted a topic in Modelling, Unwrapping & Texturing
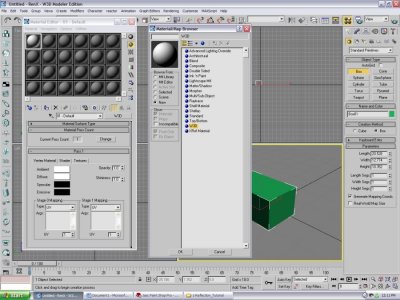
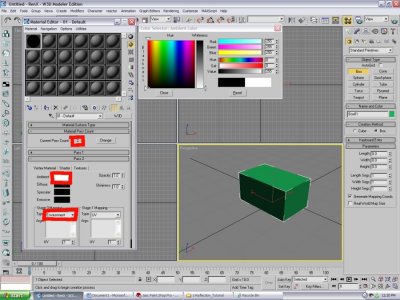
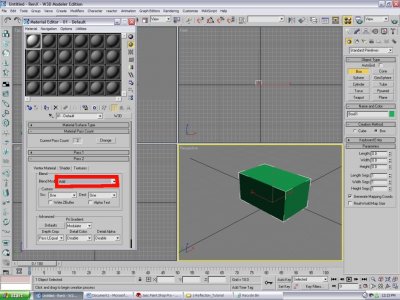
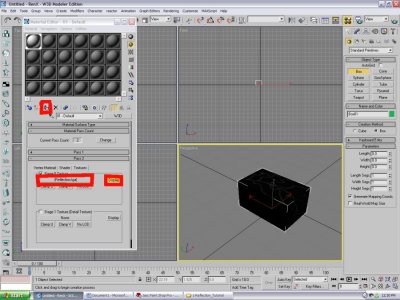
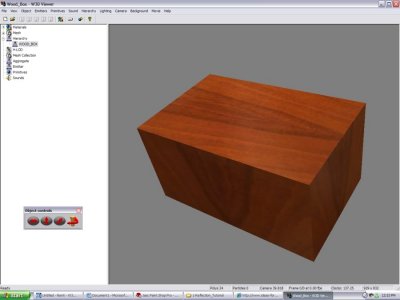
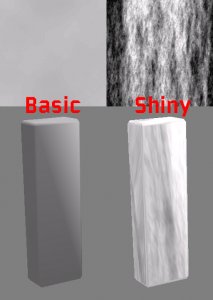
Author: Wub Wub Skill level: 2 This is a tutorial to make textures shiny, a.k.a. fake reflective. For it I will be using a simple reflective texture and a simple wood texture. You can get more advanced as you get more skill but for now I will tell you the basics. Here is a basic reflection: Here is a basic wood texture: Now, open both of them up in photoshop (or paintshop pro) and save them both as .tga Save the reflective one as Reflection and the wooden as Wood Open 3ds max and make a box any size. Now click on it and push m to open material editor and goto the w3d tab: Change the pass count from 1 to 2. On pass 2, change the Ambient to white (255, 255, 255) Make the stage 0 mapping from UV to Environment Now go to the Shader tab right beside the Vertex Material tab and change the Blend Mode from Opaque to Add Go to the Textures tab right beside shader and click on Stage 0 texture box and then click None and open Reflection.tga file you saved earlier. Hit display and click the box and then assign material to selection The box should now be black with faded white lines Now to apply the background texture. Go to Pass 1 and go to Textures Click stage 0 mapping and then click None and open Wood.tga you saved earlier. Click Assign to material again. Go to File and export as Wood_Box.w3d in the format of W3D Asset Make sure you put eh w3d file in the same folder as Reflection.tga and Wood.tga or else they wont show up. Click on Wood_Box.w3d file and it will go to w3d viewer. Go to hierarchy and click wood_box. A wooden box should now appear and if u move it around u should see the reflection Here is the finished product: Bonus section Here's another example: The basic texture is a regular 1 Pass material, and the shiny one has the reflect texture added to it as per this tutorial. -
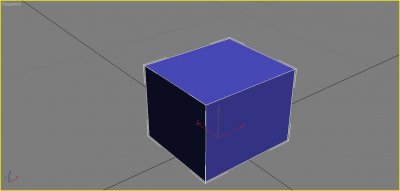
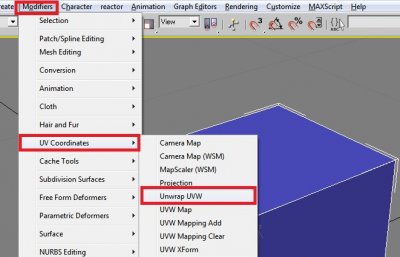
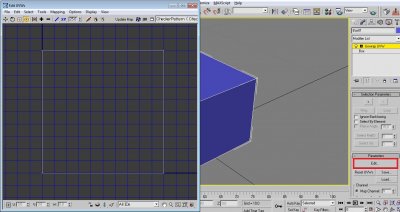
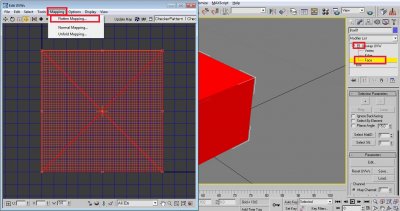
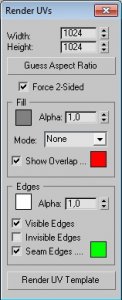
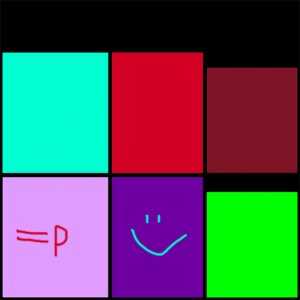
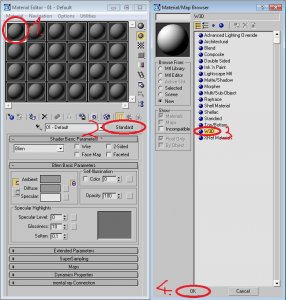
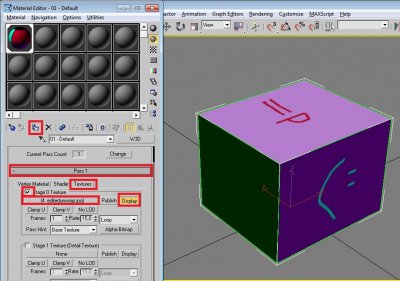
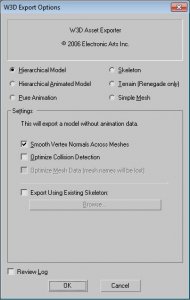
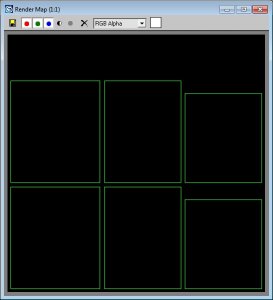
Author: moonsense715 Skill level: 2 Ever wondered how to connect modeling, unwrapping and texturing together? How an unwrap gets into photo editors and then comes back to the modeling software? Then this tutorial is for you. 1. Create your model To keep this tutorial simple, I will demonstrate the workflow on (you guessed it) a box, but it works for almost anything. So in 3ds Max, get your model complete, here's my box (size: 3.5 x 4.0 x 3.0): 2. Unwrap your model The next step is, unwrapping your model. Apply the UVW Unwrap modifier onto your model (make sure it is selected): Now on the right side panel, you will see "Parameters" and under that a big "Edit" button. Click that and the Edit UVWs window will pop up: Now on the right panel, expand Unwrap UVW and select Face. Hit CTRL + A to select all the faces. On the Edit UVWs window, click Mapping and choose Flatten Mapping. On the popup window, just hit OK. The unwrapping for this box is complete as it is a very simple model. For more complicated models, the unwrap will most likely look very unoptimized and scattered all around. You can learn more about unwrapping HERE. For now, let's continue using the unwrap in the texturing phase. 3. Get your unwrap ready for an image editor Before you close the Edit UVWs window, we need it for one more thing. Click Tools and select "Render UVW Template". The following dialog should appear: Play around with the settings if you like or leave it as default and hit "Render UV Template". An unwrap image will render. Click the save icon save it as a PNG or TGA filetype, whichever you can open with your image editor software such as Photoshop, Gimp or even MS Paint if you just want to try out this tutorial. 4. Use the unwrap in the image editor Open the picture you rendered with an image editor software. Edit it to your liking, the unwrap lines help you as they show where to draw on the image. If you are unsure which part of the unwrap is which, you can check it on your Edit UVWs window. Select a face and it will be highlighted in all your open camera views. This is an example I came up with: Save the image. 5. Apply the new texture to your model Back in 3ds Max 8, open your material editor by hitting "M". Select any material slot (big grey ball) and click Standard. Change it to W3D and hit OK. Under Pass 1, switch to the Textures tab. Tick Stage 0 Texture and click on None. Browse for the texture file you just created and hit OK. Click Display and Assign Material Selection on your selected model. The texture should appear on it. 6. Export the model and finish In normal cases, you should tick Physical, Projectile and Camera collisions on your mesh on the Utilities (hammer) tab under W3D Tools so you can collide with it, shoot it and your camera will not go through it. This does not apply to characters and vehicles in W3D, you need to rig those in a special way. See the other tutorials for them. As for this box model tutorial, now click File -> Export. Filetype should be W3D Asset, give it any name. On the export options, choose Hierarchical Model and change nothing else. Now your asset is ready to be used in the W3D engine. Open it with W3D View to look at it or add it as a preset in Level Edit to use it. Tutorial source files Here are the files used by this tutorial, feel free to look at it to check as reference: GenericAssetWorkflow.zip
-
Author: Di3HardNL Skill level: 2 Allright this tutorial shows how you can make a sound object which you can attach to an object (Like vehicles,structures and weapons) Open W3dviewer - Click 'Sound' and then Create Sound Object - Name the file however you like best - Browse for you MP3 or WAV files (put them to your LE project folder or your game's Data folder if they are not inside always.dat) - Play around with the settings untill you think its good, you can always change it afterwards if it isn't what you wish. - Export the Sound Object. Open RenX - Create a box and name it however you named your Sound Object file. - At the W3d settings of this box only select 'Export Geometry' - Below the Geometry settings select 'Aggregate' - Then LINK the box to some object which you have opened in RenX. Export and enjoy If you still can't work it out PM me on www.renegadeforums.com Slave was the guy who explained it on renegadeforums.com, so he takes the actual credits.
-
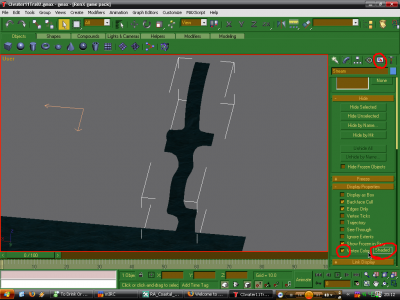
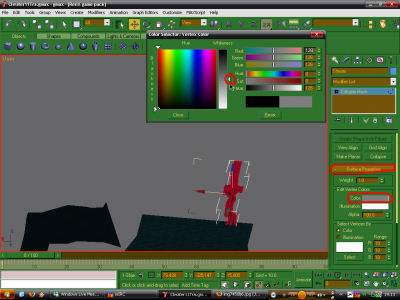
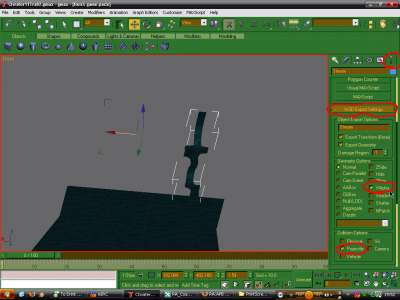
Author: r34ch Skill level: 2 RenX Stage OK This tutorial goes through how to make the realistic water from the link below, translucent. So I'm guessing you've already set up the water plane with the tutorial below *Hint* Realistic water tutorial OK so select the plane you want translucent. Hit 'M' to bring up the material editor. Firstly in the properties tab, make sure you have ticked static sorting and set it to 1 (should do this by default) Otherwise the water will seem to flicker at different angles. Also set the material type as "Water Permeable", so projectiles go through it. There should be two passes from where you set up the realistic water from the tutorial linked above. Click on 'Pass 1', then 'Shader' and change blend mode to 'Alpha Blend'. Leave everything else. Click on the little TV screen. Scroll down to find 'Vertex Colours'. Check this. Click on 'Shaded', This will mean in the next step when you colour the vertices they will change colour in renX. (just helps to see) Change to edit vertices so the little blue cubes appear. Select the cubes in the areas you want translucent (or select all if you want it all translucent) Scroll down to 'Surface Properties'. Click on colour and change the colour to Grey (halfway) This will make the water translucent but will still keep the water effects (i.e. not make it completely translucent) Click on the hammer to see the W3D settings. Open up W3d export settings and click 'vAlpha' so that the game renders the alpha blend (and so makes it translucent) If its the sea your doing, click 'vehicle' so boats and subs can use it. Also click 'projectile' so projectiles leave splashes, but make sure the water is set to 'water permeable', otherwise boats can't hit subs. Notes When making a level in renX, anything that is made translucent like in this tutorial must be saved on its own as a different file, and deleted out of the original file. I.e. 'MyMap' would contain all the terrain etc, but the water deleted. 'MyMapWater' Would only contain the water from 'MyMap', no terrain. LE Stage Now when you go into LE and 'make' the ground and water separately, both can be toggled hidden within LE. When you are ready to compute vertex solve, click the instances tab and deselect 'MyMapWater'. This will 'hide' the water in the level in LE. Now compute vertex solve while the water is hidden. Once the lighting is done, check 'MyMapWater' again to show the water. Save. Export to mix. If you do compute vertex solve with water on your map in LE, it will turn white. Many thanks to Raapnaap - For basically showing me how to do this, so he deserves most credit. I just wrote it up and took pics to help other people. r34ch
-
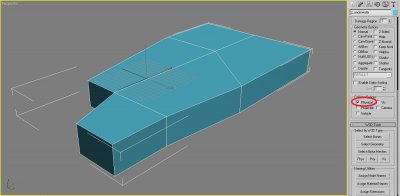
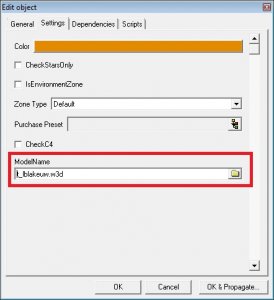
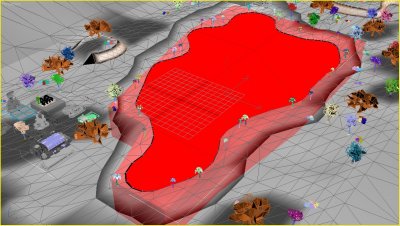
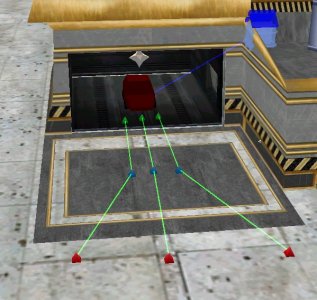
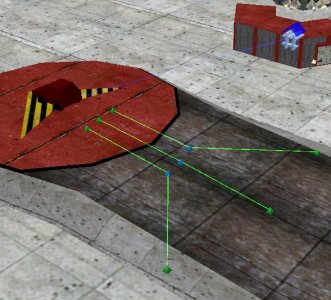
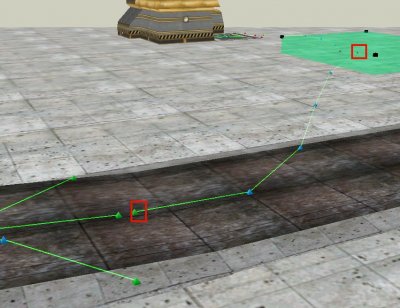
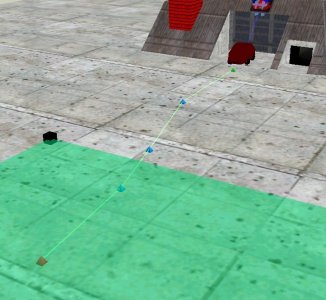
Author: moonsense715 Skill level: 2 This tutorial will show you how to create a custom shaped script zone because inside LevelEdit you can only create box shaped ones. In Reborn, this technique is used to define underwater zones and areas where Sub-APCs and Devils Tongue vehicles can not dig/surface. 1. Create the zone model Launch GMax-RenX or 3ds Max. Create a model that will be the shape of your script zone. It must be a convex shape. The faces can look inwards or outwards it does not matter. Here's mine: Tick Physical at Collision Options (Utilities tab -> W3D Tools). If your custom shaped zone is map specific, you must position it perfectly in 3d space to where it should be on your map. For example, I made an underwater zone and positioned it at the lake: Now export this single zone model (hide/delete everything else in the scene) as W3D format, Terrain type. 2. Add the zone in LevelEdit In LE, browse down to Object -> Script Zone, and Temp that or any other zone you prefer to copy initial settings from. Name it then switch to the Settings tab. Browse your script zone's model at ModelName and point it to the zone w3d file you just exported: The rest of the settings is up to you, along with the scripts tab if you wish to add extra script effects. Note that if CheckStarsOnly is enabled, the zone will only affect players and not bots. Up to you to tick it or not. Hit OK to finish creating/modding the script zone. 3. Placing the script zone Place the script zone by clicking Make. Set its position to the origin of the map by double clicking on the zone, going to the Position tab and changing the x, y, and z positions to 0. Then click OK. You don't need to change its rotation or size, the shape that appears when you hit Make will be replaced by the custom shape you created earlier. Have fun with your new custom shaped zone Note: from engine version 5.0 onwards, custom shaped script zones can be moved away from the origin (0,0,0) world location. This means they can be proxied by buildings and are not restricted to be exported individually on every map when buildings want to use them.
-
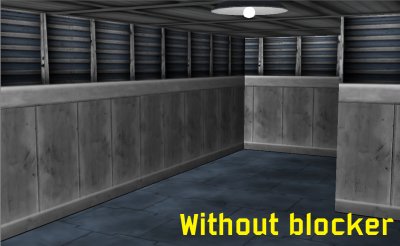
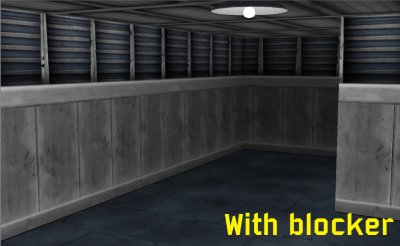
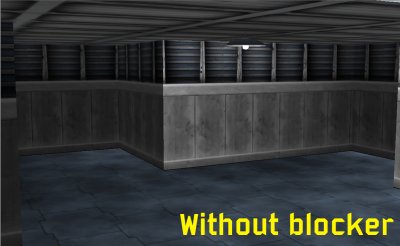
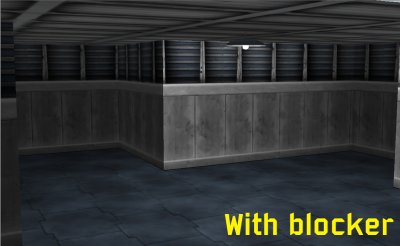
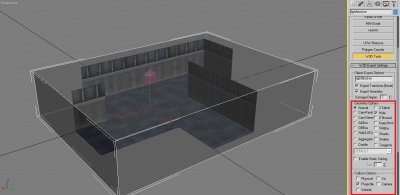
Author: Oblivion165, moonsense715, Jerad2142 Skill level: 2 This tutorial is designed to help you get better Lighting out of your buildings, or anything really. I'm sure you can see the difference. To accomplish this, simply make a box around your entire model. (Make sure you cut holes on the box so that it does not clip through any exiting corridors or you'll have projectiles/ammo get blocked on it!) Next, copy the W3d settings seen in the picture, and export. When you get in LE, generate a light solve, and you should have great lighting.
-
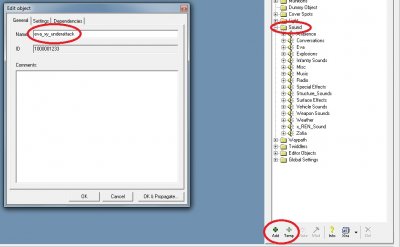
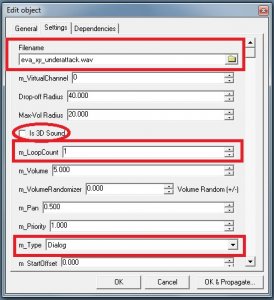
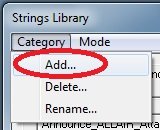
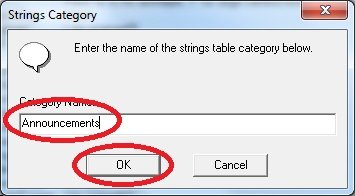
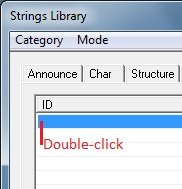
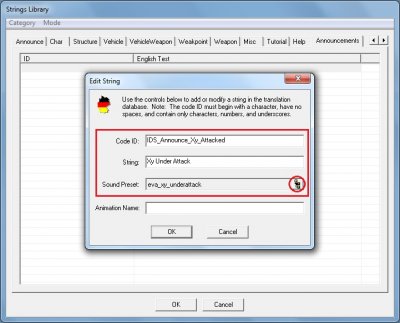
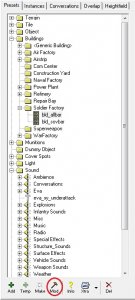
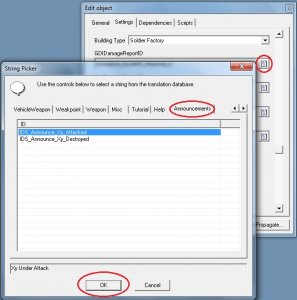
Author: moonsense715 Skill level: 2 This tutorial shows you how to add sound/text announcements to your buildings when they are under attack or get destroyed. 1. Creating the sound presets Open your Level Editor. On the sidebar Presets tab, click the Sounds "folder". Now click "Temp" if you are making a single map for an existing game or "Add" if you are making a simple mod/full conversion game. On the General tab, give your new sound preset a name. If you haven't done it already, move your under attack / destroyed sound files to your LE project's folder. Switch to the Settings tab and browse your sound file from your project's folder. Make sure that Is 3D Sound is ticked OFF The m_LoopCount is 1 m_Type is Dialog You can copy the other settings from this image but you don't have to touch anything else other than listed above. Once done, hit OK and your sound preset is complete. Do the same process to create a "Xy destroyed" preset. 2. Creating the string Find the Strings Editor and click it: Now you can create a new Category or use an existing one to add the new string to. I'll create a new one like so: In your chosen category, add a new string by double clicking an empty slot: Now give your string an ID. Then an actual text that will be displayed ingame when the building is under attack. Finally, click the preset browser button and browse your sound that you created in the first step so that it gets linked to this string. After done, hit OK. Your new string with sound is created. Do the same process to create the "Xy destroyed" announcement, make sure it has a different ID. If you want to have a different text or sound for the other team, you'll need to make additional strings (all the announcement strings can go into the same Category). 3. Link the announcement strings to your building Find your building controller under the Buildings "folder" and hit Mod: Switch to the Settings tab and scroll down to GDIDamageReportID (the GDI tag stands for team 1, and Nod for team 0 e.g in Apocalypse Rising GDI refers to Allies/Team 1 and Nod refers to Soviets/Team 0). Click on the String Picker icon and select your freshly created strings (find them under the category you used/created) and hit OK. Repeat this with the other 3 String Picker buttons to set up the Under Attack announcement for the other team and the Destroyed announcement for both teams. Press OK to close the edit object dialog. 4. Finish That's it, you have your announcements set up for your building! If this is a single map, export your map as a mod package and then rename it to .mix (or export as a mix but then you'll have to re-add strings.ddb from your project's \ALWAYS\TranslationDB folder to the map's mix file via XCC Mixer or RenegadeEx. Now get ingame and start wrecking it!
-
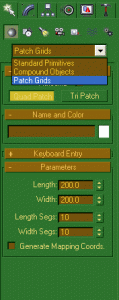
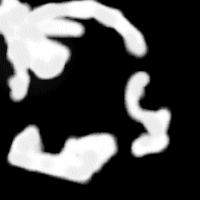
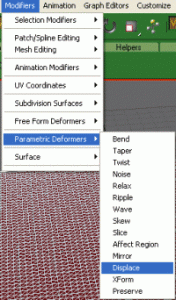
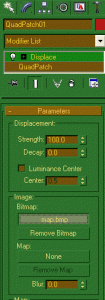
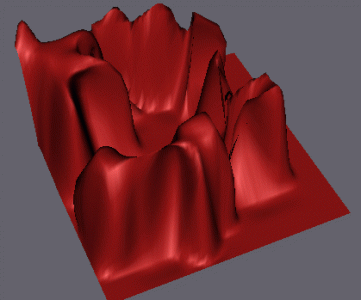
Author: Genocide Skill level: 2 This tutorial shows an alternate approach of shaping up the basics of a map in GMax-RenX/3ds Max. Make Terrain Without Modeling It! Bored of Making Maps/Terrain? Well Now With my Tutorial I Have Made It Sooo Much Easier, And It Dont Take An Expert To Do. This Tutorial Will Learn You How To Make Easy Terrain Just By Using Your Favourite Paint Package, PSP/Photoshop/Paint Or Whatever. Right Reset RenX/Gmax By File>Reset Right, Now Create a `Quad Patch` Object (In Standard Primitives Dropdown Box) For Example Create One 200X200 And Units With 10 Segs In Both The Length And Width. See Below: Now Its Time To Create The Terrain. Ok, Now Open Your Favorite Paint Program And Make A New Image It Doesn`t Need To Be Hi-Res For This I Used 200X200. Make Sure The Background Colour Is Black And Then Choose Your Brush Tool And Change Its Properties To The Lowest/Hardness And Opacity. Make The Brush Whatever Size You Want And Now Just Scribble Or Make A Really Detailed Picture, Up To You. This Is What I Made: Make Sure That You Save The File As A .BMP Now Under Modifiers Go Down To Parametric Deformers And Then Choose "Displace" Set strength to 100 and click the bitmap box (it should say none) now select the BMP file that you just saved Finished: And That`s It! Remember This is a beginners tutorial, keep practicing and mess around with the settings and maybe u could make some excellent map, without actually modeling it....anyway ..that`s it . moonsense715: Obviously, it's a very rough shape that you get. Try smoothing it out or relaxing the outstanding vertexes to make the "cliffs" look less extreme and you might have a good map start that you can continue working on after converting it to Editable Mesh/Poly.
-
Author: Oblivion165 Skill level: 2 This tutorial shows you how to add extremely basic bots to your map. 1. Open leveledit to your desired map. 2. goto (on your presets tab) Objects ~ Spawners ~ Object Spawners, Temp the "Object Spawners" 3. Name the new Temp, whatever you want to call your bot ~ then hit ok. Now goto Soldier ~ Soldier_Presets ~ and select any of the players to use as a bot. Temp the soldier, and name it whatever you want your bot to be. 4. Now you must make the bot angry, so under your "Temped" soldiers "Settings tab" Click this setting: Hit OK 5. Go back to: Objects ~ Spawners ~ Object Spawners, Select your temp you made ealier, Under the "Settings" tab, select your soldier as its preset. 6. Place the Object Spawner on a map, and your done. 7. Extras: To make a random spawner (to randomly, spawn different player types) temp different soldier types like before, and make a new Spawner for them, but as its preset, add all of the soldier types you made. Written by Oblivion165
-
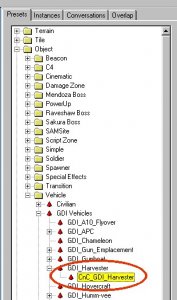
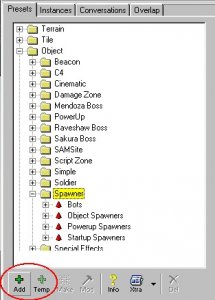
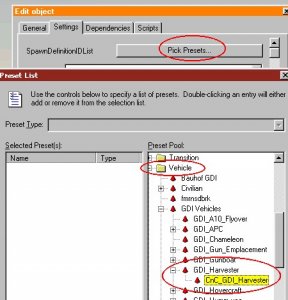
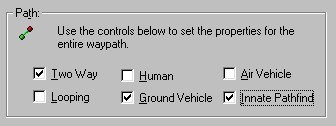
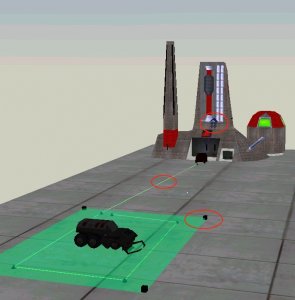
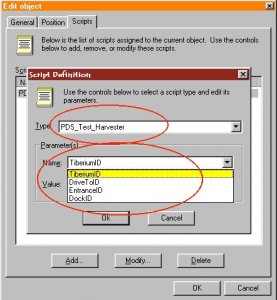
Author: Läubi Skill level: 2 This tutorial guides you how to place AI Harvesters and help them find their way from the Refinery to the Tiberium/Resource field when there is no Vehicle Production Facility present on the map that creates them. 1. Create the Harvester: There are two ways: I. If you only want to have a harvester that don`t come back if it is destroyed, just browse in the Presets to Objects -> Vehicles -> (Nod or GDI = xxx) -> xxx_Harvester - CnC_xxx_Harvester II. The second way is using a spawner, that means if the harvester gets destroyed, a new one will spawn. Goto Object -> Spawner If you making a map you must click to Temp, if you use this in a Mod use Add. Enter a name e.g. Nod_Harv_Spawn. Then go to the "Settings" tab and click "Pick Presets". Then select Vehicle -> xxx Vehicles -> xxx_Harvester -> CnC_xxx_Harvester. Double click the preset so that it appears in the left list. Press Ok. (two times, your now back at Commando Editor Screen) 2. Place the Harvester and setting up the envoirment: Select the Harvester on the preset list, click at Make, and move the Harvester somewhere in the Tiberium field. Also place a Tiberium field zone and waypath from the refinery to the Tiberium, with the two way, Ground vehicles and inniate pathfind options enabled. Now write down the following ID`s (doubleclick on the object) Tiberium refinery Controller WaypathID (not the ID from a waypoint! The wapath ID is needed!) Tiberium field 3. Setting up the harvester script: Double click an the Harvester and add the PDS_Test_Harvester script and fill in the following parameters: TiberiumID = ID of Tiberiumfielde DriveToID = ID of the waypath EntranceID = ID of the Tiberiumrefinery Controller DockID = ID of the Tiberiumrefinery Controller 4. Finish your work: Save your level. Also place a human pathfind generator on your map and then generate the pathfinding, then save again, and enjoy your work.
-
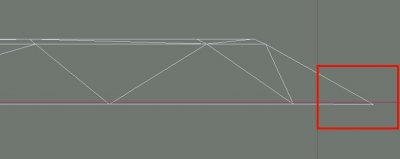
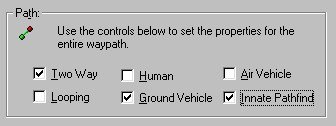
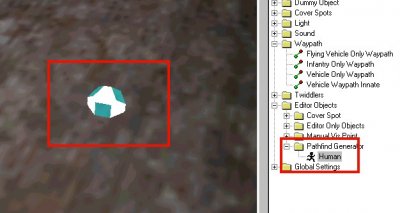
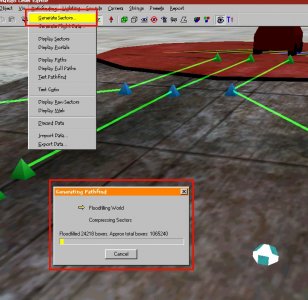
Author: Läubi Skill level: 2 This tutorial guides you how to let the AI Harvesters find their way from the Refinery/War Factory to the Tiberium/Resource field. X. If you are making a map for Renegade: Check in Gmax/RenX, that the airstrip building model sticks a little bit into the ground: 1. Export your Level and open it in Level Editor. 2. All waypathes you create for harvester must have the following settings checked: 3. Set three Waypathes for vehicle factories (for the nod airstrip, the vehicle must point to the direction of the arrow on the strip): (If you don't have the building controller or car marker placed yet, you can find the controller under Buildings > Airstrip / WarFactory. Place the controller and press CTRL + P to create and place the carmarker.) 4. Then one waypath must go to the tiberiumfield (no difference between GDI and Nod): 5. Now you must make a waypath from the refinery to the tiberiumfield: 6. You must set a pathfindgenerator at your map (named "Human"): 7. Now save your Level as it's time for generating pathfinding sectors. This next step can take some hours, depending on the size of your map and the speed of your PC. You should also check, that there is enough free disk space for the Windows swapfile, because this process sometimes need 500MB swapfile, depends on the size of your RAM. Goto Pathfinding > Generate Sectors. The the pathfinding generating will start. When the status changes from Floodfilling World to Compressing Sectors it may seem that your PC hang up! Don`t restart, just wait some minutes and the progress will continue. When the progress is done save your level and try it out ingame.
-
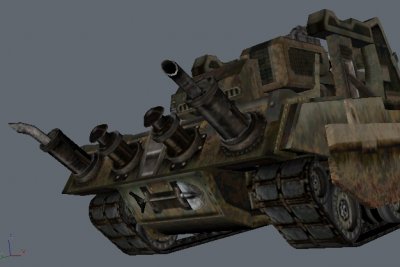
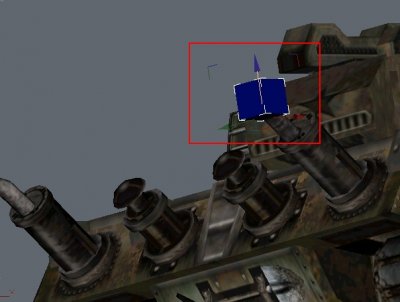
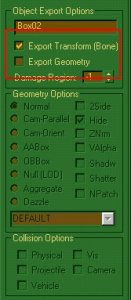
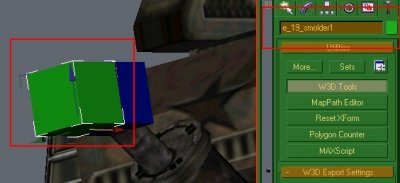
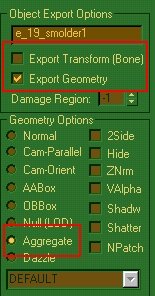
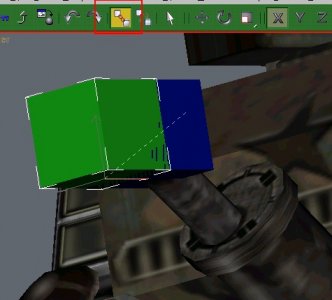
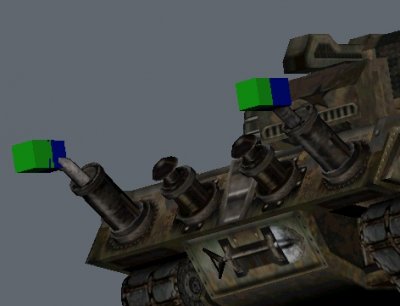
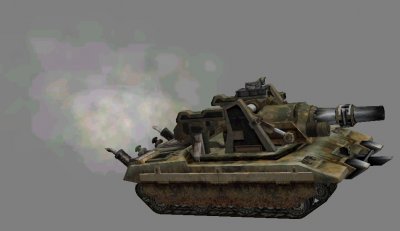
Author: Läubi Skill level: 2 1. First, you need some smoke for the exhaust, i`ll use: e_19_smolder1.w3d 2. Now you should open your Vehicle in RenX, I`ll use a Westwood made one for this tutorial: 3. I`ll just make the exhaust fumes for one of the exhausts but it will work the same for the second one. create a box 1x1x1 at the place where the exhaust later should apear Deactivate the [ ] Export Geometry for the box 4. Clone this box, and name it like the emitter you want to attatch. Deactivate the [x]Export Transform on this cloned box and Activate the (*)Aggregate on the W3D Tools 5. Next step is link the emitterbox to the exhausbox, just use the Link tool, Drag and drop from the emitterbox to the exhaustbox and you are done. 6. Repeat this for the second exhaust: 7. Now export your model, and put the model and the emitterfile into the same directory to test your work: 8. You can rotate the emitter by rotating the exhaustbox. Have Fun!
-
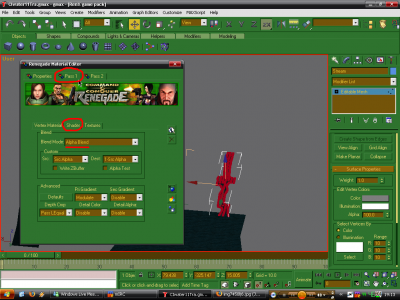
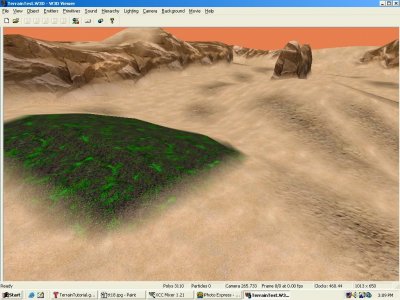
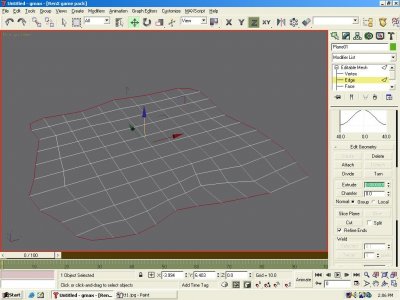
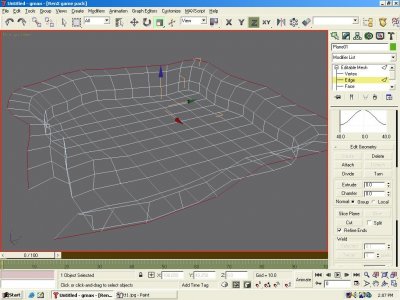
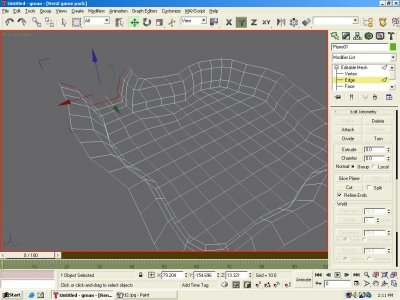
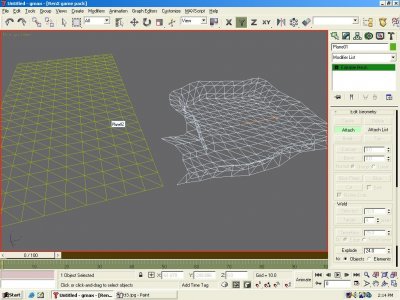
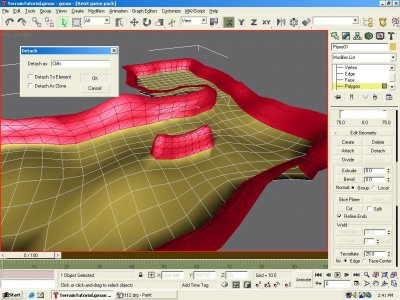
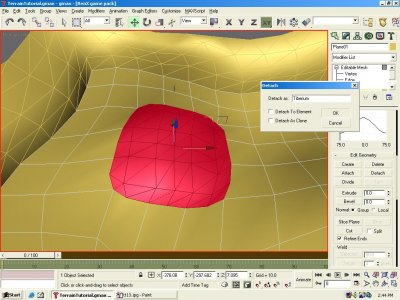
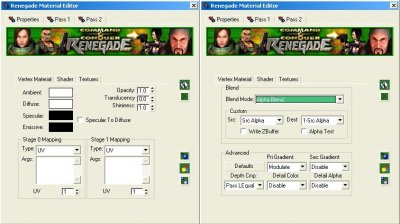
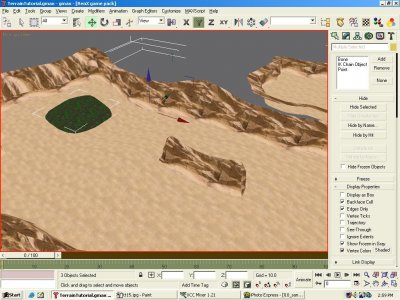
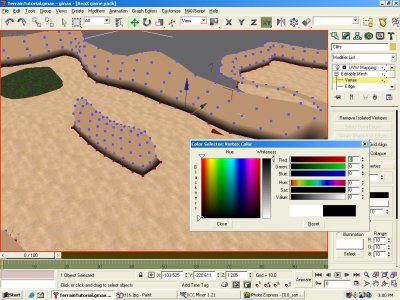
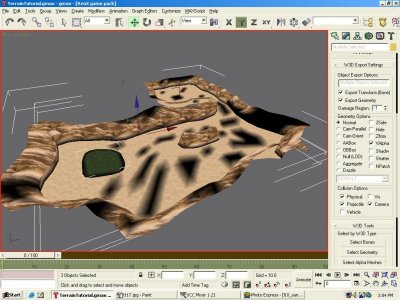
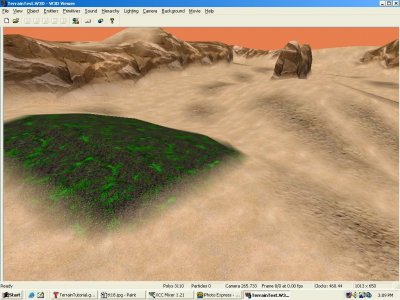
Author: SomeRhino Skill level: 2 Download the Models here Creating terrain seems like a cumbersome job is you envision aligning planes and boxes only to yield flat ground and blocky mountains, but if you know how to use Max properly, it can be done neatly and in a relatively short amount of time. Note however that this only covers the basics of creating the terrain meshes, nothing advanced. When you create a C&C mode map, you`ll need to align the buildings with the terrain. I also am assuming you know how to navigate gMax, and how to do apply basic textures. Texturing tutorials are aplenty. Start off by creating a plane. Convert it to an editable mesh (right click) and drag the edge vertices around using soft selection (found by expanding its tab under Editable Mesh. Round it out a bit to form the base ground. Select the outer edges of the mesh. Scroll down to Extrude on the sidebar and set the value to 0.00000001 or similar to keep the extrusion from going anywhere. Hit the Extrude button, and drag the edges vertically. Hit it again, and repeat. Note: a much faster and better method for extruding is to move your mouse above the Z arrow, hold shift and drag that Z arrow/axis upwards. Use the scale tool to make the edges curve outward (mouse over the Z arrow/axis when scaling outward). Do this one or two more times until the edges cannot be seen from the ground below (by the players). If you don`t have one already, create an opening by deleting some polygons (select them and hit delete on your keyboard.) Drag a few of the vertices to make an outer angle. Now select the edges on the opening and extrude some more to create an exit to the area. Now create a larger plane, which you will make into the main area of the map. Attach the meshes together using editable mesh. Shape the new plane into more terrain using soft selection on the edge vertices and extruding some more. Now it`s time to connect the two objects together with polygons. Select vertices that are relatively close to each other and in the Weld box, set the value next to Selected to however many meters from each other you estimate the vertices are distant. Hit the "Selected" button, and they should weld. If you get an error, increase the value. Hit the Face branch on the Editable Mesh tree and hit the Create button. Build face by clicking on three vertices consecutively in Counter-Clockwise order. Hitting them clockwise will build a backface. Build more faces to completely connect the objects. If you switch your view to smooth + highlights, you`ll notices that your level will be very faceted and blocky looking. Remedy this by selecting all the faces and scrolling down to the Auto Smooth button. Set the value to 180 and click it. I have changed my terrain's color to look more like a desert. This is not the texture though and is merely for my myself during the modeling process. Now, use soft selection to drag vertices smoothly on your mountains and ground to give the terrain a more realistic shape. When you move a vertex with soft selection on, gmax/max will automatically also move the surrounding vertexes by a certain amount toward the same direction. The amount is merely indicated by colors on every vertex and can be controlled by Falloff, Pinch and Bubble. Aircraftkiller taught me an easy technique for creating ridges. Select a few of your ground polygons and extrude them up a couple times scaling them down a bit each time to give the ridge a tapered look. Now, select all the polygons that make up the ridge and find the Tessellate button. Leave it as Edge and 25, and just hit the button. It will smooth out the ridge with more polygons. Again, you need to run the Auto Smooth on your terrain. Now it`s time to divide up your meshes. Select the mountain polygons. I selected mine by going to the front view and selecting the higher polygons. Clean up by holding down the Ctrl key on your keyboard and selecting/deselecting polygons my clicking on them. Hit the detach button on the sidebar, name it, and hit OK. If you want to make a tiberium field, select a few polygons, Tessellate them with a value of 0 this time. Move the vertices around to give the tiberium a boarder, which will be the blending area. Detach it as you did the mountains. Now, set up your materials with 2-passes. Pass one should be the texture you want blended onto the main texture. Don`t hit display on the texture until you have both passes set-up, or RenX will crash. Pass 2 will be the main texture. Set its Ambient and Diffuse settings to white, and its blend mode to Alpha Blend. Apply the materials and texture accordingly. You`ll want to have display set up on the second pass to all your materials. I have 3 materials: Cliffs, Sand, and Tiberium. The Cliffs and Tiberium you`ll want to have a sand texture on their first pass, so that you can blend them seamlessly into the ground. For pass 1 on sand, I have an alternate sand texture. I`ll use blending to eliminate the monotony of a single ground texture. Now, go to the display tab on the sidebar. Select all the objects and put a check by Vertex Colors. Select the vertices that you want the blended texture to appear on, and change their colors to black using editable mesh. First make sure to have all the verts bordering the ground black, then you can select random verts to prevent a tiled look. When you`re done playing with vertex colors, select all the objects and mark your collision options. Check the Valpha box under the W3D export options to tell the W3D engine to blend the meshes. Export to W3D, and take a look at it in W3D Viewer. If you have meshes that didn`t blend, make sure you have it`s blending mode set to alpha blend, and VAlpha is marked. If no errors exist, then you should have some nice looking terrain!
-
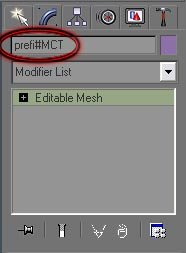
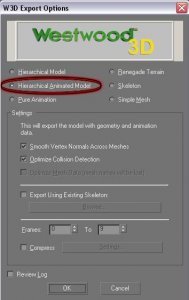
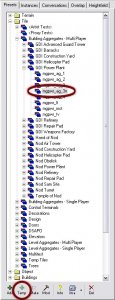
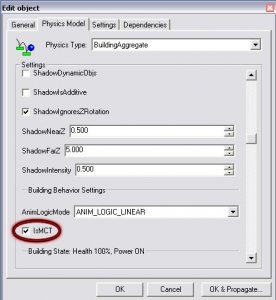
Author: Bumpaneer Skill level: 2 Setting Up MCTs and PCTs Download the MCTs Here or PCTs Here These MCT`s were developed by Bumpaneer with help from Abjab and StoneRook. The PCTs were developed by Bumpaneer with help from AircraftKiller and StoneRook. These soldiers made this project possible. Thanks most certainly goes out to them. Feel free to use these MCTs and PCTs in any map/building you create, but please remeber to include Bumpaneer in the credits. *These instructions only cover setting up MCTs. To set up PCTs follow the same instructions, but DO NOT check the "IsMCT" box* To set up the MCTs for use, first open one of the two files in RenX. Click on a mesh, and go to the Modify tab on the right hand side of the screen (looks like a blue arc). Click on the name for the mesh and replace the default "prefi" with the prefix for your building. You can use no more than five characters for this. Remember most of the Nod buildings start with "mn" while the GDI buildings start with "mg". You have to rename every mesh that starts with "prefi" but DON`T change anything besides that (as far as names). If you want another texture, feel free to use whatever you think looks best. The next step is to export the MCT for use in Level Edit. Goto the File menu, then to Export. On the first screen that pops up, give the MCT a name. A good naming convention is "prefi_mct" where "prefi" is replaced by the prefix for your building. You should save the MCT into the main folder of your mod. On the next screen that pops up, make sure that Hierarchical Animated Model is selected, and then click OK. The MCT should export without any errors or warning messages. Once you have the MCT all exported, open up Level Edit. Choose your mod in the opening screen, and then browse to mgpwr_ag_3n to set up a GDI MCT or mnpwr_ag_3n to set up a Nod MCT. Single click on the file (shown at right) and then click the Temp button at the bottom. A screen like the one below will pop up. On the first screen that you see give the Tile a name. Once again the "prefi_mct" form works well here ("Prefi" is replaced by your prefix). After you have the name typed in, goto the Physics Model tab (second tab). Browse down until you see the checkbox indicated, IsMCT and make sure this box is checked. Then click OK. A Tile with the name you gave it should appear. You can drag this tile under another menu if you so desire, so that it is organized. To get the MCT on the map, click on it`s name and click the Make button. You will then be able to highlight the MCT and drag it to where you want it. I hope these instructions have been helpful, and good luck with all your projects. ~Bumpaneer
-
Author: Blazea58 Skill level: 2 Part 1 https://www.youtube.com/watch?v=6h7UdzG44W0 Part 2 https://www.youtube.com/watch?v=MrcYBavZzVA
-
Author: Oblivion165 Skill level: 2 Part 1-6
-
Author: RenAlpha Skill level: 2 Part 1 Part 2
-
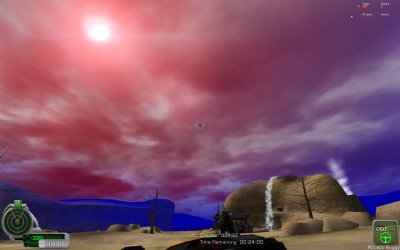
Author: Jonwil, moonsense715 Skill level: 2 Jonwil has just added a feature to scripts (4.2, 4.3 and 5.0) that lets you have custom sky colors on any map, in case you can not get what you want by changing the time of day in LevelEdit. For example you can not get a full red or green sky normally. ATTENTION! Using this feature will completely overwrite all the sky/sun/etc. color settings set by LevelEdit. If you want to change anything in the list, prepare that you will have to set everything yourself, not just the parts you wish to alter. 1. Preparation So let's say you want custom sky, sun, moon, etc colors for a map named: TS_Mars.mix. Get a scripts build that supports this feature from here. Copy its content to your game folder (not Data) and overwrite all. Create a file named TS_Mars_map.ini. Inside this ini file write/copy this section: [SkyColors] OverrideSkyColors=true ; Warm sky color - Clouded sky's additional color around the sun ; Normally changes with set time of day and is a transition color inbetween the sun/halo and Cold sky colors WarmSkyColorRed=230 WarmSkyColorGreen=230 WarmSkyColorBlue=230 ; Cold sky colors - Clouded sky's additional color everywhere else + Fog color (bottom skydome) ; Fog color in LE is affected by cloud gloominess and time of day, copy the fog color with no gloominess applied ColdSkyColorRed=230 ColdSkyColorGreen=230 ColdSkyColorBlue=230 ; Sun color; - Normally changes with set time of day SunColorRed=75 SunColorGreen=75 SunColorBlue=75 ; Sun halo color; - Normally changes with set time of day SunHaloColorRed=100 SunHaloColorGreen=100 SunHaloColorBlue=100 ; Moon halo color MoonHaloColorRed=255 MoonHaloColorGreen=255 MoonHaloColorBlue=255 ; Sky color (top skydome); - Normally changes with set time of day SkyColorRed=112 SkyColorGreen=146 SkyColorBlue=176 ; Cloud gloominess color GloominessColorRed=255 GloominessColorGreen=255 GloominessColorBlue=255 ; Star field transparency, 255 - Stars appear (good for clear sky night time); 0 - No stars StarfieldAlpha=0 The comments in the code should help you understand what affects what exactly.This setup is 99% similar to what the sky looks like with the default map time setting in LevelEdit (15:00 / 3:00 pm). 2. Customize the colors Change the colors to suit your taste. For example you can have a red sky around the sun and blue fog. I don't recommend going overboard with the colors as it can look wierd. I suggest adding little color additions only; except if it's an extreme map. Here's an example that you should never do, (but can do): 3. Finish Export your map with this new ini file included in it and enjoy the new colors! Note: you have to restart the map (but not the game) for any color changes in the ini file to take effect, if you have the ini file in the Data folder during color testing.
-
Author: danpaul88 Skill level: 2 After some experimentation I have discovered the cause of vehicles automatically rolling backwards or forwards and, thankfully, the fix is very simple. Firstly, select all of your WheelP## bones and then group them together. Then switch to the Move tool while this group of WheelP## bones is selected and look at the X position for the group, this is the overall X position of all of your WheelP## bones. Note down this number and then ungroup the WheelP## bones, we were only using it to get the X position. Now, either select your origin bone (this should have EVERYTHING, including the worldbox, linked to it either directly or through a chain of links, if you don't have one yet create it now) and choose the move tool. Click on the square grid icon next to the X coordinate to activate relative movement. Now, type into the X field the inverse of the number you wrote down earlier, so if it was -0.512 type in 0.512, if it was 0.245 type in -0.245, and then select the Y field. Everything in your model should move along the X axis by that amount, perfectly centering the WheelP## bones along the X axis. Now you can turn off relative movement mode if you like and re-export your model. It should no longer roll backwards and forwards on it's own.
