Search the Community
Showing results for tags '1 - Beginner'.
-
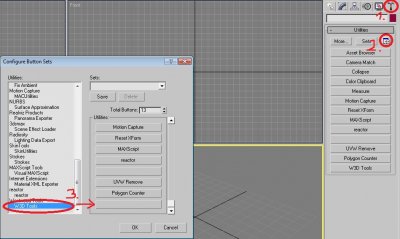
Author: moonsense715, ChopBam Skill level: 1 Hi and welcome to the tutorial that will get you started with modding/building in the W3D engine. This is merely a tutorial to set your tools up and running so you can start modding right away. Let's get to the point now since that's why you came here. Game Asset Creation To create content for the game, you will need a modeling software. Option 1: Gmax-RenX The smallest, simplest, free software out there is gmax 1.2. Unzip the file, start up gmax12.exe and hit "Setup". After self-extraction is completed, go through the installation process. Since Discreet/Autodesk no longer supports Gmax it is impossible to get a working Identification Code online. (They were always free in the past, they just sent the code to you in an e-mail, but that does not work anymore.) Therefore, there is a legal workaround that lets you "activate" Gmax. Double-click on Autodesk.reg to add it to your registry keys. (Feel free to read the Read_Me.txt file for more information about this.) W3D tool pack - RenX To make Gmax compatible with W3D, you need to install RenX from the Renegade Public Tools. Run the installer and go through the process. You can leave everything ticked, but: If you do not have C&C Renegade, the Level Editor that comes with Renegade Tools will not work properly. Now start up RenX from the installed RenegadePublicTools for the first time and choose a Display Driver. Feel free to use HEIDI Software Z Buffer and hit OK, since you can change this later if necessary anyway. Shortly after RenX starts up, the software will get recolored into a shade of green. You have finished installing GMax for W3D modding. Option 2: 3ds Max 8 - for advanced users Instead of using Gmax, you can also try 3ds max 8 for 30 days. It has better keyboard shortcut support and is a better choice if you plan to model and unwrap buildings, vehicles and weapons. Run Setup.exe to install it and run as a trial to try it out. If there are any errors about AcGe16.dll missing, you can probably find the file in C:\Program Files (x86)\Common Files\Autodesk Shared, and you can move it to your new 3DS Max folder (usually C:\Program Files (x86)\Autodesk\3dsMax8) - Setting up 3ds Max for W3D For using Max 8 to set up and export W3D content, you have to install the following: DirectX 2008 (even if you have a newer one) -Run directx_nov2008_redist.exe -Extract the .cab files to any folder -Run DXSETUP.exe, which will be in the folder you extracted the .cab files to 3DS Max Service Pack 3 -Run Setup_3dsMax8_SP3.msp W3D Scripts for 3DS Max -Copy the contents of W3D_Scripts.zip to your Max 8 directory (usually C:\Program Files(x86)\Autodesk\3dsMax8), as this contains the w3d plugins and the w3d importer -For ATI video card users: drop the contents of ati.zip into your max directory Now start up Max. When you launch for the first time, it will pop up with a "Graphics Driver Setup" window. Try using OpenGL as this is the best driver when it works. Otherwise, Software should do the trick. If you need to change the driver, from within the program you can go to Customize -> Preferences -> Viewports then click on Choose Driver and choose Software this time If you can't get into 3DS Max at all and you need to change the driver, go to Start -> Programs -> Autodesk -> Autodesk 3ds max 8 -> Change Graphics Mode to access the popup again, and choose Software Windows 10 Only: viewport freezing fix Copy the 3dsmax.exe in your executable folder. Paste it back in the same folder.. you will have a 3dsmax - copy.exe Change your desktop shortcut to run the -copy.exe version. Set the desktop shortcut to run as administrator Many people have reported this problem as being fixed when they follow these steps Windows 10 Only: fixing autobak Autobak (the process of the program auto backing up your work) may not work natively on Windows 10 due to the way permissions now work inside Program Files. You'll need to take control and possibly ownership of your Autobak folder inside C:\Program Files (x86)\Autodesk\3dsMax8 to allow 3ds max to write files to that directory You have to add the W3D Tools to your Utilities tab. Click Utilities (hammer icon), click Configure Button Sets and scroll down to Westwood Tools. Drag W3D Tools over to an empty button and hit OK. After all that, your 3ds Max 8 is now ready to create and export content into file formats the W3D engine works with. Level Editor Level Editor is where you manage your game content. You set up the physics for objects, give them health, armor, weapons, speed. For specific maps you set the game objective, place special script zones, edit the sun position along with the clouds, and so on. Every W3D game has its specialized editor. For a properly working Level Editor, you MUST have an installed W3D game on your computer. - Renegade Level Editor The Renegade Public Tools installer will have installed an old (non-scripts) version of LevelEdit. This version works but lacks many features. The latest version of LevelEdit is available in the TIberian Technologies Mod Tools: TT downloads page Replace your copy of LevelEdit with the one in the zip. Note: this version of LevelEdit will only work if you also have Tiberian Technologies scripts installed. - TS:Reborn Level Editor To install the TSR Editor, just download the file below and follow the instructions in the "How to install LE.txt" file. Download TSR LE Having a modeling software and Level Editor installed, you can go ahead and start creating/modding stuff in the W3D engine! Other tools W3D View This tool is used mostly to view W3D models, create emitters/sound emitters and create LOD for objects. Download W3D View RenegadeEx This is used to open files such as .mix or .pkg extension maps and mods as well as always.dat. You can extract files from them with this tool. Download RenegadeEx
-
SDK Download Link 3DS Max 2017 Export Plugin
- 1 reply
-
3
-
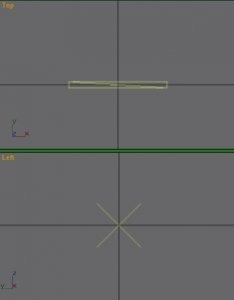
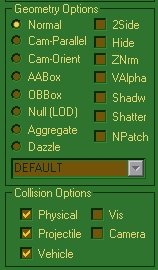
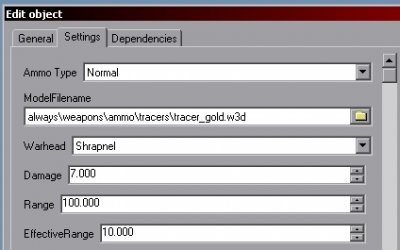
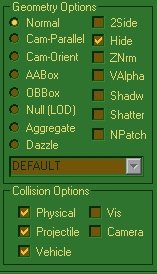
Author: Oblivion165 Skill level: 1 Projectiles Projectiles are simple a small low-poly mesh. For instance, this is what the Renegade MiniGun Shoots: To make a projectile for a gun, simple model a bullet or lazer, center it in gmax, and export it as a "Hierarchical model" with these settings: and add it to level edit as ammo: Set the weapon that you want to use this for, to use that new ammo type. After seeing it ingame, shink/enlarge it to the right size. You should be good to go. Enjoy Melee Weapons To make melee weapons, such as knifes or swords, etc. Simply make a invisible projectile (1x1x1 Square will do), Center it in gmax, apply these settings: Export it as a "Hierarchical model" and add it in level edit as ammo, in its settings make its range short, 1 or so, and make sure you change the effective range to the smaller number as well. Thats it, enjoy. Written by Oblivion165
-
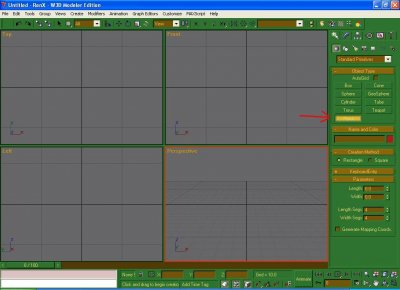
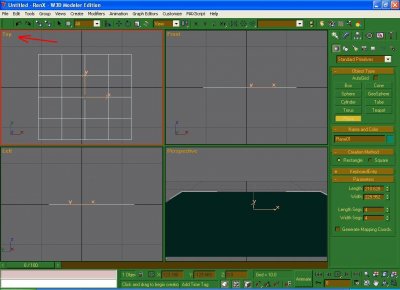
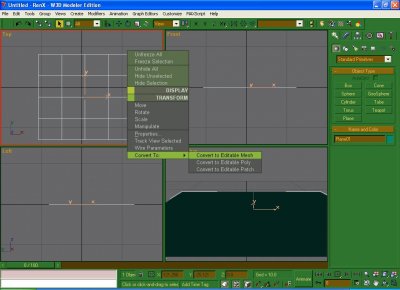
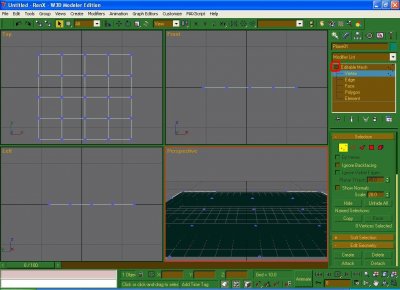
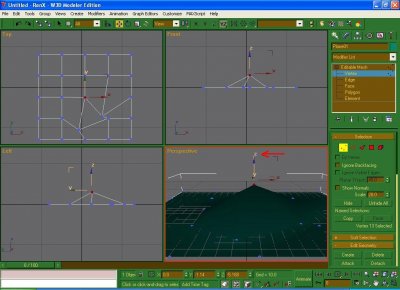
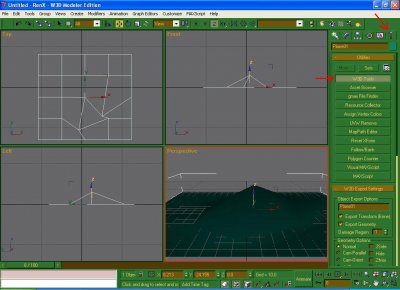
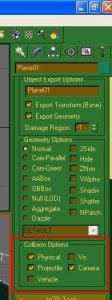
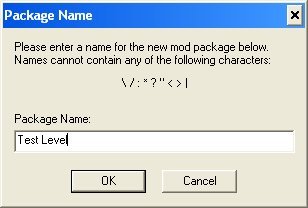
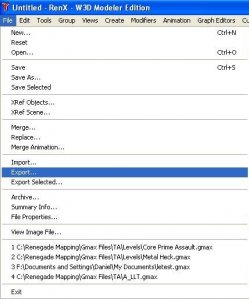
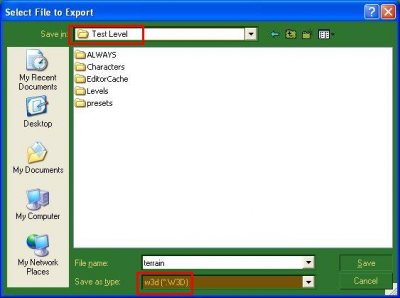
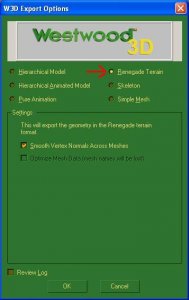
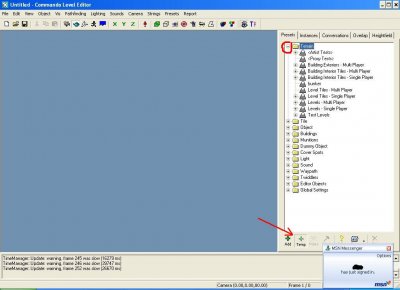
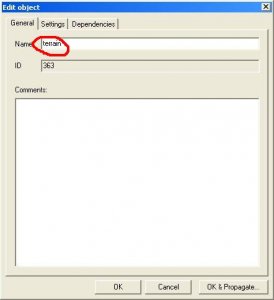
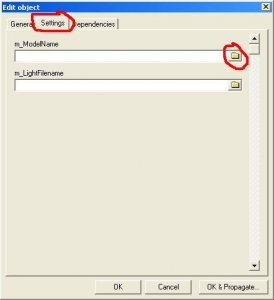
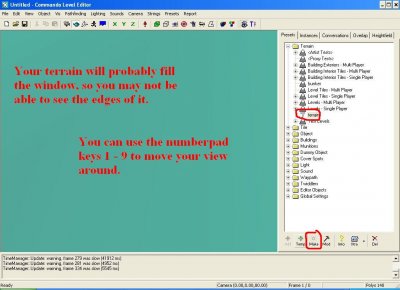
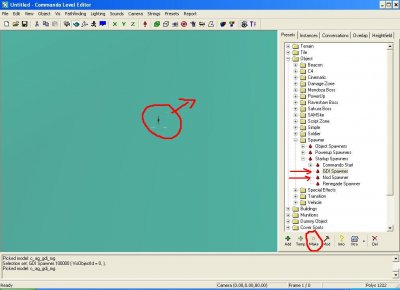
Author: danpaul88 Skill level: 1 An Introduction to Renegade Mapping Foreword This tutorial is designed to give you a brief insight into creating maps for renegade.It only covers the very basics needed to get started. Getting Started To get started with renegade mapping you will need to download and install Gmax and Renegade Tools. It is important to install Gmax before Renegade Tools, or you will not be able to export from w3d files from Gmax. Download Gmax from here. Download Renegade Tools 2 from here. Now all you need to do is install gmax followed by Rengade Tools 2 and your all set. Creating your terrain The first thing to do when created your own map is make the terrain (land) for your map. This is done with RenX (the renegade addon installed to gmax). Locate RenX on your start menu and open it. On the right hand side of the RenX program there are several buttons under Object Types. Click Plane (A Plane is a flat square when created). In the Top view area click and drag to create the Plane. Your will see what you are creating in the other view windows from different angles. You should now have a simple, flat area of land to work on. Editing your terrain Now that you have created your land you might want to move it around, make hills etc. To do this make sure your land is selected, right click on it and go to Convert To -> Editable Mesh. The window on the right of RenX will now have changed. Click the + button next to Editable Mesh and select Vertex. Blue dots will appear on your land. By moving these blue dots you change the shape of the land. First select the Select and Move tool at the top of the screen. Click on one and drag it around to move it. To move it up and down, click the arrow with the Z label and the move it. To switch back from up and down movement locate the part of the menu bar shown below and select the XY option. NOTE: if it shows YZ or ZX then click and hold until a small menu appears and choose XY there. Play around with this method of shaping the terrain for a while, the best way to learn is by doing. Preparing to Export your terrain Once you are happy with your land you need to prepare it for use in Renegade. Click on the hammer tool on the right and select W3D Tools. Scroll down until you come to Collision Options. Make sure you have your land selected and tick Physical, Projectile and Camera Options. This means you dont fall through your terrain, bullets cant pass through it and the camera does not go under it. Before exporting you must create your Mod Folder. Open the Renegade Editor program from the start menu. It will show a window titled Choose Mod Package. Click New... and type in Test Level and click OK. Select your newly created package and click OK. When the program finishes loading minimise it. Exporting from RenX You now need to export your terrain the the W3D format recognised by renegade. Go to File -> Export. You must set it to save as type : w3d and enter the name terrain. Save it in C:\Program Files\RenegadePublicTools\LevelEdit\Test Level, assuming you installed to the default location. You will be shown an options window. Select Renegade Terrain mode and click OK. It will export, and you can close RenX (save the terrain first if you wish to come back to it later to edit). Adding level objects Now your terrain is created all that remains is to add it to the renegade editor program and add spawn locations. On the right window of Level Editor click the + next to terrain. Keeping the terrain folder selected click Temp at the bottom of the screen (there is a reason for not using Add, but that is not relevant here). In the new window enter the name terrain. Click the settings tab and click the folder icon next to the text field for m_ModelName. Select your terrain.w3d file. Click OK and the terrain is now available for use in Level Editor. Select your new terrain preset and click Make (next to Temp). Your terrain will now appear in the main window. Now all you need to do is add spawners and export. In the presets window go to Object -> Spanwer -> Startup Spawners. Select the GDI Spawner and click Make. It will appear on your terrain. Select it and move it to one side to make room for the Nod Spawner. Exporting your level Once you have made the 2 spawners you are ready to export your level. Firstly you must save the level. Go to File -> Save and enter the name testmap. Once saved go to File -> Export Mod Package. Navigate to your Renegade Data folder (if it is not already shown), enter the name testmap and click save. Your map will be saved as a pkg file. This is a mod package, not suitable for use on servers, but for this test it is easier to leave it in this format. Open renegade, click LAN, host a new game (1 player) and select the mod package testmap which you have just created. Start the game and run around in your new level. Notes This tutorial is very basic, and only intended to help you get started mapping. The best way to learn mapping is to keep trying new things to see what they do.
-
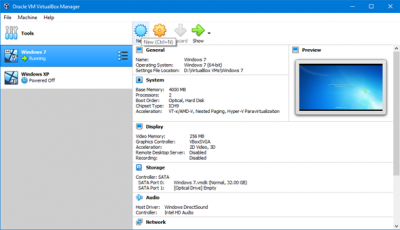
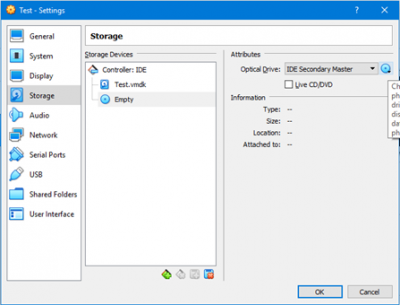
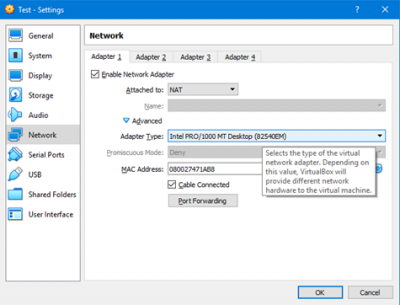
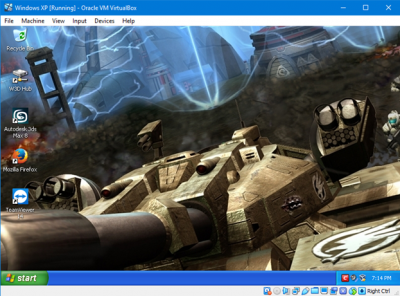
VirtualBox Setup Guide Introduction VirtualBox is a free virtualization software by Oracle and is often used to run legacy programs that either don’t run on Windows 10 or have problems running smoothly. In W3D Hub’s case, it’s fantastic for ensuring 3DS Max 8 and legacy LevelEdit don’t give you a bad time when you’ve just nearly completed that new fancy model. Following this guide is entirely optional and is not required to do any w3d modding work, but it can make life easier! You Will Need: -A processor on your host PC capable of virtualization technology (look for VT-x in BIOS and enable it) -A copy of Windows XP -At least 4GB of RAM (the host PC will be running at the same time as the virtual machine) Preparing VirtualBox Assuming you followed directions and enabled VT-x and have a copy of Windows XP at the ready, you can install virtualbox via the hyperlink above. Choose the installer for your host OS (Windows, Linux, and Mac OSX are supported) and also download the VirtualBox Extension Pack. The extension pack enables support for USB devices (seamless mouse and keyboard), which is pretty important. Go ahead and fire up VirtualBox and click the New button to add a new virtual machine. Name your machine and select Microsoft Windows XP (32 or 64-bits whichever you have) from the Type and Version dropdown menus. Click Next and you’ll be asked to choose how much RAM to allocate. Windows XP recommends a minimum of 128MB of RAM for the operating system itself, while 3DS Max 8 recommends an additional 512 MB of RAM. Given the probable multitasking you’ll be doing, your minimum RAM allocation should be 1000 MB (1 GB). Remember, the Mammoth editor uses Scripts 5.0, which doesn’t support Windows XP, so you won’t need to worry about having enough RAM to test anything in APB within your virtual machine. On the next screen, you’ll need to select the middle option – create a virtual hard disk now. Click Create, then click VMDK. Make it dynamically allocated, give it the same name as your virtual machine for consistency, and give it 16-32 GB of storage. Your machine will appear in the main menu. Right click it and go to Settings, and then go to the System tab. You can edit your base memory here if need be, but for now change the chipset to ICH9 and check the box to enable I/O APIC. Use the arrow buttons to rearrange the boot order, ensuring CD comes before Floppy. Click the processor tab, give it 2 processors, and in the acceleration tab check both boxes. Go to the Display tab and up the video memory to 64GB. You can add monitors if you have more than one. Check the two boxes for 3D and 2D acceleration and then move on to the Storage tab. You’ll notice your .vmdk file is already there. It’s essentially a blank hard drive, so we need to put Windows XP on it. Click the empty CD drive icon and on the right side of the window you’ll see a smaller icon near the dropdown menu. Click on it and either select your .iso file or if you’re using a live disc, put it in your CD drive now and select your CD drive. Check the Passthrough checkbox if you’re using a physical disk. Go to the Network tab now and ensure the Adapter Type is set to the following: This enables internet on your virtual machine, which is handy in most cases. In the USB tab, enable the USB 2.0 controller (3.0 isn’t supported in XP natively), and in the Shared Folders tab you can add any folders form your host machine that you want your virtual machine to be able to access. Click OK to submit your changes to the settings, it’s time to fire up that machine! While Windows XP is doing its initial setup, download the Ethernet adapter driver you’ll need (it’s specific to XP) and put the .exe in a shared folder. If you didn’t make a shared folder, you can use the File Manager in the Machine dropdown from the main toolbar. Once Windows XP is booted to the desktop, install the Ethernet driver to gain internet access. You can go ahead and install any remaining windows updates as well at this time. The version of internet explorer that comes with Windows XP is outdated, so you may wish to find and install Firefox 52.9 ESR (the last version to support XP) or a different supported web browser. Click the Devices dropdown in the main toolbar and at the bottom, click on Insert Guest Additions CD image. This adds some extra features and stability to your virtual machine, so if something isn’t quite working correctly, try this first. Once you have everything completed, don’t forget to remove your Windows XP .iso or live disk from the machine. You can now boot into Windows XP without any further hassle. Now you can follow the guides to get 3DS Max 8 up and w3d-ready. Congrats on your more stable w3d modding machine! Troubleshooting/FAQ My mouse and keyboard aren't being recognized by the VM! If your peripherals are USB-based, odds are you didn't install the VirtualBox Extension Pack. I can't get my mouse back, it's locked to the virtual machine! The default "host button", which swaps the mouse between the host and guest machines, is Right-Ctrl. Press it and move your mouse outside of the VM window. My machine won't recognize my USB Drive! Assuming you have the VirtualBox Extension Pack installed, I can't help you there. I use a network-mapped drive for this setup, so I'm afraid I don't have experience in troubleshooting the problem. Try the Insert Guest Additions CD image option explained above, and also unplug and re-plug your drive while the machine is running. How do I get my files out of the VM and into my host system? A network-mapped drive or a shared folder accomplishes this, but if you have neither, you can use the File Manager in the Machine dropdown menu option. My issue isn't listed! Try googling the problem, there's a huge audience for VirtualBox and as a result a lot of problems and solutions out there. You can also try asking in the #tech-support channel in our Discord.
-
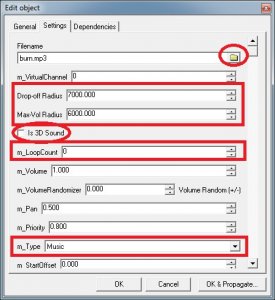
Author: moonsense715 Skill level: 1 This tutorial will show you how to add an mp3 format music to your level. 1. Add the music to the preset tree If you wish to use a music that is already on the preset tree, skip this step. Grab your mp3 music file and copy it into the LE folder of the level you want to add it to. Now start the Editor and browse the preset tree down to Sound. Click that and hit Temp. Name your sound preset to whatever you like and then switch to the Settings tab. Now browse your sound file from your project's folder. Make sure that Max-Vol and Drop-off Radius are really high values, and Max-Vol is always smaller than Drop-off Is 3D Sound is ticked OFF The m_LoopCount is 0 so that it will repeat m_Type is Music Here is an example settings page set up for music: Click OK and the music should appear on your preset tree. 2. Place the music on the level Click the music preset you wish to use (e.g. the one you just created) and hit Make to place it anywhere. (If you've set the Max-Vol and Drop-off Radious values on the preset high enough you can place them almost anywhere and everyone will still hear it. If those values are low, the music won't be heard from a longer distance away from the position you placed it.) Yes it's that easy to place the music, that was all. 3. Finish Export your map as mix/mod package and play it ingame. You should hear the music. Q & A Q: Why do I have to do all this, when Edit -> Background Settings has a Music tab where I can simply add one? A: That only works on single player maps and/or if you are the server/host. Other players in multiplayer will not hear the music if you set it up like that. Q: Help! My music is not repeating! A: Try importing your music into Audacity (free sound editor software) and reexport the music as mp3 from that. If it still doesn't work, change Options to export it at 128 kbps, that should work for sure.
-
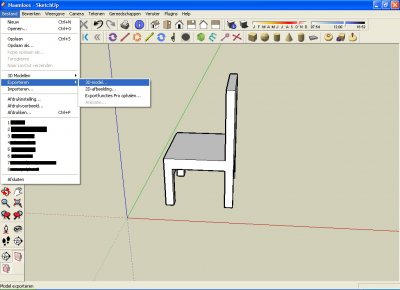
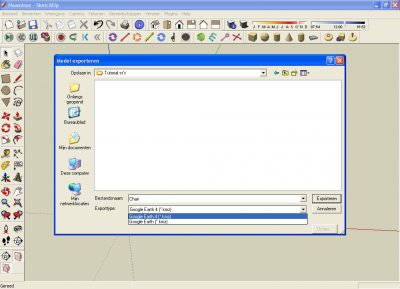
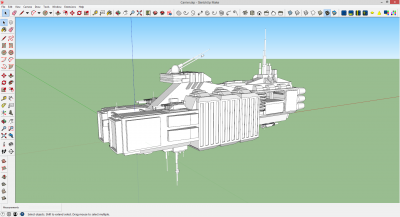
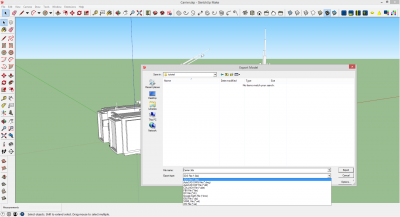
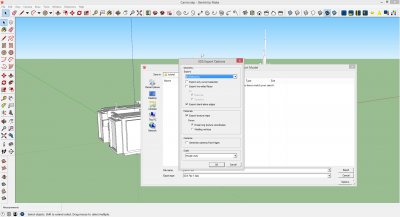
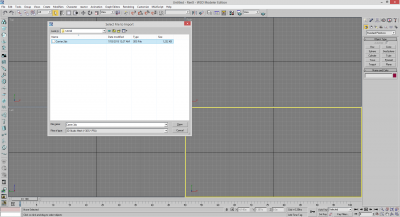
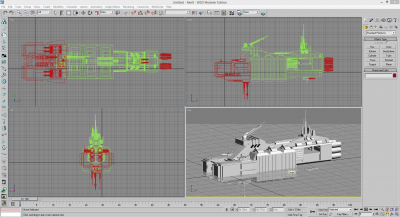
Author: woandre, Squid Empire Skill level: 1 Ingredients: 3ds Max 8 / GMax: Download + setup instructions Trimble (formerly Google) Sketchup (2015+): Download from here Method Here is woandre's original tutorial saved for posterity. It is no longer necessary to go through the steps they listed however and I'll continue with the new tutorial below. Make a sketchup model. I'll assume that you know how to do this, but here's a hint: use groups and components as much as you want, they convert fine and save poly's. Click 'File' then 'Export' and then '3D Model'. Name your model and move it to wherever you want. Change the Export type to 3DS File. This step only has to be done once, the settings will save. Click 'Options' and de-check "Generate camera from Pages" - checking this causes 3DS to only import the camera. Once you've done that you can click 'OK' and then click 'Export' Open 3DS Max and click 'File', and then 'Import'. Navigate to your exported file and import it. You're done! Wasn't that easy?
-
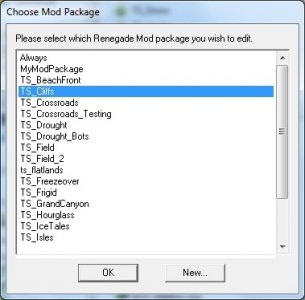
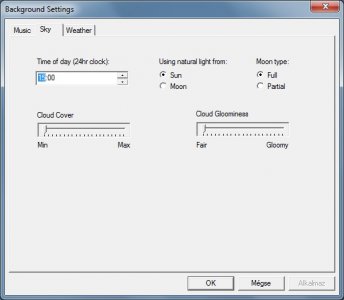
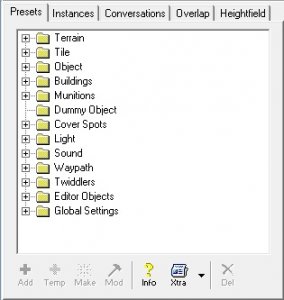
Author: moonsense715 Skill level: 1 1. What is Level Edit? Level Edit, also known as Commando Level Editor is an extremely important modding tool for the W3D engine. With it, you can manage all the assets imported from GMax-RenX/3ds max, give weapons to units, set up buildings, animations, scripts and so on. Secondly, what most people use it for is to set up maps/levels with it, hence the name Level Editor. That includes adjusting day and night, music, ambient sounds, snow or rain, placing base defenses, creating harvesting/mining zones just to name a few. 2. Choose Mod Package When you launch Level Editor, it will always ask which Mod Package you want to work on. It basically asks which unique workspace you wish to start editing, something that is present for every level and mod. These are folders on your hard drive in which you can place files specific to that mod/level. For example in TS: Reborn, there is a package called TS_Drought. If you start that and open the level file within, the terrain is loaded, building logic is activated on the (otherwise bare) building meshes, shadows are generated, etc. How to name your mod package If you are making a standalone, full conversion mod, it is necessary to have a project folder called Always where you put all the models and textures into, and define not map specific data, such as the Health/Armor and the weapon of a rifle soldier, the strength of its weapon, etc. This data will be shared between all maps that belong to this full conversion mod but that information goes beyond the purpose of this specific tutorial. When you just make a simple level, first check the name prefix each map has in the game you make it for. For example if you make a TS: Reborn map, the prefix is 'TS_' without the quotes. So for example, this is a valid map name: TS_Mymap.mix. If you don't use the prefix tag but still save it as a .mix map, it will not appear on the maps list you can choose from when you try to test it on LAN. If you create a special mod package but not a standalone, full conversion game, you can name it anything but export from Level Edit as mod package with the extension pkg. Here's an example package list from TS: Reborn: 3. The interface Let's go through some of the basic elements of the Editor's interface. The upper bar File Under File, you can clear the stage by New, load a previously saved level with Open, Save as/Save your current level, Save presets (used by an Always project and Mod packages) and Export to Mix/Mod Package, which will ask you to export your level/mod to a game's Data folder. This is very important, everything exported by the Editor has to go to the Data folder of any game! Typical usage: When you are done editing your level, save it and then export as mix to make it playable ingame. Edit Usual commands such as Copy/Paste/Undo can be found here. (Copy-pasting is used for objects you select in the scene.) The most interesting part here though, is Background Settings The Sky and weather tabs speak for themselves. Play around with them to see how they change your level's atmosphere. The Music tab is used for Single Player/Skirmish maps, do not use it for Multiplayer. At Level Settings, the most important and used thing is the Allow Flying Vehicles checkbox. If you have Helipads or other flying Aircraft that can be purchased by the players, this must be ticked! Note: this tickbox does not do anything from scripts 5.0 onwards and can be ignored. Lighting The most used settings here are Edit Sunlight and Compute Vertex Solve. You can move the sun around with Rotation/Elevation or change the sun's intensity and projection color. Compute Vertex Solve will generate basic shadows on the entire map, based on the sun's and other lights' placement on the level. Make sure you always tick Check Occlusion. Strings The Edit Table option is what you will always use. Here you can give names to every object, unit, weapon, etc. and change the text displayed in the menus and loadscreens too. As an example, for any Infantry or Vehicle, under their Settings tab (after you Mod them), you should see "TranslatedNameID". Clicking that will bring you to the list of strings here and you can pick any to change the name that appears for players when they target them ingame. If you want to localize the game, you can do that here as well by changing/translating every single string resource. Strings get saved into ALWAYS > TranslationDB > strings.tdb. There are several other buttons on the upper bar but I will not talk about all of them in this tutorial. The sidebar Presets On the Presets tab you can find objects that you can place by hitting Make (after selecting said objects in the preset tree). You can also add new objects to the preset tree by hitting Temp if you are making a single level and Add if you are making a full conversion or a mod package. Go ahead and expand some of the Nodes and check what is inside them. See what settings invidual presets have by selecting them and clicking Info. Note: not everything is suitable for Make. For example, Terrain and Tiles are usually placable but as a counter-example Munitions and Global Settings should never be placed. When you are making a single level, it is usual that you click on Terrain, hit Temp and add your exported W3D format terrain to the preset tree under Terrain as a temp preset (this means it only belongs to this level and can be exported as mix correctly). Instances Instances are objects you already placed onto the level. On this tab you can browse the placed objects and go to them by double clicking them (alternative: click Goto) or delete them. The other tabs on the sidebar are used rarely so I will not go into them but I'll mention that you can create a Heightfield map on the Heightfield tab (this is not recommended when making a Multiplayer map as Heightfield maps are not optimised and Undo does not work while editing it). That's it for the basics of the UI. 4. Camera navigation You might ask: "This is all very nice but my camera is still floating high up in the air! Help!" So let's talk about 3 ways to move around a level. Default camera mode You first need to enter this mode by hitting that button or F5. How to use it: Left-click and drag to rotate your camera. Left AND right-click drag to Pan around. Right-click and drag to zoom in/out. That's all there is to it. Selection orbit mode If you have something selected (in object manipulation mode, F6), you can switch to this mode by clicking the button or hitting F7. Now you can rotate your camera around the selected object with your mouse. Walk-thru mode Hit F8 or click that button to walk around the level as an infantry unit. If clicking the button does not do anything, hit ESC and click it again. Repeat until it works Note: looking up/down is reversed in Level Edit compared to ingame. Note2: if there is no Walk-Thru character preset set up under Object -> Soldier and you enter walk-thru mode, the editor will crash. This is because the editor is using this specific preset to enter this mode. Numpad-navigation The best navigation mode in my opinion is this. You need a numpad for it of course and make sure Num Lock is ON. If none of the number keys do anything still, click on the scene first. What each number does: 1 - move downward 2 - move backwards 3 - turn downward 4 - turn left 5 - reset camera to look forward 6 - turn right 7 - move upward 8 - move forward 9 - turn upward This will all actualy make sense once you start using them. Important: keep pressing CTRL to triple the speed of moving/turning with the numpad! It is very useful! 5. Moving objects You can move objects around in the Editor that you placed previously using Object Manipulation Mode (F6). Navigate to the object, select it then drag around to move it to the position you prefer. By clicking X, Y or Z, you can move it in that specific direction only. The red pyramid button, when enabled will position your object at your cursor by placing in on the ground under your cursor. This will only work if there is mesh under your mouse which has physical collision. To rotate an object, make sure Z is on and right-click drag. If Z isn't on, your model will rotate in stupid ways but you can undo that mistake under Edit. Alternatively, you can double click an object, switch to the Position tab and set the position/rotation to a specific number there. Note: terrain objects are not movable unless you tick Terrain selectable under Edit. And that is all for this Level Edit introduction. I hope you learned something useful from it. I recommend reading some other tutorials to create a new level and play it ingame ASAP!
-
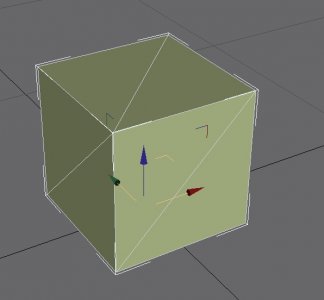
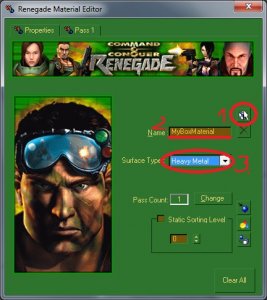
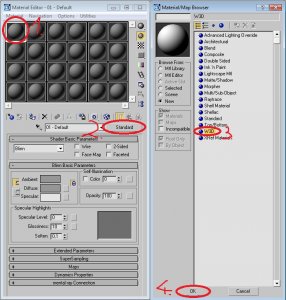
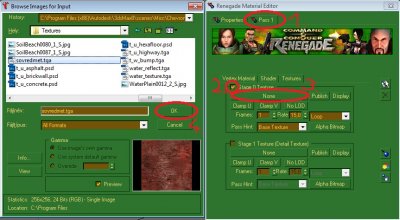
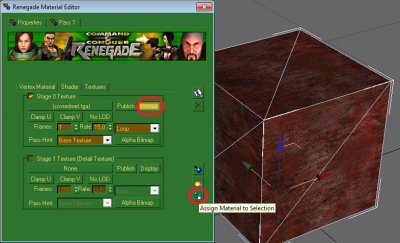
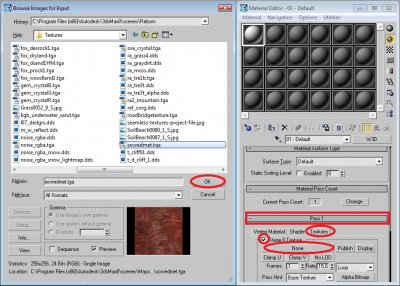
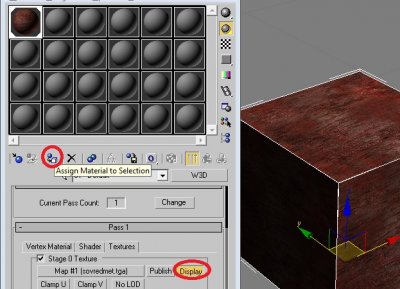
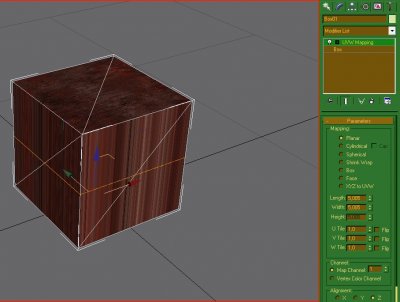
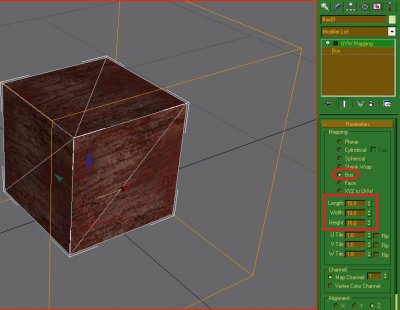
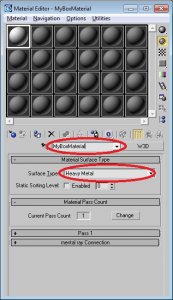
Author: moonsense715 Skill level: 1 This tutorial will show you how to apply a very simple texture to an object that the W3D engine can recognize using W3D materials. 1. Get your model Open GMax-RenX or 3ds Max. Create an object if you don't have one already. I created a box. 2. Apply the texture Select your object and hit "M" to bring up the material editor. In RenX Now if you are using RenX, click the Make New Renegade Material button, name it and select a surface type: Switch to the Pass 1 tab, tick Stage 0 Texture and click on None. Browse for a tga texture file you want to use and hit OK. Click Display to make the texture appear in the scene and click Assign Material to Selection (make sure your model is selected when hitting that button) Now close the material editor by pressing the X button in the top right of it. In 3ds Max If you are using 3ds Max, click on any material slot, click Standard and choose W3D and hit OK. Then name the material and at Material Surface Type, select a Surface Type from the dropdown. Expand Pass 1 if you can't see it and go to the textures tab. Tick Stage 0 Texture and click on None. Browse for a tga texture file you want to use and hit OK. Click Display to make the texture appear in the scene and click Assign Material to Selection (make sure your model is selected when hitting that button) Now close the material editor by pressing the X button in the top right of it. 3. Optional: Apply a UVW Map Modifier The texture might be stretching on your model or maybe you want it to repeat on the model. In this case you can use the UVW Map Modifier. With your model selected, apply the modifier. If you have a box model like me, your texture will suddenly stretch REALLY bad on your model, like so: That is because the Mapping parameter of this modifier is set to Planar. You can see the shape of the texture that is getting applied to your model with the orange shape that surrounds the model now that you have UVW Map Modifier on. Set it to Box and change the Length, Width and Height parameters to anything you like. I've set them all to 10. And that's all. Congratulations! You just applied a texture to your model!
-
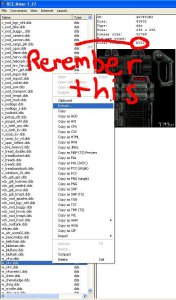
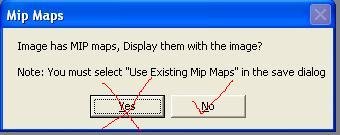
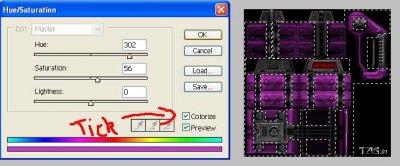
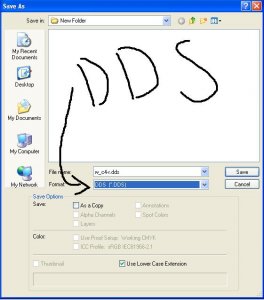
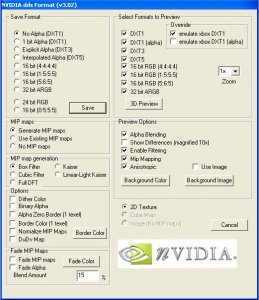
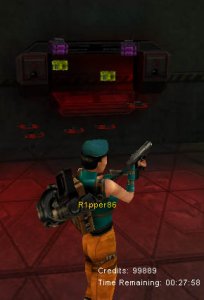
Author: Ripper86 Skill level: 1 This tutorial will show you how to modify a texture of any ingame W3D model. 1. Get the texture Extract a texture file (dds) from the always.dat file found in the Data folder of any game. I`ve chosen w_c4-r.dds, that`s Third person Remote C4 in Renegade. Important thing to remember, the pixel format, pending on what texture you mod it will change. Game objects will usually be DXT1, hud objects will usually be DXT5. 2. Modify the texture Open the file in Photoshop. On the popup asking to load Mip Maps, click no. Edit your texture to your taste, the easiest thing I do is change the Hue/Saturation. If you are doing this, use the marquee select tool to select what you want to change, then go to Image > Adjustments > Hue/Saturation, make sure you have Colorise ticked. Pick a colour using the hue bar then tweak the colour using the saturation bar and if needed the brightness bar. I have chosen the "Pimp" purple. 3. Save the texture Go to File > Save as Make the file save as a DDS and click save. Remember that important thing I told you to remember? now we`re using it. If it was DXT1 follow these options and click save. If it was DXT5 change save format to Interpolated Alpha (DXT5) and save. 4. Finish Now put your DDS file in your game's Data directory. This makes the engine use your new texture file here instead of the one in always.dat. If you want to use the original texture again, just move the file out of your Data folder or delete it. That`s it! Now the fun part, testing!! Heres my final result: Well I hope you learned something. Thanks for reading, Ripper86.
-
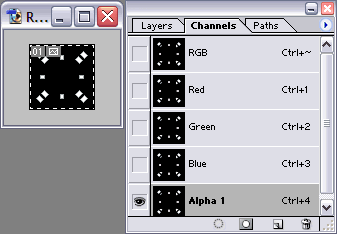
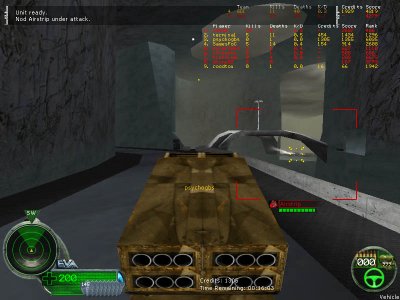
Author: Psychosis, Dayton Holt Skill level: 1 This tutorial will show you how to create your own reticle for W3D using Photoshop and its nVidia dds plugin (the plugin lets you save textures/images in dds format). 1. The first thing you do is to create a 64 x 64 pixel image. Now, draw your new reticle in black and white in the shape of a reticle, crosshairs, a dot, whatever, so it looks something like this: 2. Now, go to "Select" -> "All" (or press "CTRL + A") Go to "Edit" -> "Copy" (or press "Ctrl + C") Click on the "Channels" tab and at the bottom "Save selection as channel". The Alpha channel will appear, click on it go to "Edit" -> "Paste" (or press "CTRL + V") to paste your reticle into the alpha channel. (The alpha channel must be grayscale in alpha channel in order for W3D to get the transparency right, don't colorize it!) 3. You`re pretty much set. Now save your file as a DDS in the data directory of your Renegade/Reborn/Whatever game folder, make sure you save it as hd_reticle.dds, and make sure you save it as DXT5 with mipmaps. If the reticle you are making requires a custom center dot as well, create a new image file and do all the steps above the same except: Draw the center dot instead of the outer Reticle and the name should be hd_reticle_hit.dds. 4. That`s it basically. For a screenshot of the results:
-
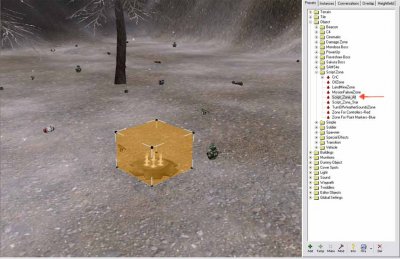
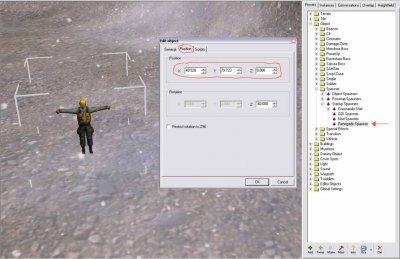
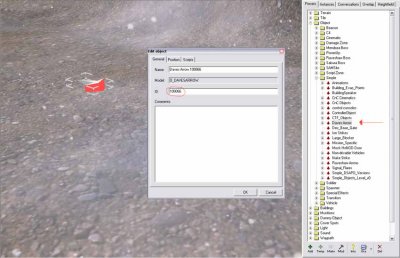
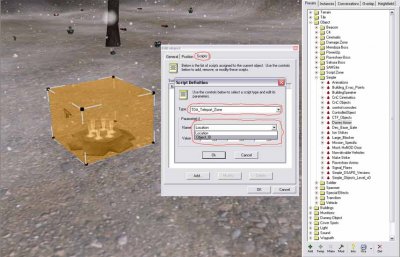
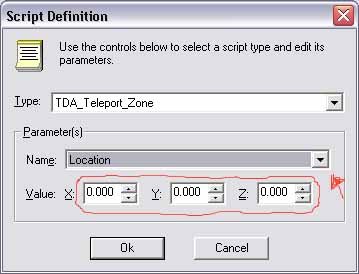
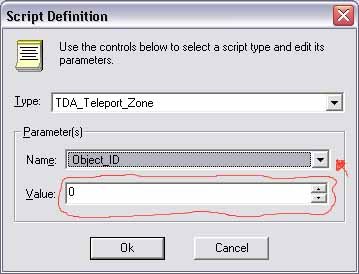
Author: General Havoc Skill level: 1 Getting Started This tutorial will guide you through making a working teleport on a map. After you have completed this tutorial you should have enough information to add a teleport zone to any map. I will guide you through each step of making a teleport zone. You may wish to skip some steps if you know what your doing. The teleport works using a custom script written by Dante that needs to be setup correctly for it to work. 1) Setting Up The Map Before we can begin to implement the teleport script we need to set up some objects to teleport to, these will be used in the script but not necessarily be seen in the game. First thing is to load up your terrain into the Level Editor. After you have loaded up your terrain into Level Edit we can start to add the objects required for the script to work. The fist thing you will probably want to do is add an object to indicate where the teleport zone is. You can either use a preset (e.g. a pedestal) or make your own model in gmax and import it into Level Edit or you can just leave it and use a feature of the map to indicate where the zone is (e.g. a doorway into something). This object has no function, it`s just to tell the player where the teleport is because the script zones are invisible in the game. Add your object to the map. The next step is to add a script zone that will indicate to the script the zone that any object goes within will be teleported. You will find the script zone under Object > Script Zone > Script_Zone_All. Make this object so it appears on the map, move the zone so that it covers the area you wish the object to be teleported in. You can size the zone using the back dots in the corners, holding shift will allow you to drag the zone upwards. it doesn`t have to completely cover the object or area, an it doesn`t need to be as tall as the object your teleporting. The next step is to set the destination for where you want to teleport to. This is the point where you choose what method to use. Dante`s teleport script has two parameters, only one of them should be used. The one tells the script to teleport the object to an XYZ location and the other one tells it to teleport the object to another object (using the objects ID). Each method is as effective as each other. This is the first method, this uses XYZ coordinates to teleport an object. The object that enters the script zone we made will be teleported to specific coordinates we pick. if your teleporting infantry you can use any object to get the coordinates, but if you want to be accurate then it`s best to use a model from the presets such as a spawner found under Object > Spawner > Startup Spawners > Renegade Spawner. Place the spawner somewhere on your map and it`s best to make sure its aligned with the ground when you move it (Ctrl + D) then after you have it in the correct place where you want your teleported object to go to double click the spawner on the map. A box will appear, click the position tab and note down the X, Y and Z coordinates for later use. After you have got the coordinates, delete the object. This is the second method, this uses an object`s ID to teleport an object. The object that enters the script zone we made will be teleported to this object that we add to the map. This allows use to see where we are teleporting to on the map but is no different in game to the first method. You may find that the different methods are useful for something. Place an object on the map, Daves arrows are probably the best thing to use as they don`t show up in game. There found under Object > Simple > Daves Arrows. Place the arrow on the map where you want to teleport to, make sure there is enough room for the object spawned to fit, you may have to adjust the object`s position later if you find that your being teleported into the ground. Once the object is placed double click the object and then note down the objects ID found in the box. Do not delete the object after you have it`s ID number. 2) Setting Up The Script The last stages are to setup the actual script so that it is linked to everything we have made so far. go back to the script zone we made earlier and double click it. Then got to the scripts tab and click "add" this will bring up a box similar to the one in the picture below. from the "type" list you should see a list of different scripts, if you don`t see them then you have not installed the scripts into your mod folder correctly, follow the process at the start and check to see if you did everything correctly. From the list of scripts scroll down until you find "TDA_Teleport_Zone" select that then you should see the same as below. You should see a section with the title "parameters", this is where you select the parameter according to how you set up the map. You must only use one of the parameters of the script or it may have undesired effects in the game. Select the "Location" parameter if you are using the XYZ to teleport to and the "Object_ID" parameter if your using another object to teleport to. If your using the "location" parameter fill in the X, Y and Z coordinates you noted down earlier in the three boxes on the window. After that click "ok" then it`s finished. If your using the "Object_ID" parameter then you have to fill in the object ID that you noted down earlier in this box. Remember you only use one parameter. 3) Testing Congratulations, you have successfully added a teleport to your map. You can now save it and test it in renegade. You may need to adjust it if it is not working as it should. Follow each step carefully again if you think you may have messed something up. Good Luck! 4) Credits This tutorial was written by General Havoc (Robert Hunt) I`d like to thank Dante for getting this script working and originally writing the script and may others. Also John Wilson for working on the scripts.dll. Also many thanks to the many people who help on the Westwood Mod Forums. Finally of course Westwood Studios for the excellent series of C&C Games. Let Westwood Live on!
-
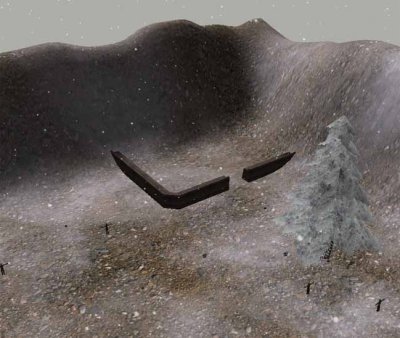
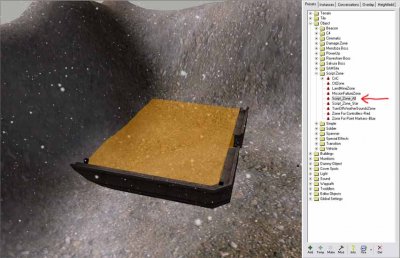
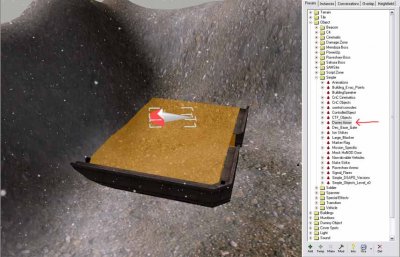
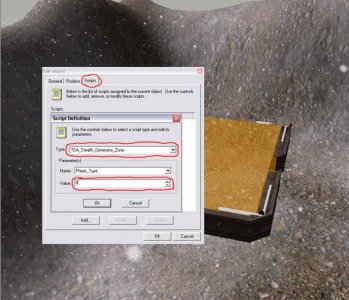
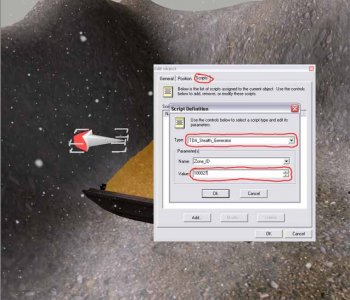
Author: General Havoc Skill level: 1 Getting Started This tutorial will guide you through making a working stealth generator zone on a map. After you have completed this tutorial you should have enough information to add a stealth generator zone to any map. I will guide you through each step of making a stealth generator zone. You may wish to skip some steps if you know what your doing. The stealth generator zone works using a custom script written by Dante that needs to be setup correctly for it to work. 1) Scripts Here is some information about the scripts that are used in this tutorial: TDA_Stealth_Generator_Zone - This script is attached to a scriptzone and defines the area where an object will be turned stealth. This zone will turn infantry and vehicles stealth whilst they are in the zone. The objects uncloak as soon as they exit the zone. There is a side effect to using this script, when the object exits the zone they will have inherited a stealth effect, similar to that of an uncloaked stealth tank or blackhand. TDA_Stealth_Generator - This is the script that powers the stealth generator zone and is attached to another object. The script is normally attached to an invisible static object and then linked to the zone using the zones ID. This script can be attached to other things to give the desired effect. If it`s attached to a vehicle, then when the vehicle is destroyed the zone will no longer make objects stealth. When added to a building controller then when the building gets destroyed the zone gets disabled thus not making objects in the zone stealth anymore. 2) Setting Up The Map Before we add the script to the map you will need to load up your terrain into Level Edit and check that your map is set up correctly and will work in the game. We will be adding the parts for the TDA_Stealth_Generator_Zone script to start with. After you have loaded up your terrain into Level Edit we can start to add some of the required objects. The fist thing you will probably want to do is add an object to indicate where the stealth zone is. You will probably want to do this in the stages of your map making so that people know it will be a stealth zone. I have used walls to show where it is going to be on my test map. This is to tell the player where the stealth zone is because the script zones are invisible in the game. The next step is to add a script zone that will indicate to the script the zone that any object goes within will be turned stealth for the amount of time it remains in the zone. You will find the script zone under Object > Script Zone > Script_Zone_All. Make this object so it appears on the map, move the zone so that it covers the area you wish the object to be turned stealth in. You can size the zone using the back dots in the corners, holding shift will allow you to drag the zone upwards. !t doesn`t have to completely cover the object or area, an it doesn`t need to be as tall as the object your turning stealth, just as long as the object can come into contact with the area. The next step is to add the parts for the TDA_Stealth_Generator script. This script is like a "controller" for the zone. You will need to add an object for this controller to be attached to. See the information about the scripts at the top of the page for more information. If you want the zone to be always active and cannot be destroyed then use the arrow as I have above. If you want to make the zone so it can be disabled then you`ll have to use a building controller or a vehicle depending on what you want to use to disable it. 3) Setting Up The Scripts The last stages are to setup the actual script so that it is linked to everything we have made so far. Go back to the script zone we made earlier and double click it. Then got to the scripts tab and click "add" this will bring up a box similar to the one in the picture below. from the "type" list you should see a list of different scripts, if you don`t see them then you have not installed the scripts into your mod folder correctly, follow the process at the start and check to see if you did everything correctly. From the list of scripts scroll down until you find "TDA_Stealth_Generator_Zone" select that then you should see the same as below. You should see a section with the title "parameters", this is where you select the parameters. As you can see this script only requires one parameter, which is "Player_Type". The "player type" parameter tells the script which team it should activate the stealth for when an object belonging to the specified team enters the zone. 0 is "GDI", 1 is "Nod" and 2 is "Unteamed" or "GDI & Nod". Enter the number in the box according on how you want the zone to work. Click okay and return to the main level. Next double click on the controller, this should be an arrow, a vehicle, or a building controller. It can also be other objects, you`ll understand once you have used it. Go to the scripts tab and "add" script as we did before to bring up the box below. From the list of scripts scroll down until you find "TDA_Stealth_Generator" select that then you should see the same as below. You should see a section with the title "parameters", this is where you select the parameters. As you can see this script only requires one parameter also, which is "Zone_ID". The "Zone_ID" parameter tells the script where the zone to generate the stealth is. This requires you to get the ID form the scriptzone we created earlier, do this by double clicking the object, it should come up with a screen and there should be a box named "ID" with a six digit number in. Type this number into the value box for the parameter. Click okay then your script is set up. 4) Testing Congratulations, you have successfully added a stealth generator zone to your map. You can now save it and test it in renegade. You may need to adjust it if it is not working as it should. Follow each step carefully again if you think you may have messed something up. Good Luck! 5) Credits This tutorial was written by General Havoc (Robert Hunt) I`d like to thank Dante for getting this script working and originally writing the script and may others. Also John Wilson for working on the scripts.dll. Also many thanks to the many people who help on the Westwood Mod Forums. Finally of course Westwood Studios for the excellent series of C&C Games. Let Westwood Live on!
-
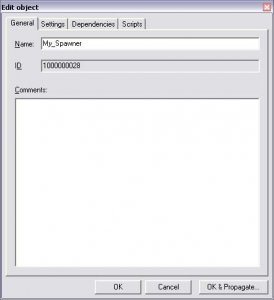
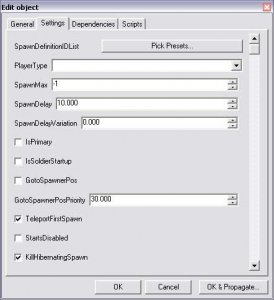
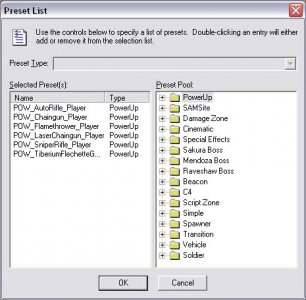
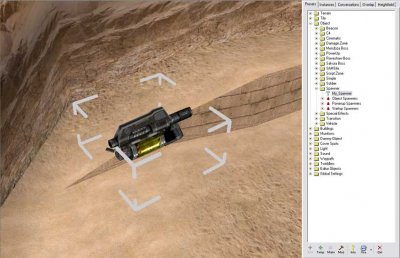
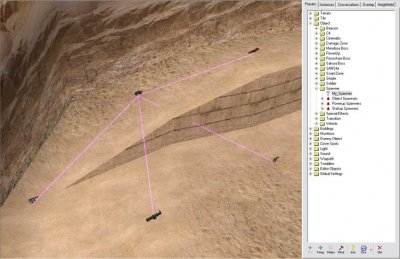
Author: General Havoc Skill level: 1 Getting Started This tutorial will guide you through making powerup spawners and adding spawn points to spawners so they can spawn at multiple places across the map as Westwood ones do. After you have read this tutorial you should be able to add spawners and spawn points on your own maps. 1) Setting Up The Spawners First thing is to load up your terrain into the Level Editor. After you have loaded it up you need to browse to Objects > Spawner on the preset tree. Next click "add temp" which should bring up a screen like below. Fill in the "Name" box with a name for your spawner then click the "Settings" tab, which should bring up something similar to below. You will see a lot of settings now, you can leave them as they are or change them. The main things you would want to change are the "SpawnDelay" which is the length of time in between spawns and the "SpawnDelayVariation" which is the added variation that is added to the time. For example if the "SpawnDelay" was set to 10 seconds and the "SpawnDelayVariation" was set to 15 seconds then the maximum time between spawns is 25 and the minimum is 10. It is selected randomly each spawn unless the value of "SpawnDelayVariation" is 0. After you have played around with the settings click the "Pick Presets..." button. It should bring up a window like below. This window is where you pick what the spawn actually spawns. You can see I have already added a few weapons, you can find them in the panel on the right side under PowerUp > Soldier Powerups > Weapon Powerups add as many as you wish, to add an item, double click it on the right panel, to remove an item, double click it on the left panel. It is a good idea to add many different weapons as when you add spawn points later you may want variation as these don`t act like individual spawners. The more times the same item appears in the list on the left, the more chance it has of spawning. After you have finished click on "ok" then "ok" again on the settings window. You should be returned to the map view with your new temp preset in the preset list. Click on your newly made spawner and click the "make" button to make it on your map. To align it to the ground, press "Ctrl + D" and then drag it around to get it into position on the terrain. You can see my spawner that i have just made on the map below. After your happy with it`s position press "Ctrl + P" to add a new spawn point. It should be linked by a pink line. Drag this copy around until your happy with it`s position. Repeat this process until you have as many as you want. Here is my may below. Don`t worry about the weapon that you see when placing them as it is just a random one selected from the list you made, in game it will be randomly selected. The thing you just did was add a "point" which is a place for the spawner you made to spawn at. It will behave like the Westwood spawners in game meaning that only one weapon will spawn at one of those points at any one time. This is a good way of reducing the amount of spawners on a map and prevent players camping the spawner for a specific weapon as the weapons that spawn change and also the places. 2) Testing Congratulations, you have managed to make a new spawner and spawn points. You can test this in game and see how it works. If it doesn`t work as you expected then read the tutorial again and check you did everything correctly. 3) Hints & Tips Here are some hints and tips that may help you when making the spawners and spawn points: Don`t add too many spawn points especially in harder to reach areas as there could be an object spawned at that location for a long time if no one can reach it easily. This will prevent any more objects spawning at other points until the one was collected. Play around with the spawn times to find out what works best. A lower time may be more appropriate. Spawners and spawn points don`t just spawn weapons, you can spawn many more things including vehicles, bots and crates, experiment with different things. Remember to add multiple objects to spawners if you want to have the spawner spawning different objects. 4) Credits This tutorial was written by General Havoc (Robert Hunt) Thank Westwood Studios for the excellent series of C&C Games. Let Westwood Live on!
-
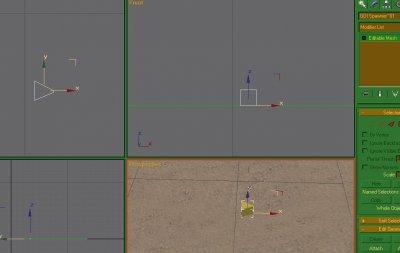
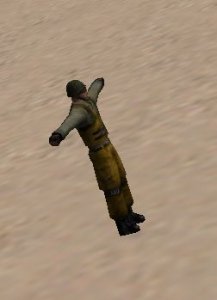
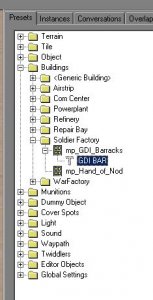
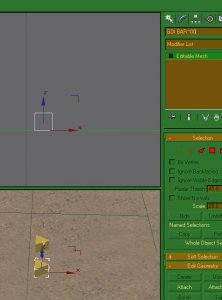
Author: Oblivion165 Skill level: 1 Proxies are probably my favorite thing in renegade. They make things a whole lot more stream-line and if you do your business right, you can make your maps load everything you need! -------------------------------------- 1. First off open your terrain, or make some. 2. Make a 1x1x1 Box somewhere on the terrain. 3. Make your box into a point at the X axis. Seen below Now name it "GDI Spawner~00" ~01 ~02 and so on for more than 1 spawner (The X axis is generally the "Front" Direction of many westwood models, including the player models) 4. Export as renegade terrain. PROXIES TO MY KNOWLEDGE ONLY WORK IF YOU EXPORT AS RENEGADE TERRAIN. Now make your terrain in LevelEdit and a GDI Spawner will be where you placed the proxie in Gmax! 5. Now make sure your spawner isnt touching anything like you normally would. As you can see his foot is in the sand. A Great Mapping Technique This is a really good idea to do when making maps. First go through the building controllers and make temps with shorter names. (Alot of them are longer than 16 characters long, Renx wont export it correctly) Go back to your terrain and do like you did with the spawner Now your building controllers will load with the map!!! You wont have to touch a thing! This works with just about everything, you can load tiberium fields, gun spawns, trees, PCT Zones, Bots, all sorts of things. Now when you have all your temps made, make a copy of the Temps in your mod folder, so when you start a new map, paste them in and its all ready to go.
-
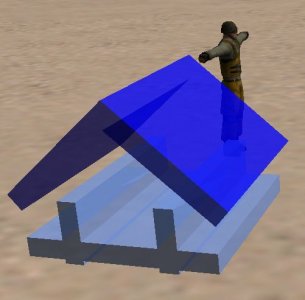
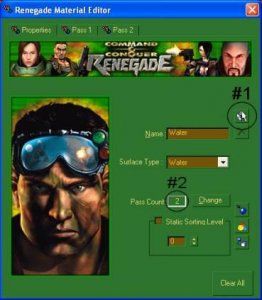
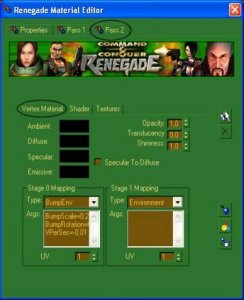
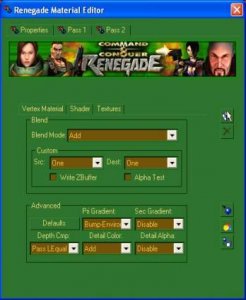
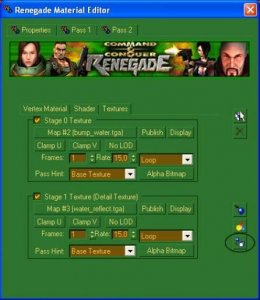
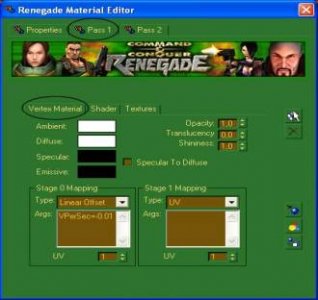
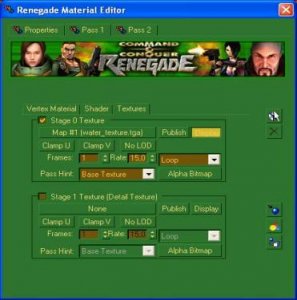
Author: Bumpaneer, StoneRook, André Skill level: 1 First step, Id like to give big thanks for Bumpaneer on allowing me to write this tutorial on realistic water making for Renegade. Well, lets get started. 1. Load your Ren-X and make a plane 10x10 or bigger. Remember this is only to get you started, once you learn this tutorial, you will be able to make the water any size you wish. 2. Press the M key on your keyboard, which should open the Renegade Material Editor. 3. Click on the blue box icon (Make New Renegade Material) to avoid conflicts between a material already used in other object. Then, change the Pass Count to 2 and select the Surface Type (Naturally Water) as show in the picture below: 4. Usually, when you start by the Pass 1 tab, Ren-X crashes, so lets move on to Pass 2 tab, then we come back to set up the #1. Click on Vertex Material tab on Pass 2. Make sure Ambient, Diffuse, Specular and Emissive colors are black. Under the "Stage 0 Mapping" (bottom Left of screen). Select the drop down box to the right of Type and select "BumpEnv". And fill the box Args below with: BumpScale=0.2 BumpRotation=0.3 VPerSec=-0.01 And dont forget to change the Stage 1 Mapping Type to Environment (Basically to make it reflective) as shown in the picture below: 5. Now lets move to the Shader tab (Still inside Pass 2 Tab). Select the Blend Mode to Add. On the Advanced (Still on Shader Tab, but on bottom), select the Pri Gradient as Bump-Environment and the Detail Color as Add. Watch picture below: 6. Now lets move to the Textures tab to set up the textures and the details of the water and its movement. 7. Check the Stage 0 Texture and click on the None button to select the proper texture. Use the texture called bump_water.tga here. 8. Now check the Stage 1 Texture (Detail Texture) and click again on None button and select the texture named water_reflect.tga On next page you are going to see how your Textures tab should be after setting up all these changes. 9. Once you are done with setting up Vertex Material, Shader and Texture tabs on Pass 2, click on the button shown on the picture (Assign Material to Selection) to apply the changes to rhe object. 10. Now lets move back to Pass 1. On Vertex Material Tab, change the Stage 0 Mapping Type to Linear Offset and add VPerSec=-0.01 to the Args box, as shown in the picture on next page. Important Note: The Ambient, Diffuse, Specular and Emissive are already set up properly, you dont need to change them. 11. There is nothing to change or set up on Shader Tab, so lets move directly to the Textures Tab on Pass 1. 12. Check the Stage 0 Texturing and select the remaining texture included in the pack: water_texture.tga Once you select the texture, check the Display button and then, to finish, click once again on Assign Material to Selection button, wich will Finished Product: Tutorial Written by André. Realistic Water technique developed and improved by Bumpaneer and StoneRook. If you wish to know how to make more realistic effects for Renegade, start using WDump provided with the Renegade Mod Tools, there you can view all W3Ds Textures settings, making you be able to duplicate any effect Westwood added to their maps with textures. == Enjoy Your New Realistic Water ==
-
Author: danpaul88 Skill level: 1 LevelEdit Change Z height You can hold shift on the keyboard to alter the height of an object (or group of objects) whilst dragging with the mouse or using the up/down arrows on the keyboard. This is quicker than selecting the Z axis button on the toolbar every time you want to change an objects height. Clone Object You can create clones of an object (or group of objects) using the standard ctrl+c, ctrl+v keyboard shortcuts for copy & paste, but the location of the new objects is somewhat arbitrary depending on where you are looking. dtrngd recently told me about a better method; Select the object (or objects) you want to clone, press and hold the mouse button down (as if you were dragging the object) and then right click on the mouse. Voila, instant copy. You can also drag an object (or objects) around the map and right click at any location you want a copy created, allowing you to create lots of clones roughly where you want them really quickly. Propagate Changes When you have multiple variants of a preset that contain the almost the same settings, such as camo variants for a vehicle, you can clone any changes to the common settings by clicking the OK and Propagate button on the parent preset properties. This will open a dialog box allowing you to tick checkboxes to indicate which settings you want to copy to all child presets of the preset you are editing. No more manually editing the same value in 4 different camo variants of the same preset. Lock Camera height While moving around with the camera, just press CAPS LOCK to lock the camera's Z movement axis. This way you can look downwards and fly around without GOING downwards. W3D Viewer Move Light Source Hold down ctrl and drag your mouse around the screen to move the light source, this is useful for lighting your model from different angles (since the default top-down scene light doesn't always illuminate everything very well, especially when it's untextured)
