Mauler
-
Posts
73 -
Joined
-
Days Won
3 -
Donations
0.00 USD
Recent Profile Visitors
4,320 profile views


-

3 - Intermediate Quick tunnels with splines
Mauler replied to Mauler's topic in Modelling, Unwrapping & Texturing
Those tunnels would also not be able to have proper looking light solve, due to the lack of polygons. It's better to have more polygons in your mesh than too little. At least on W3D. I do prefer to hand craft my terrain, personally. you have the ability to have as many polys as you wish just need to play with the settings to up the amount -
3 - Intermediate Quick tunnels with splines
Mauler posted a topic in Modelling, Unwrapping & Texturing
This tutorial is how to create natural style tunnels and man made style tunnels using splines. This method is very fast and makes modeling tunnels extremely fast and efficient. First create a spline with the line shape, this is in the 'Create' tab. Click on the 'Shapes' button and the Splines will show up. Click on 'Line' Start creating your tunnel shape. Here I am creating a linear tunnel that has sharp angles. More akin to man made tunnels. After finishing my spline shape, I will expand the 'Rendering' tab and adjust the spline for my tunnel mesh. Make sure to enable both render viewport and renderer. Then there is two choices of shapes of tunnel, radial and rectangle. Both have uses, here I am wanting more of a rectangle shape for my tunnel. I have set the scale to 6m by 6m. Totally up to you on your tunnel scales! You can also have rounded corners with the rectangular shape. Holding down the mouse button will create a bend. Releasing will continue linear shapes. Here I am using a radial shape instead for more natural type tunnels! Using the rounded corners can achieve great looking natural tunnels. Once you are happy with the shapes of the tunnels you can invert the mesh to give you a tunnel mesh! Simply convert to a editable mesh and select the mesh with the 'Element' button and it will select all polys, after that navigate to the 'Surface Properties' tab and click on the 'Flip' button under 'Normals' rollout. Repeat above step to achieve the same results on the man made tunnel! In conclusion, this tool is very powerful and can save hours of development time. This method is just a basic introduction to the splines. You can also edit the spline and have the tunnel follow the xyz coordinates to have multi-level tunnels that go up,down, and all around! Another great tool to use with this is to use 'Soft Selection' and truly have awesome looking tunnels that aren't all linear and have random dips and rises! Experiment and enjoy!

-
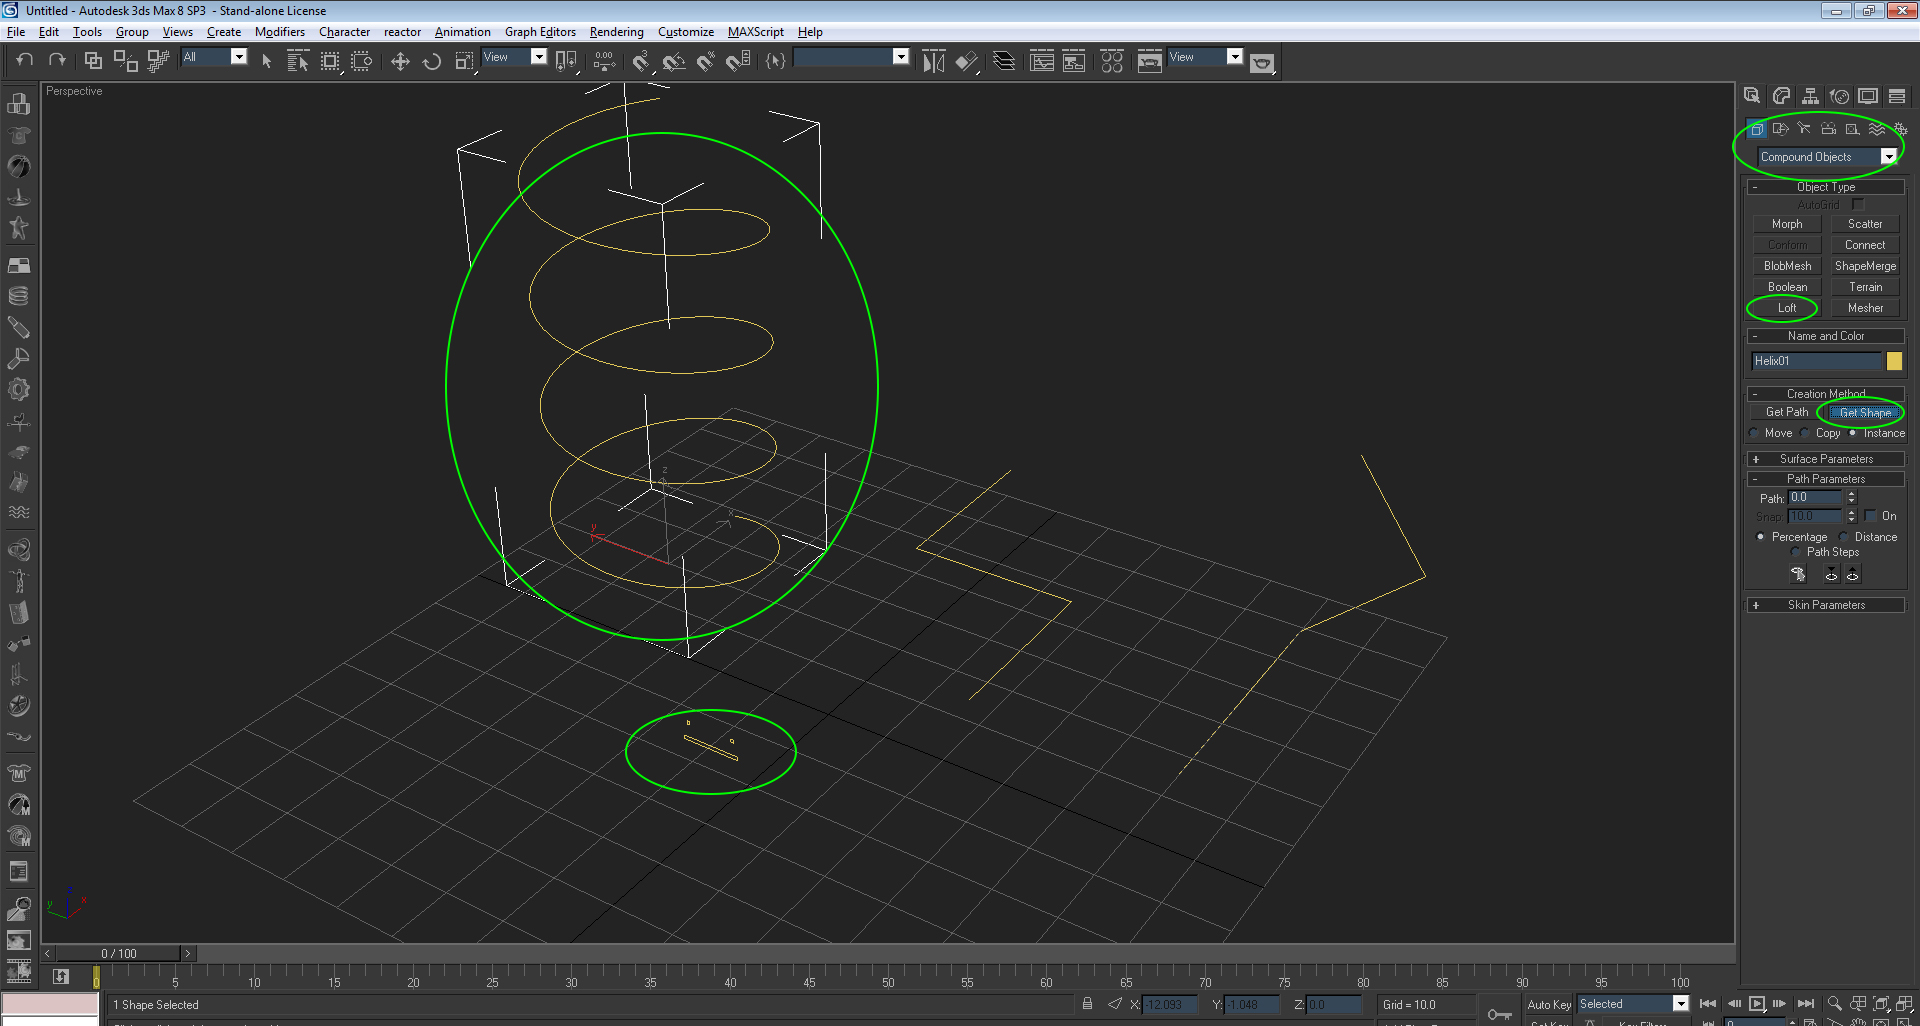
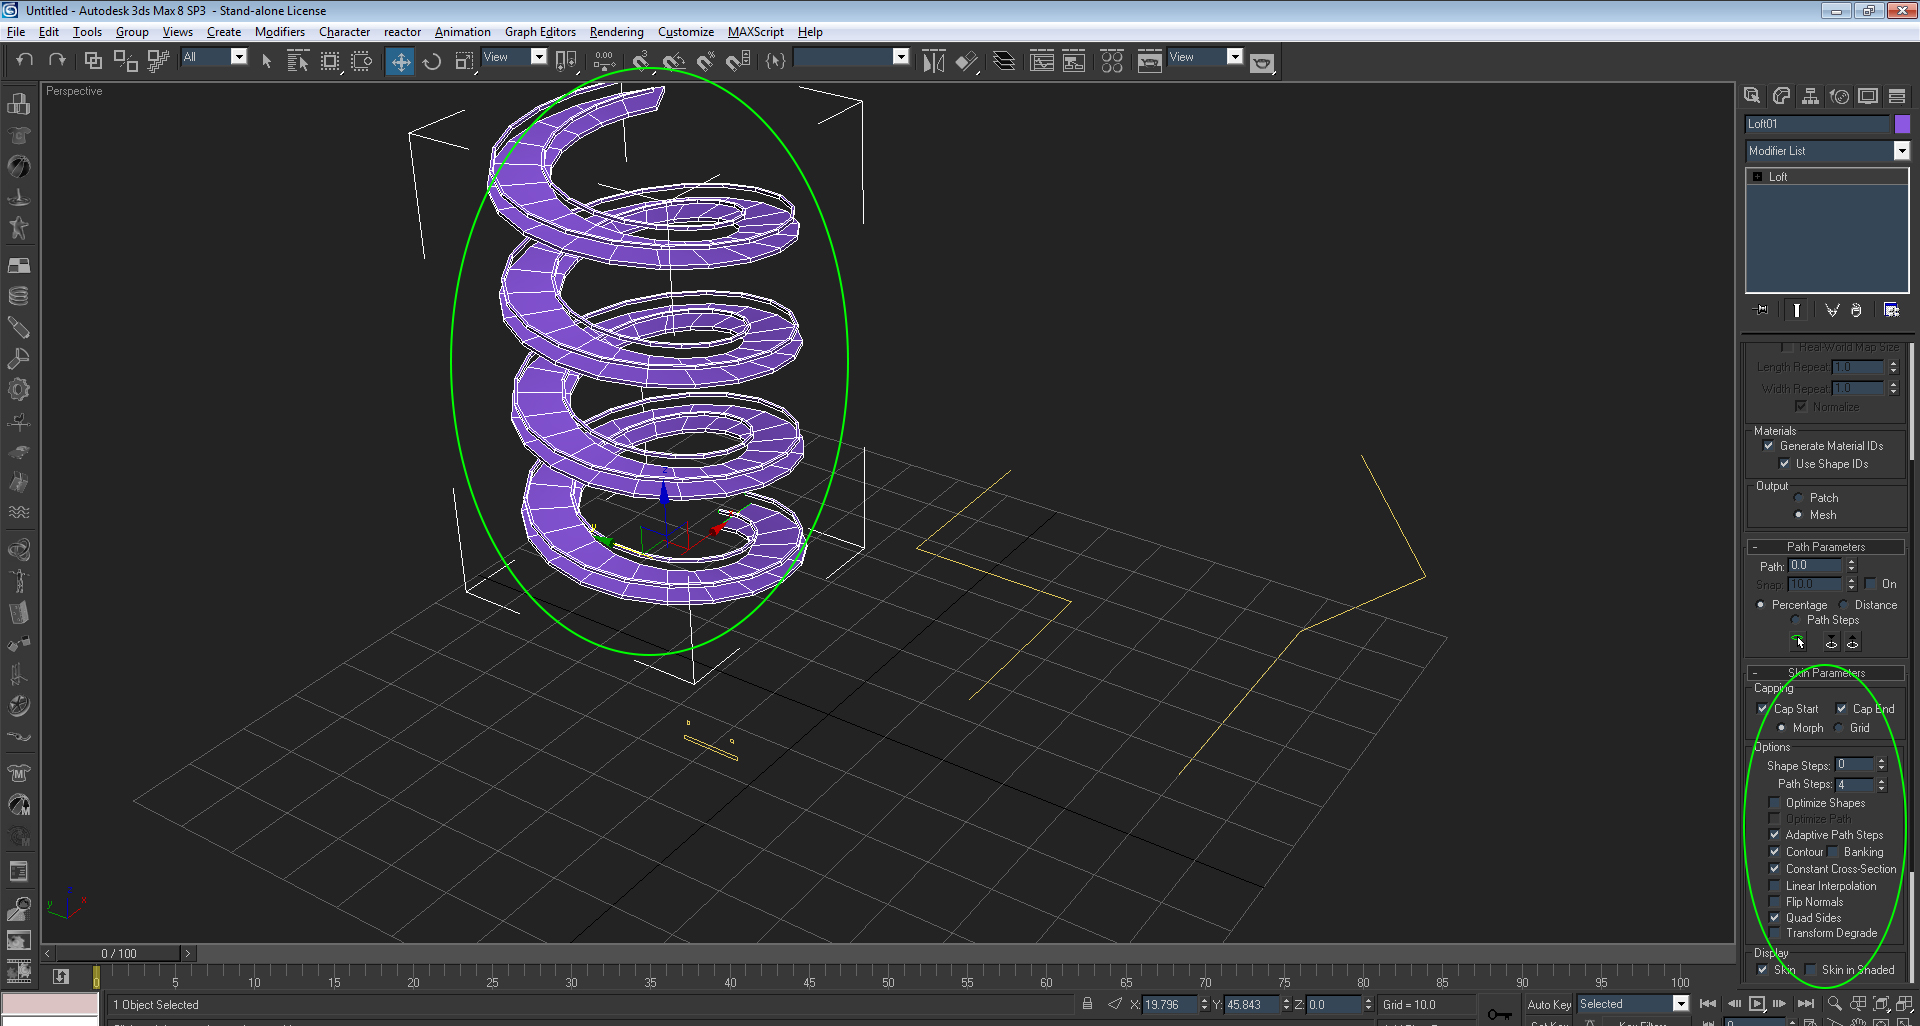
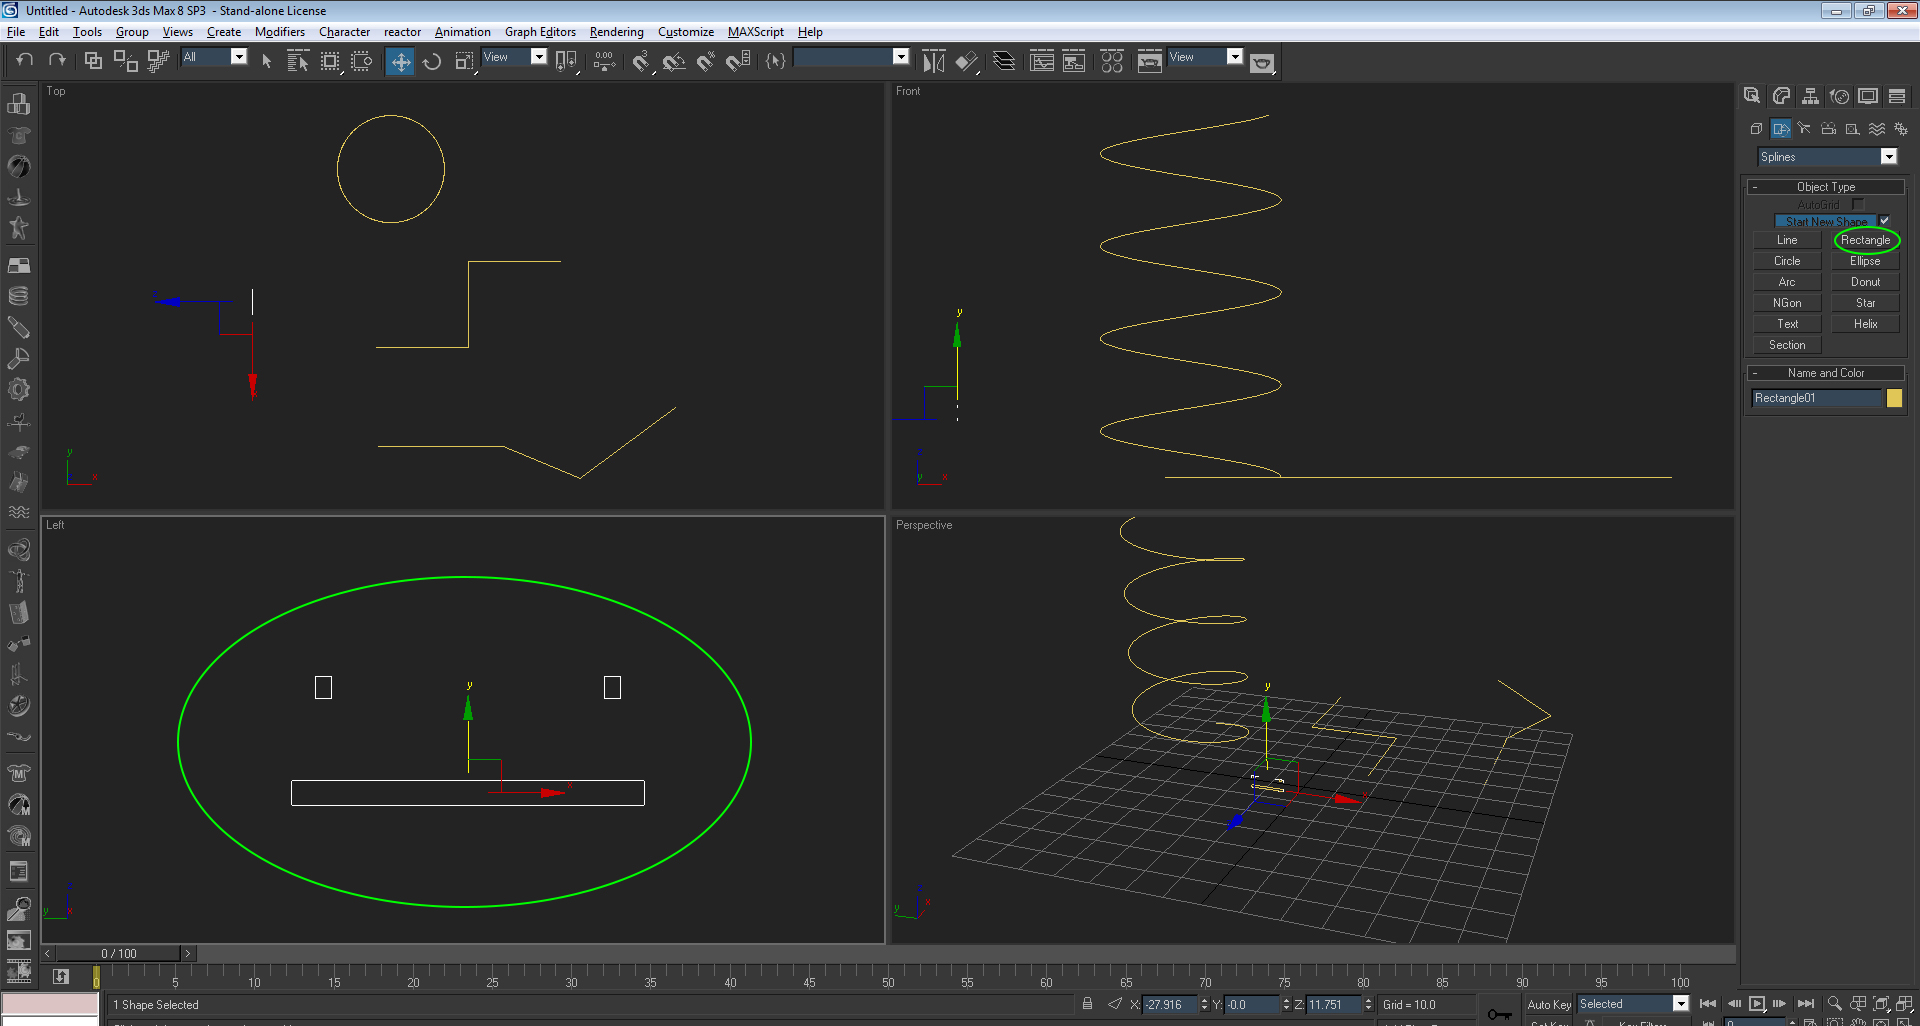
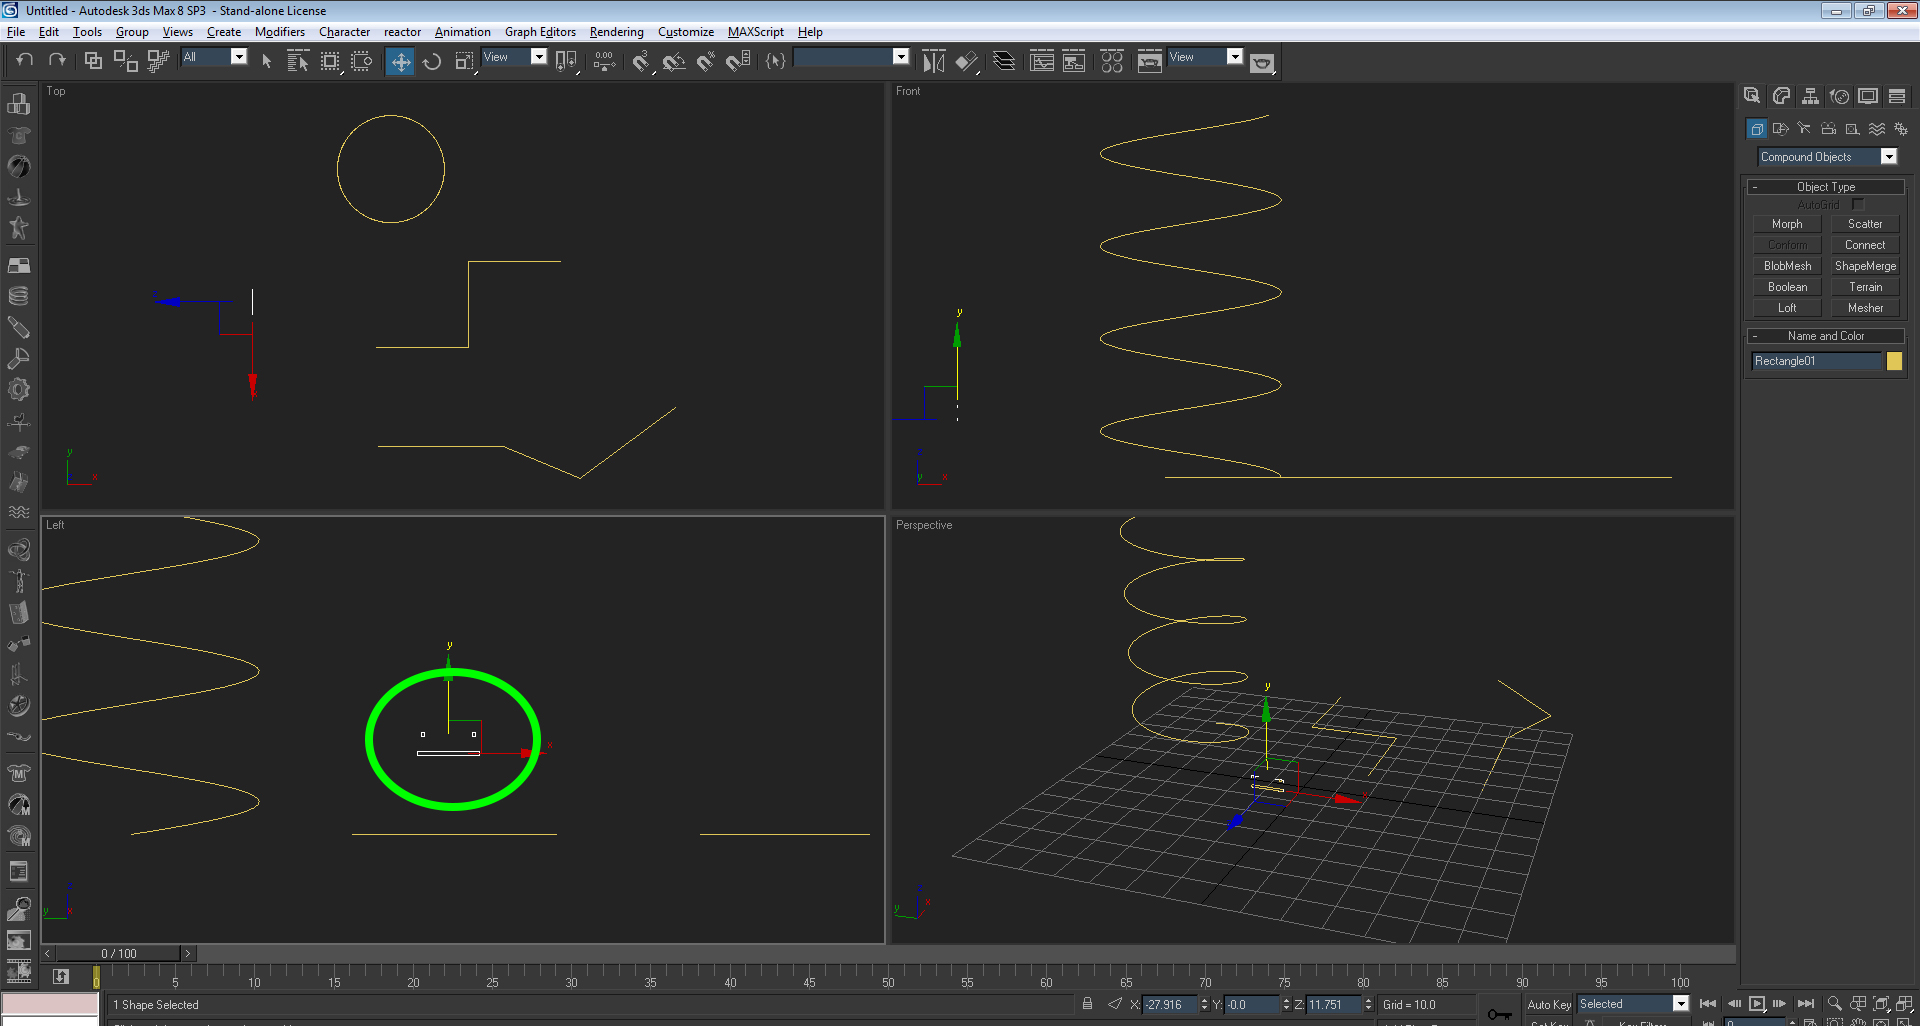
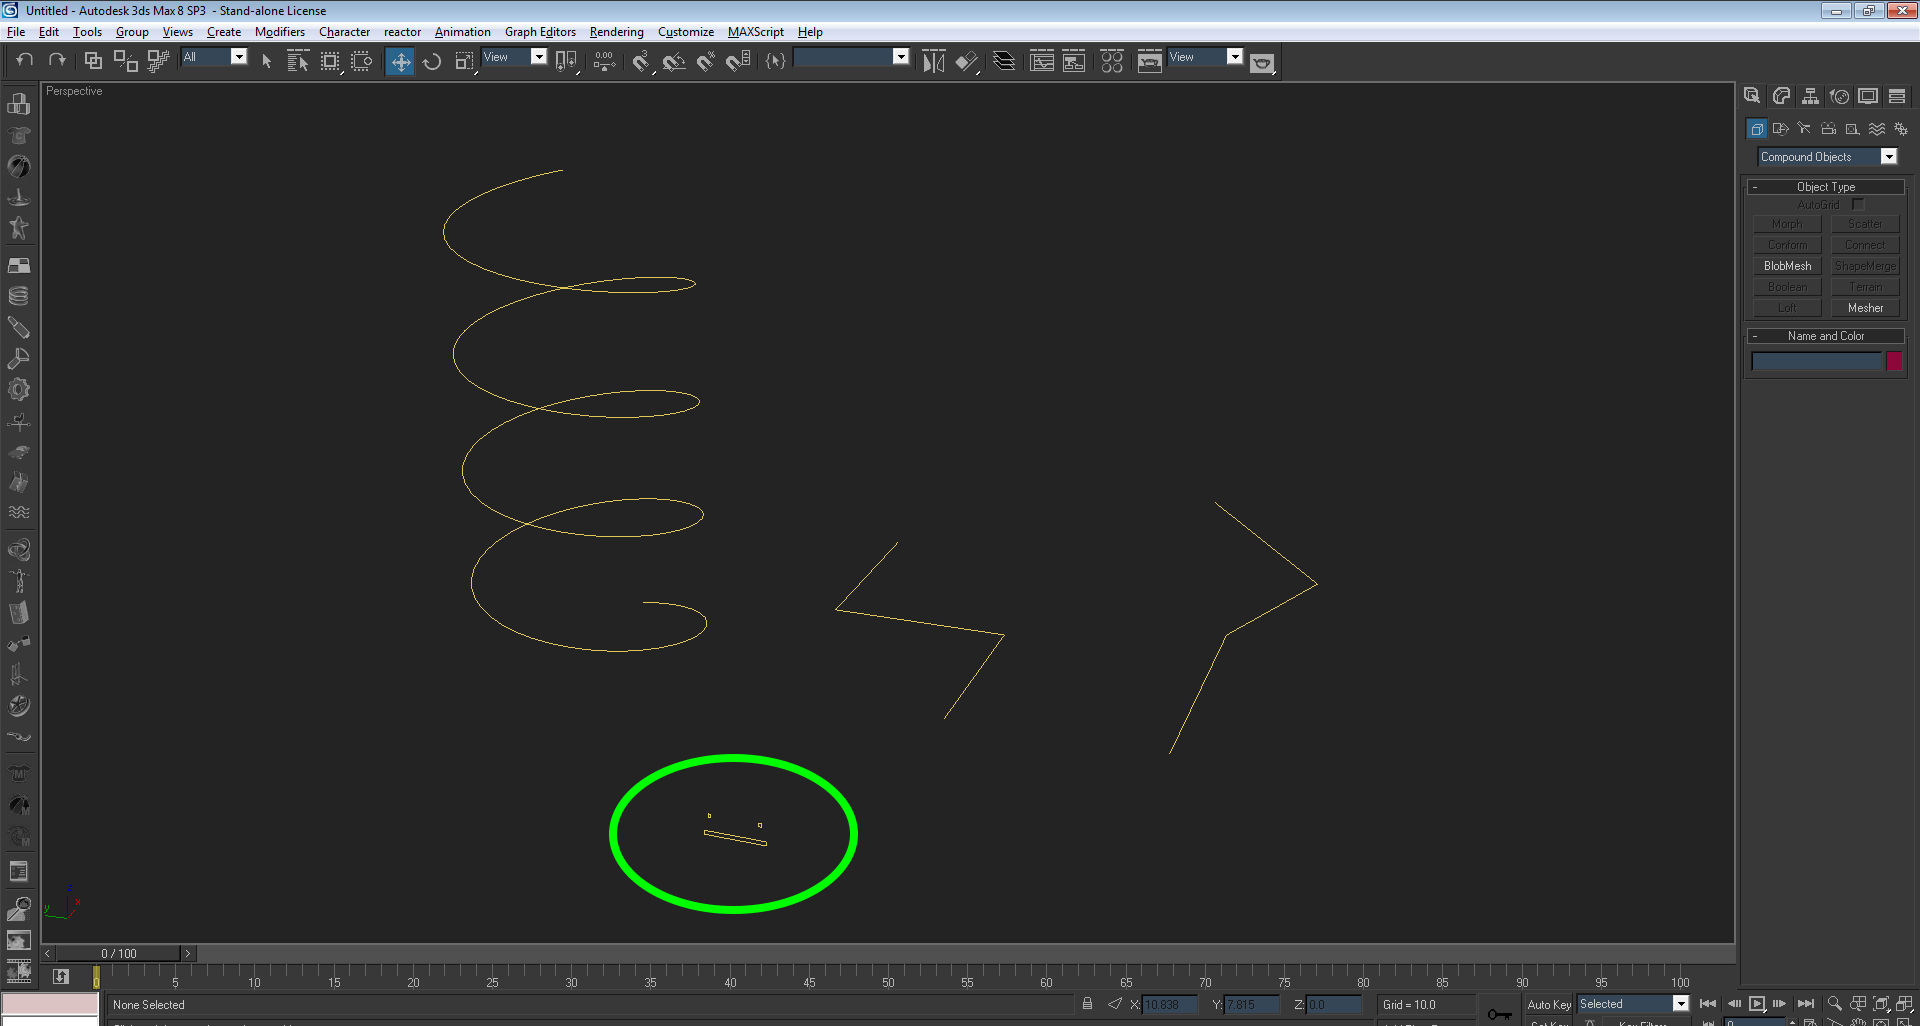
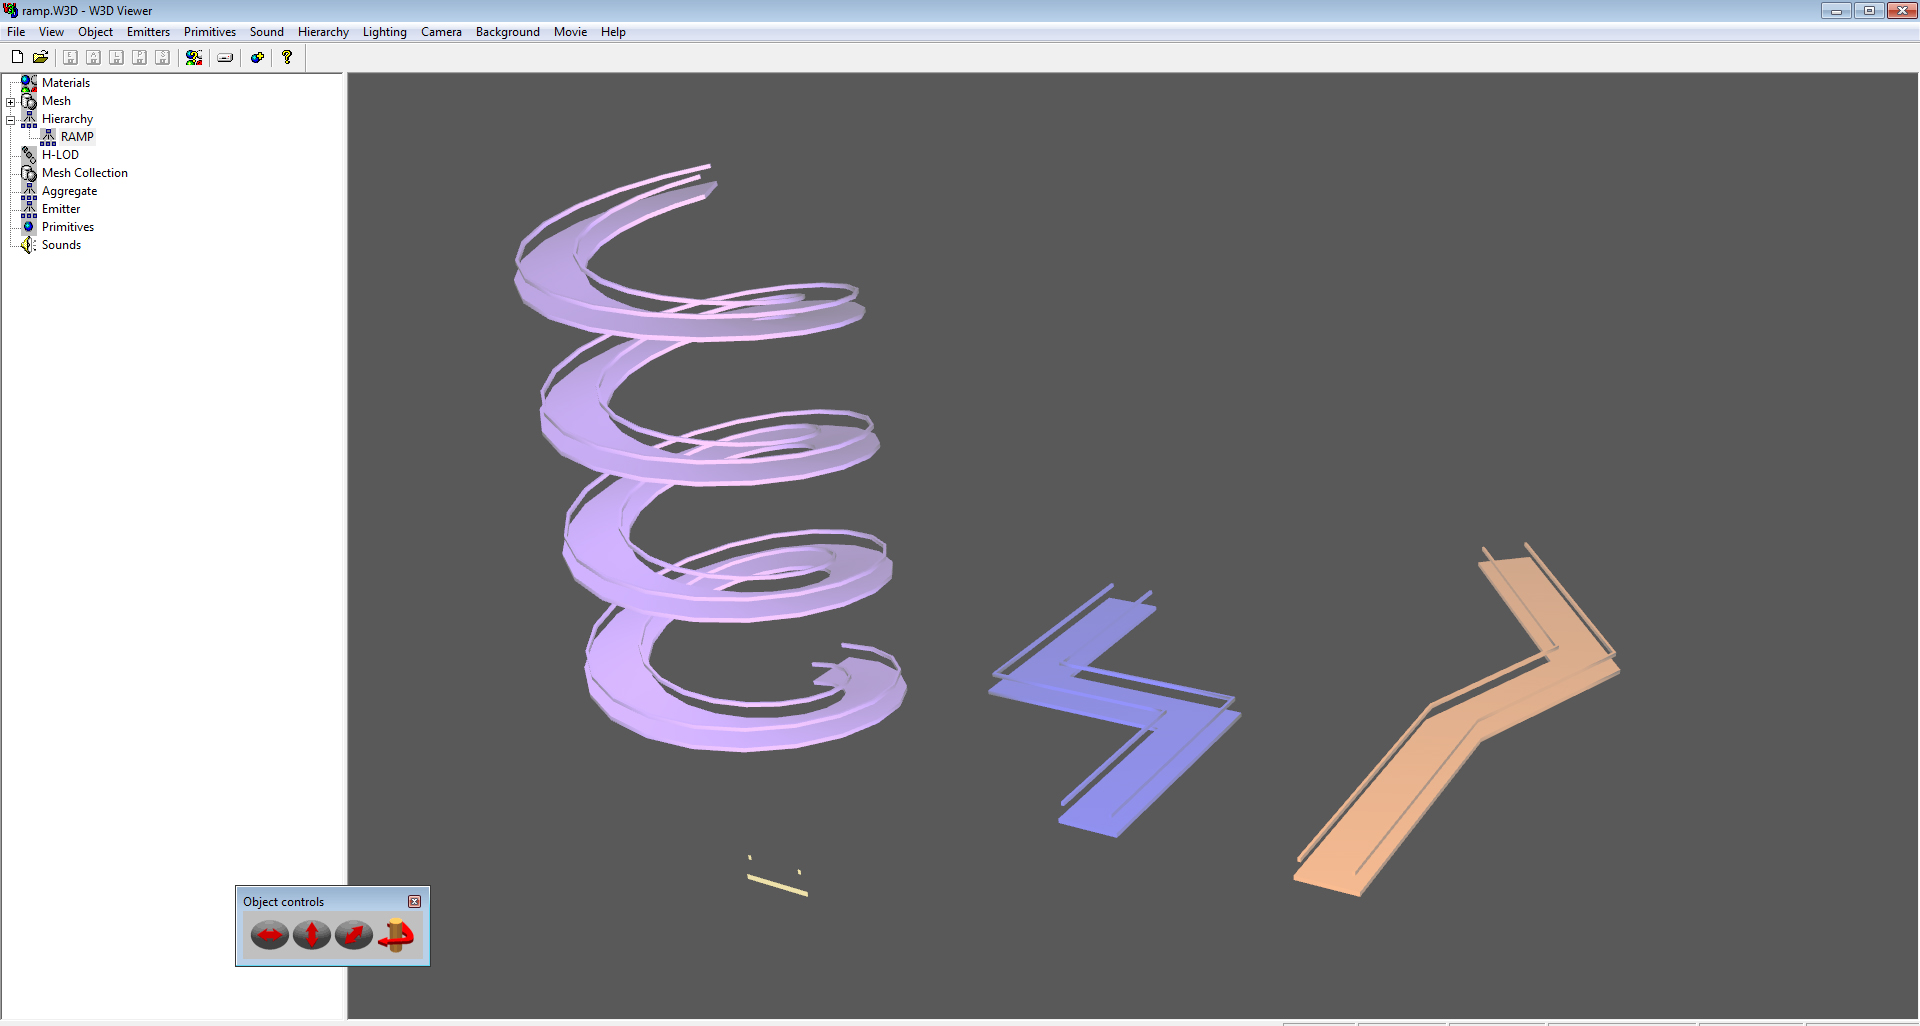
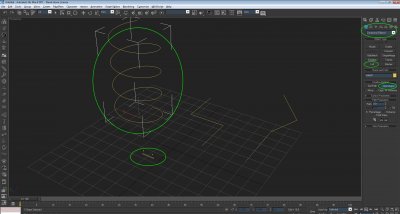
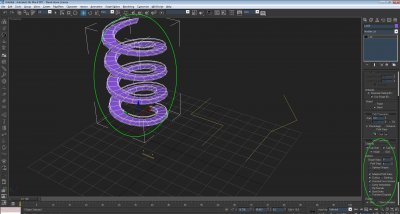
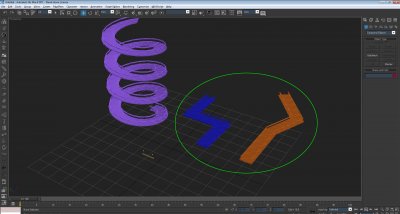
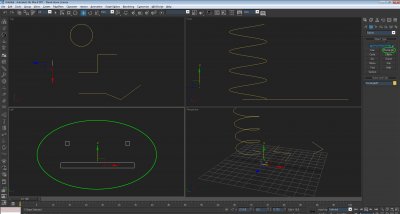
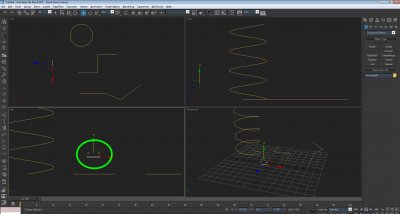
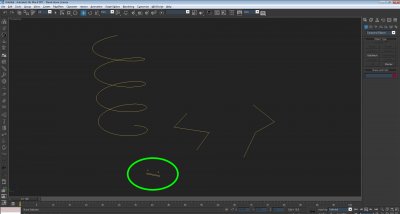
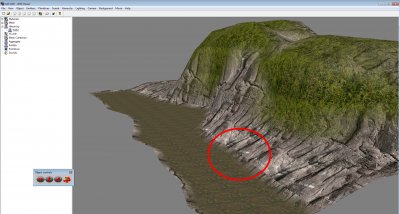
Quick tutorial to create ramp structures like spirals, catwalks etc. Cuts down modelling time to seconds. I am showing the basics of splines and loft tools for use W3D maps. Here is my maxfile with my splines I wish to make into climbable ramps, catwalks with rails. The circled spline is made up of rectangle splines oriented upright on the Z-axis, it makes the general form I wish to create for my helix, line splines above! Here I've selected the helix spline, with it selected press the 'geometry' button and where the 'standard primitives' rollout is click on 'Compound Objects' and select 'Loft'. Press 'Get Shape' under 'Creation Method' with instance on. Then click on the rectangle splines that make up your ramp. catwalk shape.. Once the loft has been completed it will give you a mesh to work with, my image shows the correct settings used for the helix ramp. Just copy my settings. Simply copy the same steps from the helix onto the other line splines and you will achieve the same results! Modelled in seconds! not hours! Completed and working in W3D viewer! Experiment and you can make some awesome things with this method!

-
4 - Competent Aligning textures in 3DSmax with Gizmo
Mauler replied to Mauler's topic in Modelling, Unwrapping & Texturing
Great, more info! Now others can learn more from these comments. -
This tutorial will cover how to align materials in max to have proper alignment for alpha blends, etc. Pretty much fixes issues with seams on objects in scene. This is a section of my test map that I am having issues on seams. The alpha blended section materials do not align properly and cause it to look unsatisfactory. This gif basically shows how to align all materials in the scene to x,y,z coordinates to 0,0,0. Basically all we do at this point is right click each object that has a material and select 'Gizmo' from the roll out, once selected the small yellow material box will show up.. at that point we will click on the x,y,z boxes on the bottom of the application and it will automatically set it to 0. Do this for every other box. Repeat for all objects that are textured (you will need to apply the gizmo to all UV modifiers to work properly and make sure that all materials have the same UV scales, e.g cliff has a scale of 15x15 planar, all other objects that share that texture must match.) After the gizmo adjusting this is the final product! Very nice!
-
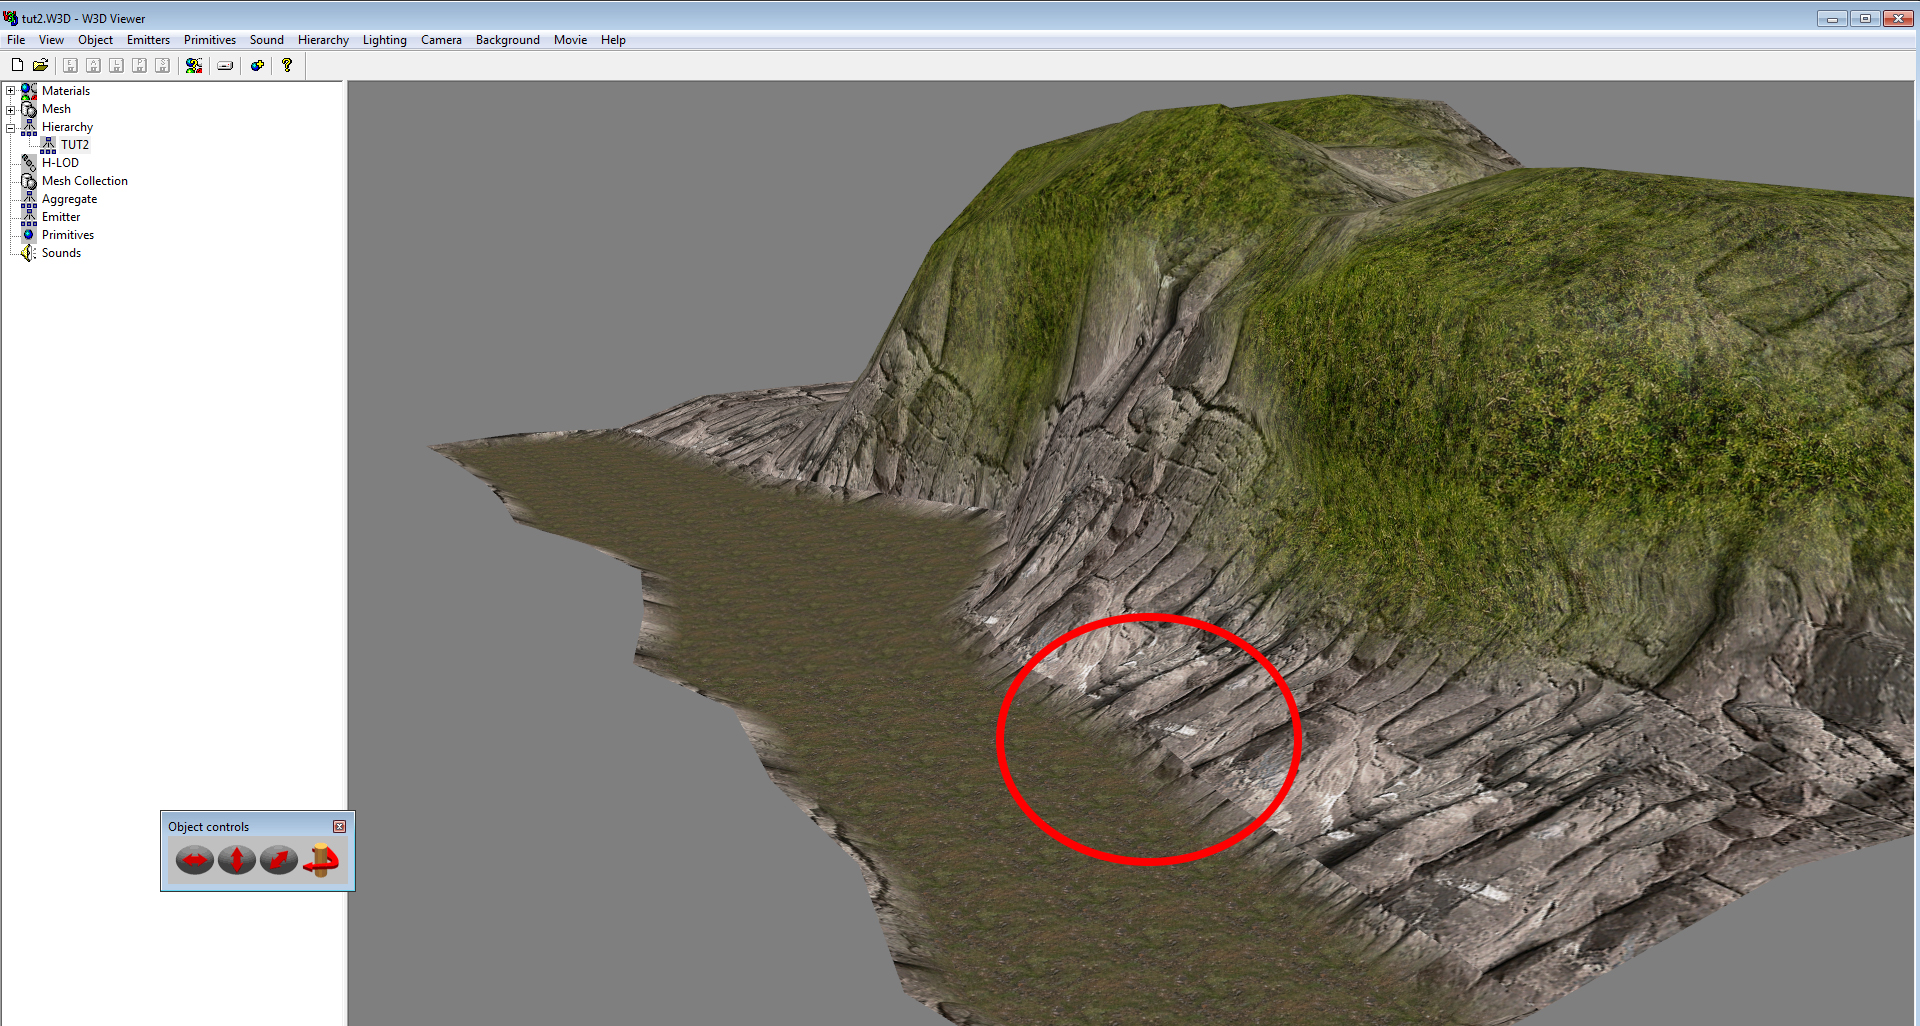
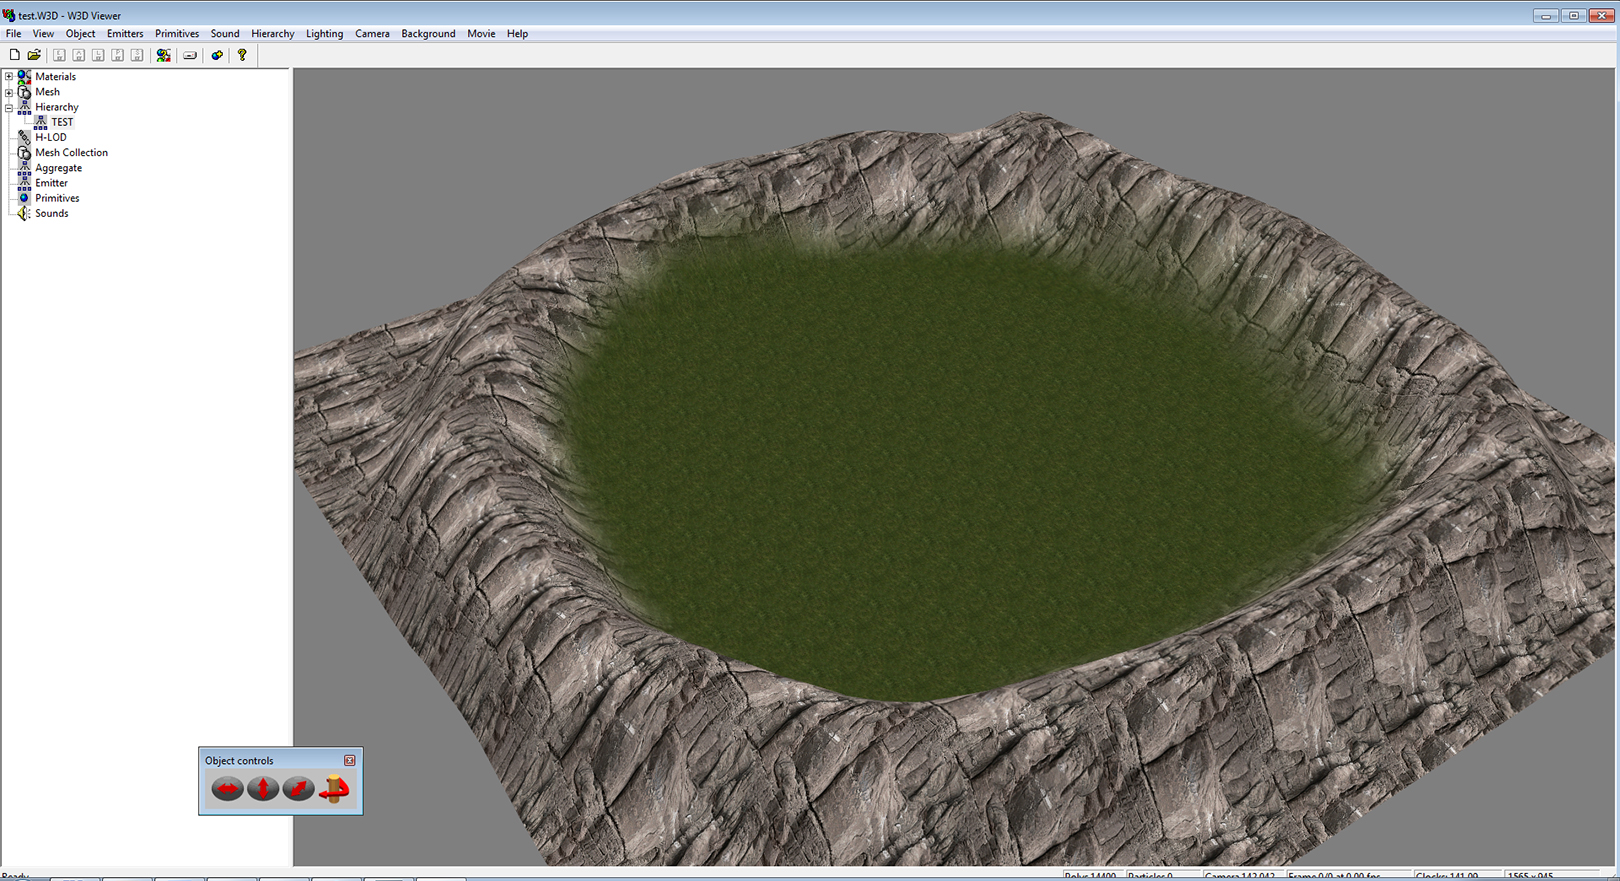
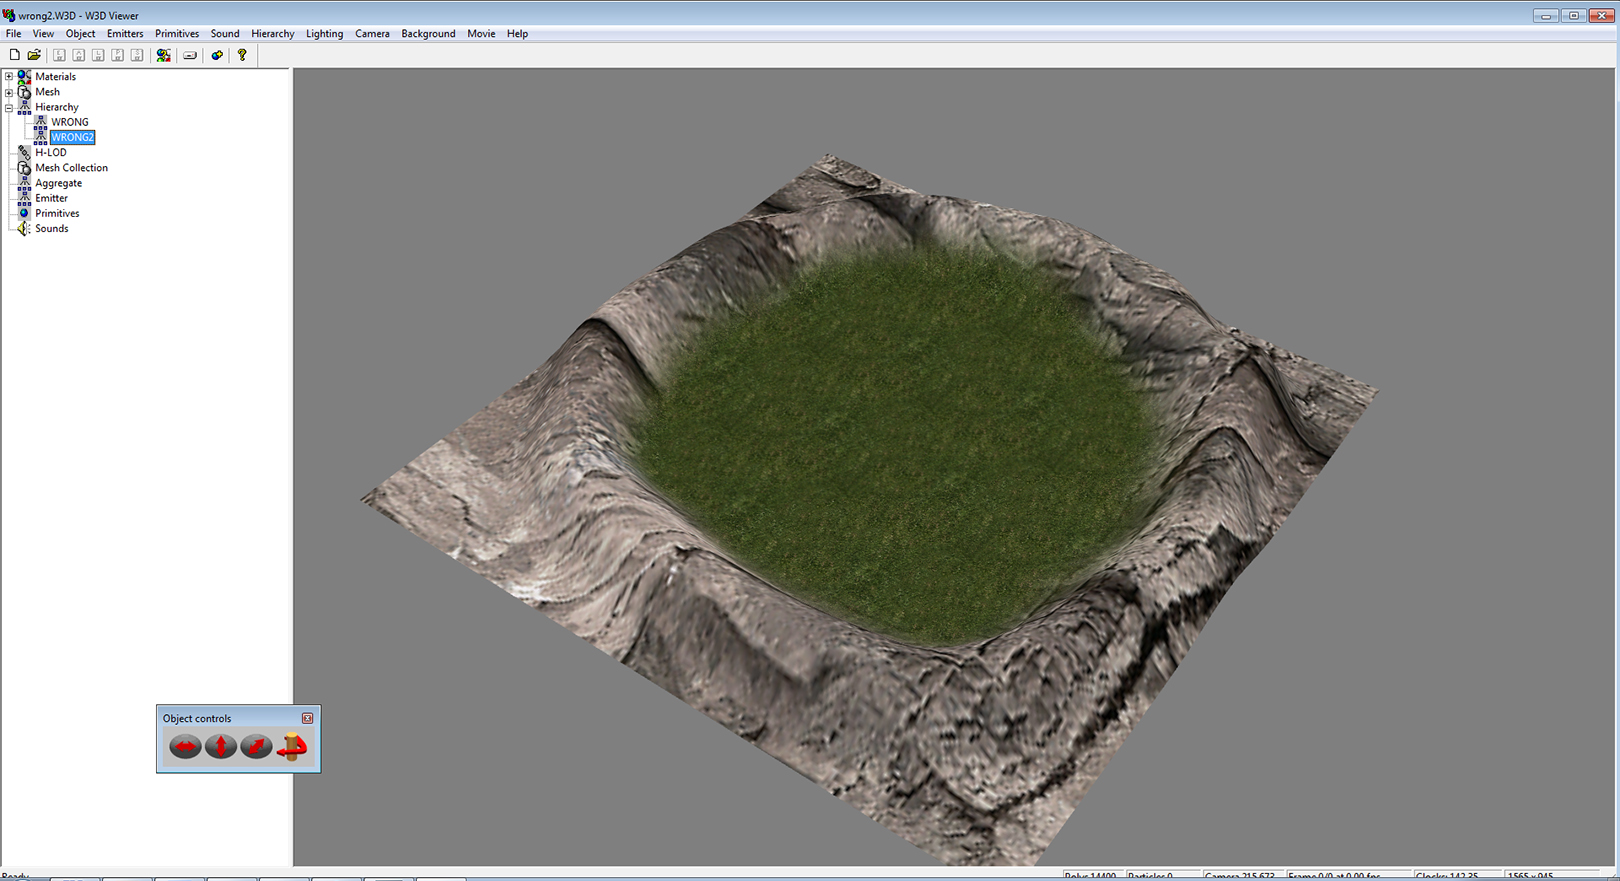
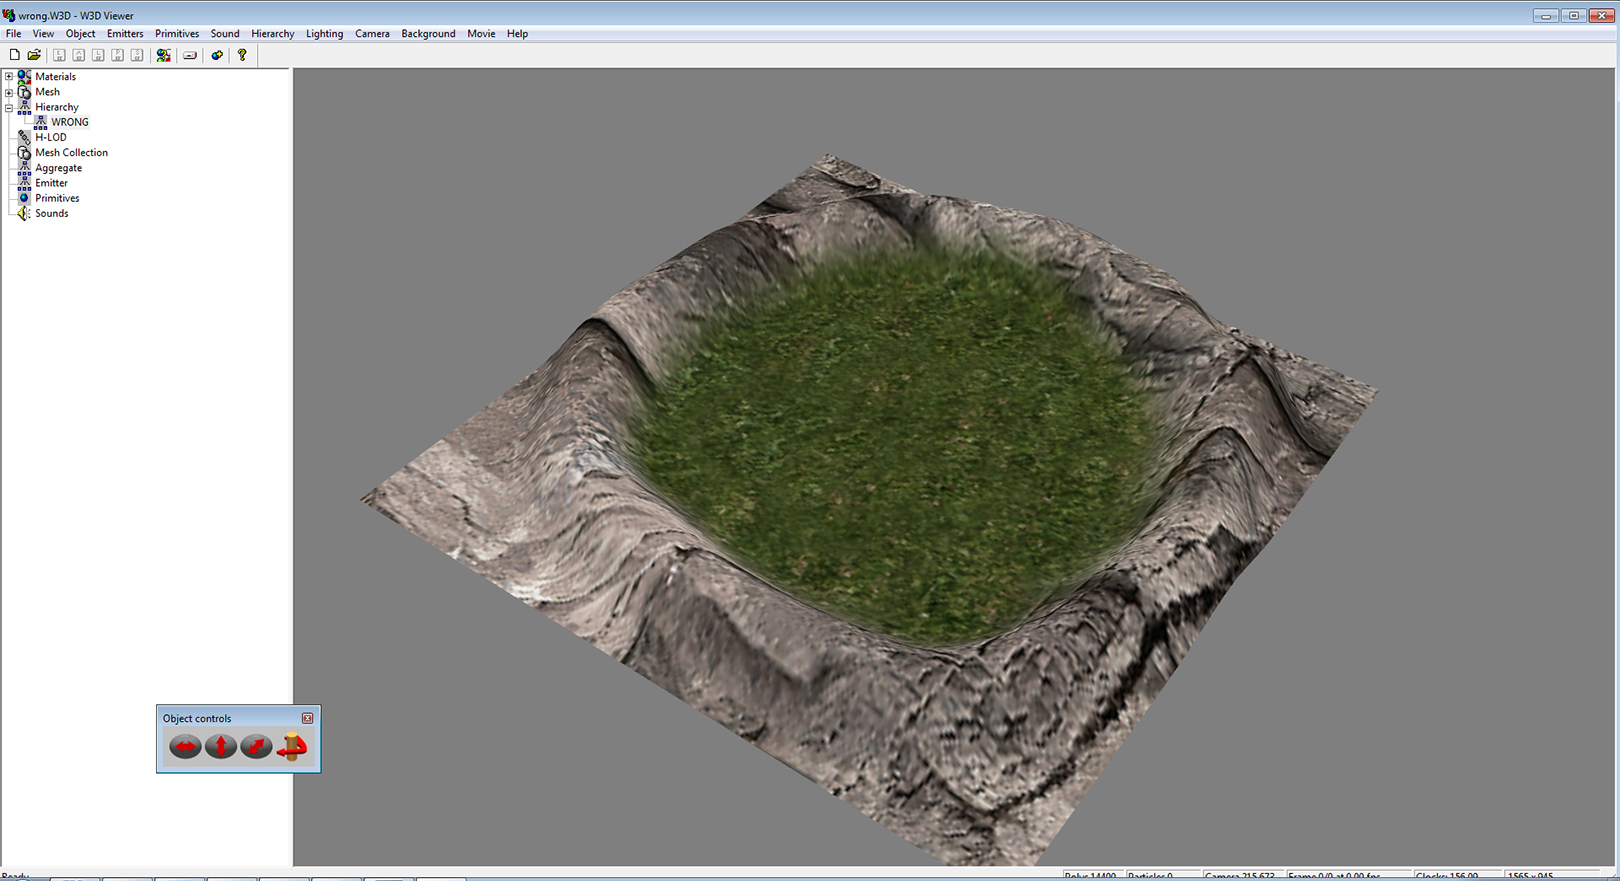
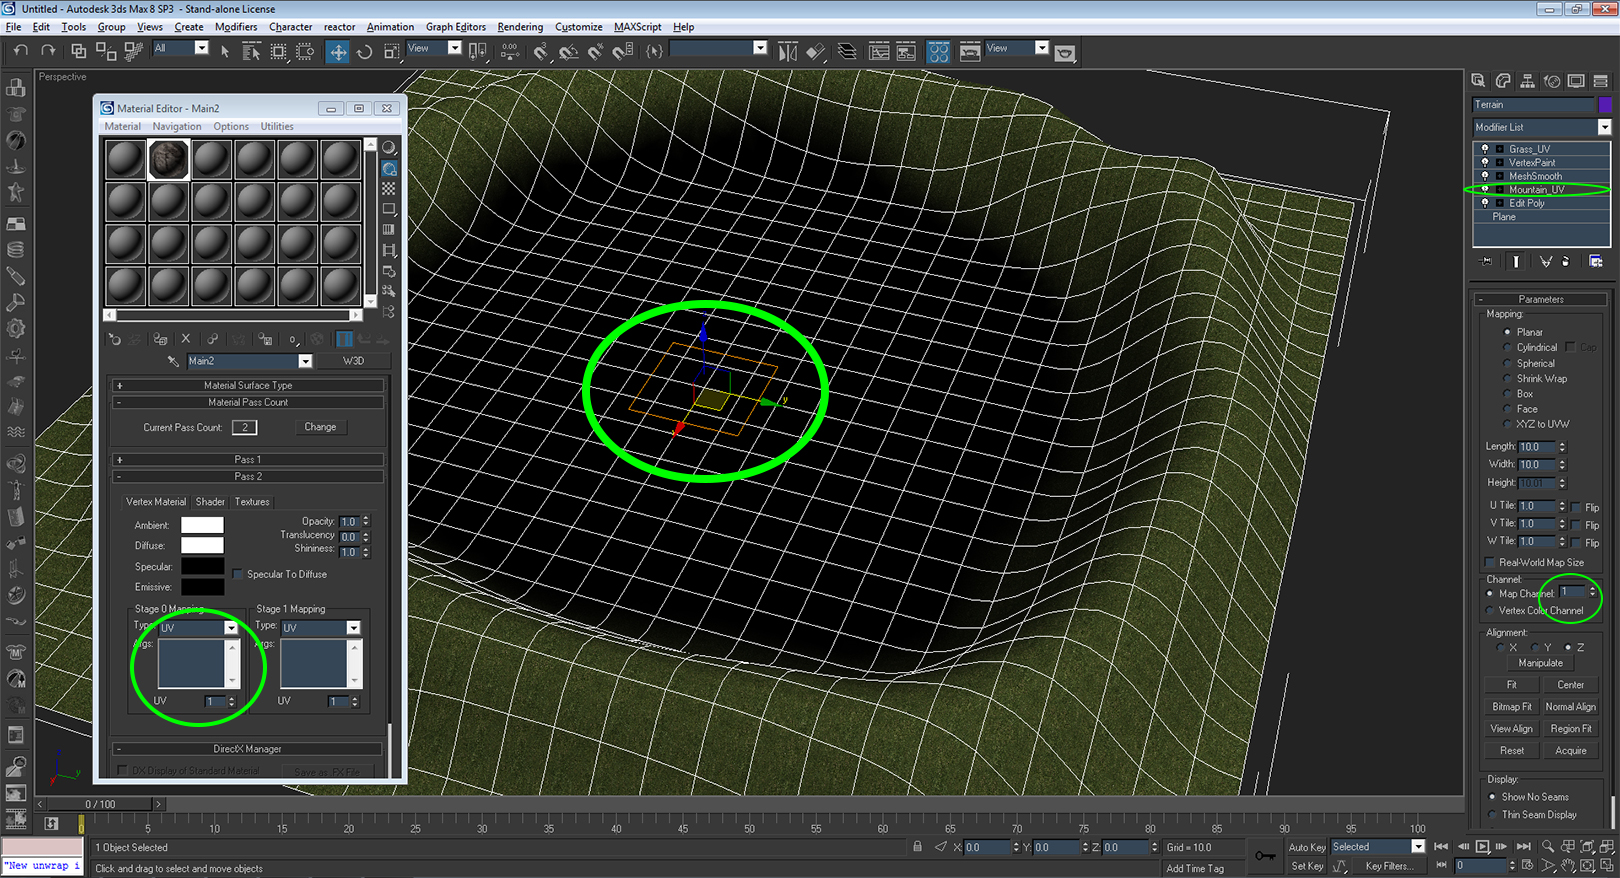
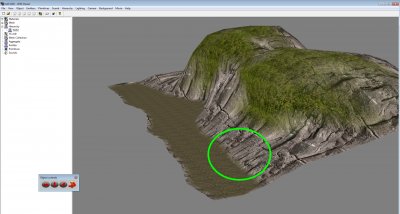
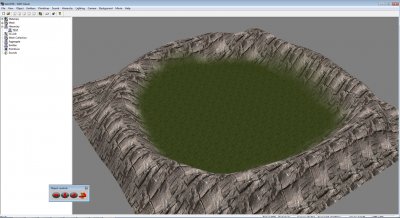
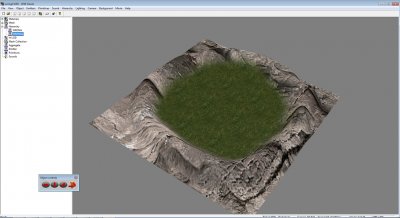
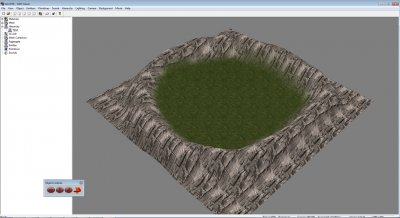
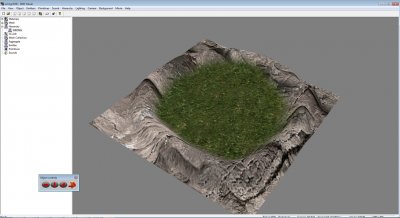
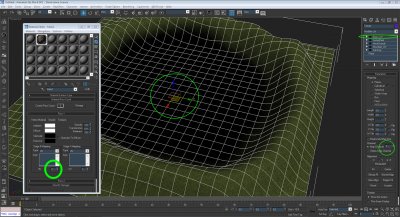
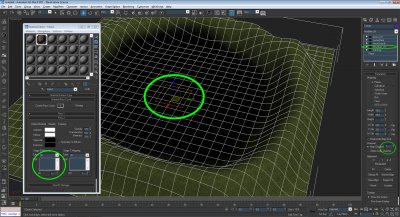
So this tutorial is a short one. Will basically show you how to setup multiple UV scales for an object by using multiple passes. This is useful for terrain texturing, alpha blending. Allows the artist to properly scale different textures, for instance a mountain texture with a grass texture and not be overly stretched and look horrible. 1. This is my start file with default UV mapping modifier. Textures are stretched and will not look good at all ingame! 2. So I will return to my max file and make adjustments. At this point we want to adjust the grass first. Let's first start by applying a UV mapping modifier to the mesh. Set your parameters to your liking, here I used a planar with 3x3 scale. Make sure to apply the UV pass to something other than default pass '1', also make sure to set the UV pass to the same number as set in the material modifier. All green circles. The orange box in the middle is our scale of the grass texture! Our results on the second screenshot is much better than what we started off with. 3. Next we will adjust the mountain cliff texture to something more refined. Same steps as above (2). Although I left the cliff texture to the default '1'. I made sure to scale the texture a bit bigger, here I used 10x10 planar. You may have to play with the settings and find your own preference! The results are much better than the default we started with. Now we have the cliff and grass textures separated and can now be adjusted individually! 4. After some further adjustments to UV scales I have a completed terrain with proper flowing textures and looks great! Here is the final results! 5. GIF animation of texturing work completed! From beginning to final progress!
-
Sad to to see this.. Lots of things will no doubt be lost...hopefully some of it can be salvaged
-
"Renx so fluid" lol when it isn't crashing haha. I use it sometimes and feels naked
-
BTW nice map, I'm on the fence about the rock texture tiling though. Edit:removed off topic discussion
-
I hope you are not talking about Fabian's Field? Because that is a gorgeous map and uses tons of eye catching visuals.. Some that even caught me offguard..
-
I was around MPF while this was going on... Looks like it did back then but this time with a Imperial age tank..
-
I enjoy my job... I rip apart diesel engines and put them back together nicely and replace broken parts from time to time.. hehe
-
Entire fleet gone! Worse than Wolf 359
-
I use the Westwood theme but always reverts back to Reborn EDIT: Offtopic
-
I personally think the like button is better than the rep point system.