Leaderboard
Popular Content
Showing most liked content on 07/08/2017 in all areas
-
3 likes
-
shameless necrobump... nobody wants to show off their setups or what? A few changes were made since my last setup showcase. Pretentious stuff ahead! Toggle spoiler to see content.2 likes
-
Finally we will receive Soviet Tanyas like in multiplayer to balance Bonsai! I like Bonsai the way it is, perhaps sans the Allied bridges. I feel they offer a bit too much line of site protection for the Allies base defenses.1 like
-
The a-bomb is perfectly fine the way it is, and the only thing I like about your proposals is the timer scaling. If a-bombs aren't already cancelled mid-flight when a missile silo is destroyed, they should be. This gives the attacking team an opportunity to react--and honestly, if a base is completely empty due to the entire team attacking while a missile silo is still alive, it's on the team. Teamwork doesn't mean all-in, it means having players in the right places working together. That means leaving one or two behind to defend.1 like
-
And when it had mammys, Allies could not win without killing ref in the first 5 minutes (or, again, using a flare). I would propose that we not swing the pendulum exactly as far in the other direction now that we know that both extremes fail. The unit that detects phases on radar, breaks their stealth in one hit, and basically denies phase attacks if your tank column has a tesla tank facing the other direction, is not a phase counter. Kden. Been meaning to buff them anyway. Maybe 2shotting longbows will give Allies something to think about on Ridge War too (that's not this map but it'd be extra damage to EVERYTHING not just LBs).1 like
-
Hello, I'm the creator of said cancerous map. I do apologize that my creation gave you cancer, I assure you, killing you was not my intent. Nevertheless, I'll answer your bullet points with my reasoning: You came to that conclusion by looking at the map scale, but not the actual play space, and certainly not the relevant play space. The relevant play space isn't any significant amount larger than standard Tech 5 maps. The Ore Truck takes a while in order to provide an opportunity for Infantry to destroy it and have it be noticeable. If the path was short like more commonly the case, destroying a truck only delays the income less. This is proportional to the travel time. To prevent economic blackouts, the dual Ore Silo keeps the game going until a team decides to take them out... If that occurs, an economic blockade becomes a real threat, and this is how you're most likely going to win the match. So first you complain that the map is too big, and then you're asking why some space is inaccessible by normal means? You're weird. Siege once offered about double the available play space than it currently has. The castle roof and interior access were axed in order to trim down the map. A lot of play space got axed to leave mostly only the relevant play space. Initially a bonus area (map secret) made the cut, but was eventually also axed. All this axing was for this triple purpose: To utilize a smaller development budget. Creating assets to occupy space takes time. To improve performance, less areas to render means more frame rates. To streamline the map, so that players do not get lost in areas that have no meaningful impact to gameplay. The purpose of APB is to destroy the enemy base, not to play hide and seek. Adding more space simply isn't an option unless gameplay changes demanded it... In Siege's case, that is unlikely unless @Pushwall gets drunk one night and decided, in blood, that Siege needs Naval combat, for... reasons. As for ghosts... They are a byproduct of inhaling toxic gasses. You don't actually believe ghosts exists? Man up soldier, and go inhale those gasses of illusion! I happen to enjoy a good rain, especially during these hot summer days. Weather helps set the mood in a map to be sure, but rain being a cause for depression? You must be of fragile mind to get depressed by some water. You'd best avoid places like, you know, lakes, oceans, even your home water tap. A common point of feedback in APB is uninspired or identical base layout design. While the Allied base on Siege isn't really special, a bit more work went into the Soviet base layout. The result of attempting to make it stand out was the lowered War Factory, expanded base tunnel, and compact building placement. The helicopter landing pads are an extension of that idea, and makes Soviet aircraft climb while clear from the base (you don't take off in an aircraft near a building, typically, due to the hazards caused by flight malfunction), and further more, the outward layout serves as a supportive extension for an adjacent Airfield, should that be enabled on the map. Naturally I'd have put more detail into the map, but even with visibility culling, the performance is absolutely pushing the current limit of W3D. Either way, if people truly wish to remove the map, then it is for @Pushwall to decide. I delivered the level, and he maintains the entire APB project. Suffice it to say, Siege was my last "new" contribution to APB. The upcoming HostileWaters revamp is my final contribution, it always was. I feel that I've lost touch with what players of W3D games want, and it'd be a waste of my limited time to continue creating undesired assets. Whether or not this will also mark the end of my working with W3D entirely is still up for me to determine.1 like
-
You know, we did have a poll on whether it should be removed from rotation a while back. Seems pretty clear cut to me. But this isn't a problem with other maps of the same size because... And due to the two ore silos, that hardly matters. I remember a game where the Allied OT was being constantly wrecked and everyone could still afford hordes of longbows. It's less a question of size and more how far the ore fields are from base (but again, two ore silos makes that less relevant). Ridge War's Allied ore field is within kissing distance of the refinery, that doesn't make it a tiny map. You're thinking of the wrong map, but I hope you can model, texture and rig the ghost medieval soldiers then. I can think of more convincing reasons why rain might be a problem (like slowdown) and the "psychological effect" doesn't seem to be an issue with the 5 other rainy maps. I've always wondered what the deal with that was myself, let's let the mapper answer that.1 like
-
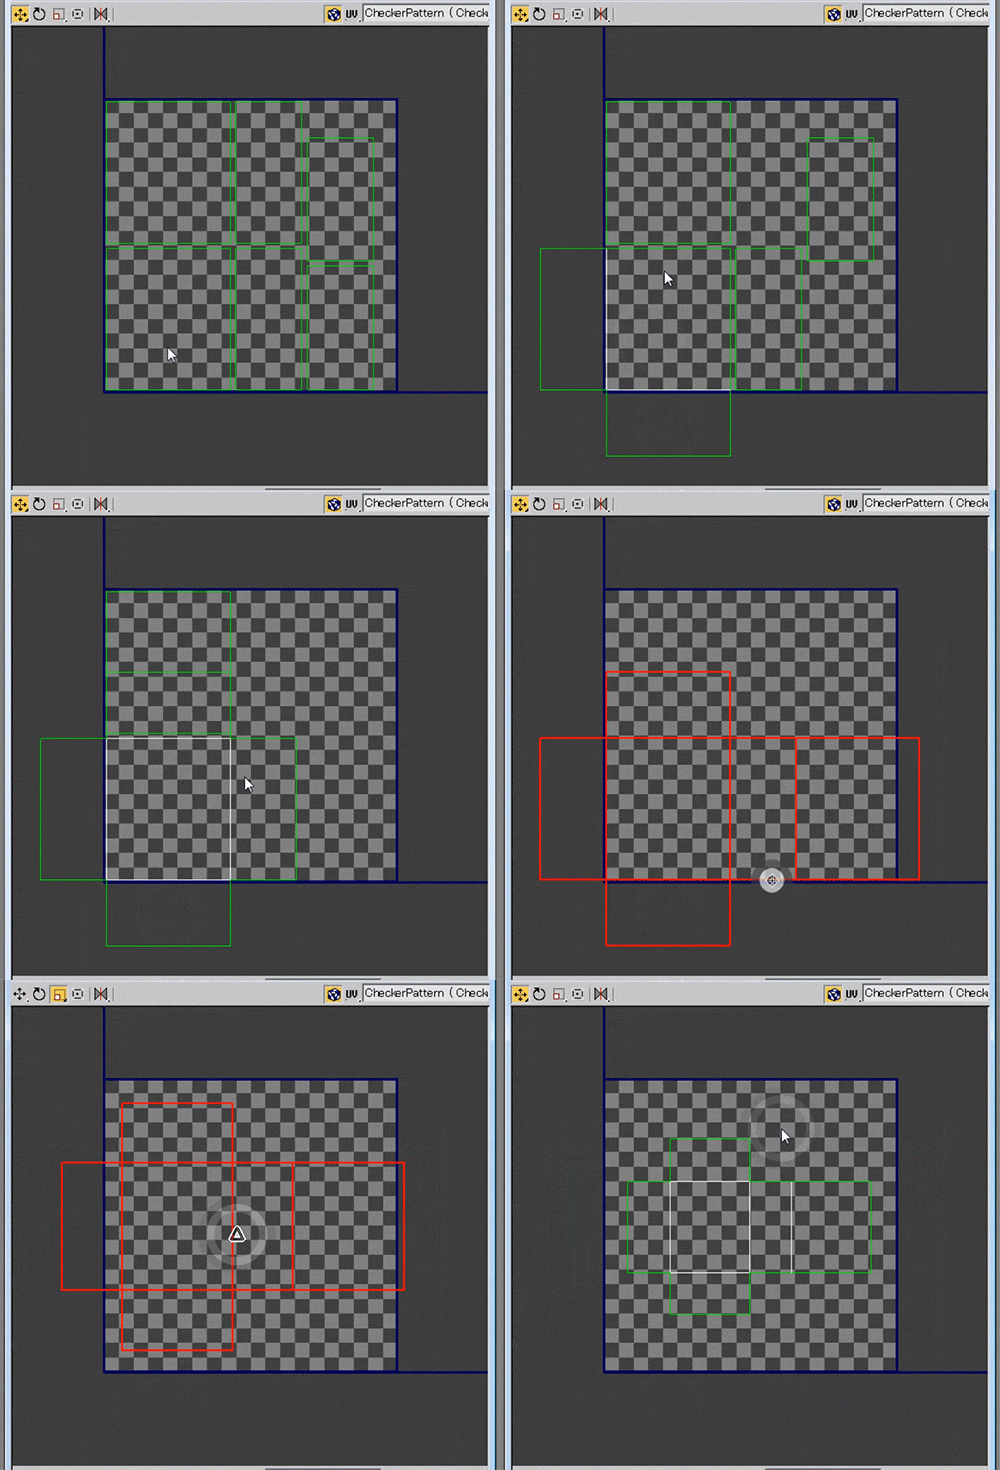
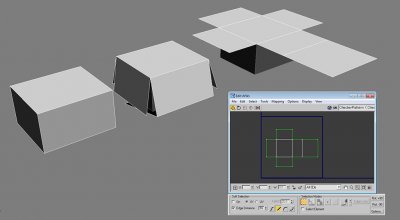
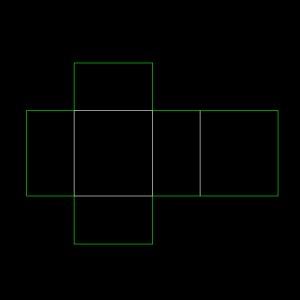
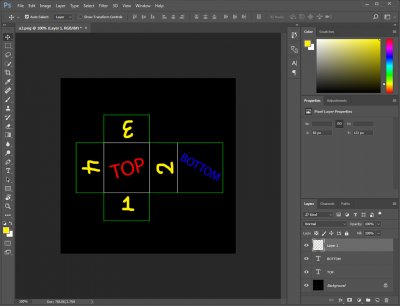
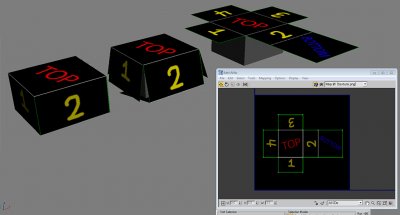
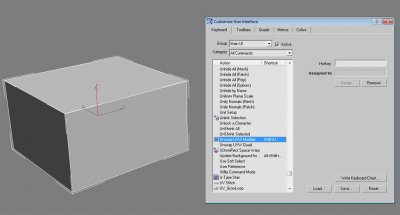
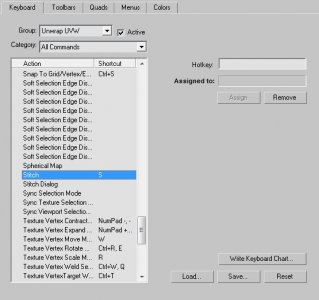
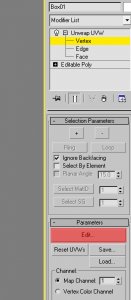
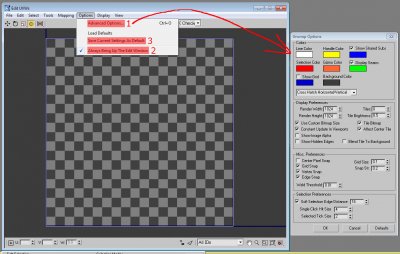
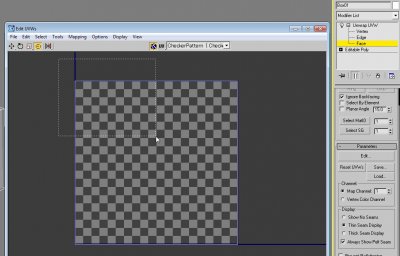
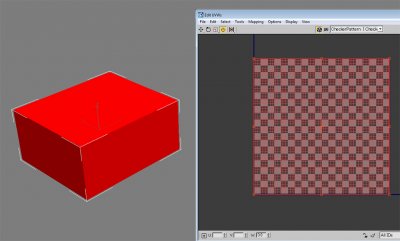
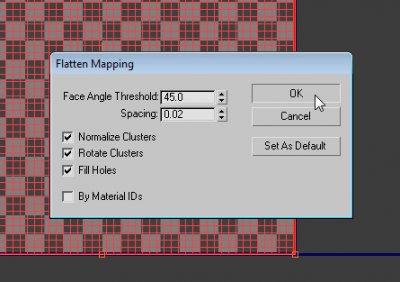
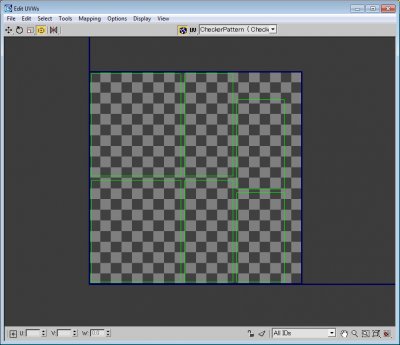
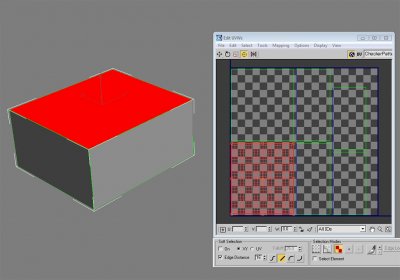
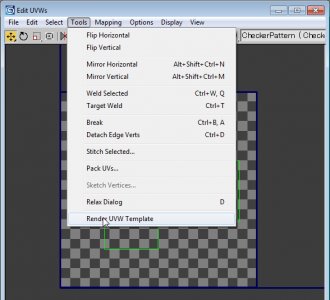
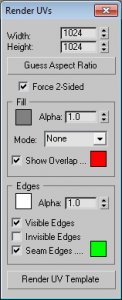
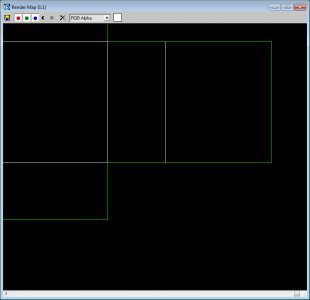
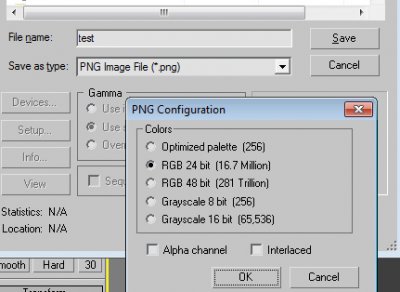
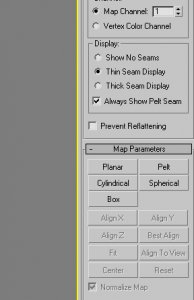
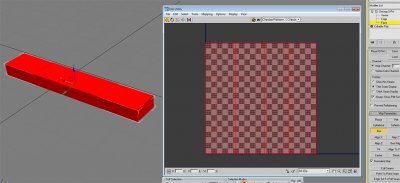
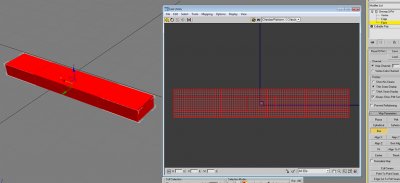
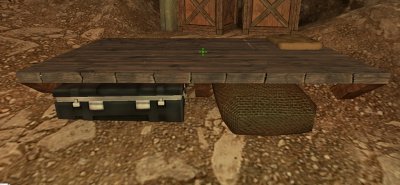
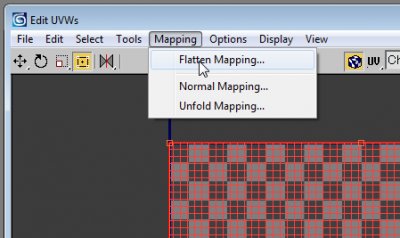
So you've modeled an object. It's probably gray or some assortment of solid colors, and if you're reading this, what you're likely wanting to do is apply stylized texturing to your object using Photoshop or some other 2D imaging program, and you either don't know how to do that yet or want to learn a few more tips to up your game. If you would rather watch a video tutorial, use this: https://w3dhub.com/forum/topic/414495-uvw-unwrapping-101-with-owa/ Otherwise, read on! This tutorial assumes a solid basic understanding of 3DS Max 8, and I will use "Photoshop" to mean whichever 2D imaging program is applicable in your case. Before we go through the tools and buttons, it would be good to provide a general outline of unwrapping and its process. I suppose the easiest way to explain it is to compare your object to a Christmas present. Imagine it is a box shape that already has wrapping on it. The wrapping is white paper and doesn't have any color on it, so you need to unwrap the present, put the wrapping on a flat table, color it, then wrap it back onto the present. The same principle applies no matter the complexity of the object. Every polygon needs to be able to be laid flat across the table. Sometimes this involves cutting parts up, which is where we get seams (useful on a lot of angular, manmade objects), and sometimes this involves slight texture stretching if seams are to be avoided (more organic or fluidly-shaped objects). The image above illustrates the principle of unwrapping a cuboid and what that unwrap would look like in the UVW edit window. The blue box in the UVW edit window indicates the boundaries of the square texture file that you will see in Photoshop. What is seen in this window can be rendered to a PNG file that will be loaded as a background layer in Photoshop, which can then be painted on. Here it is, with the texture brought back into 3DS Max. For W3D projects, the texture file would be saved as .dds and applied as a W3D material. Obviously, the UVW template background layer would also be hidden so as not to show the lines of edges and green seams in the final product. Now, HOW to do the unwrapping in 3DS Max? Glad you asked! Because of how often I do this, I set up a keyboard shortcut and I recommend you do the same (assuming you haven't imported chopbam.kbd previously, of course). Set Unwrap UVW Modifier to Shift U. Also set stitch to S. Now select your object and press Shift U. Being as familiar with 3DS Max as you undoubtedly are, you will notice that it created a modifier. Expanding this modifier you will see "Vertex," "Edge," and "Face": modes that are similar to the subobject modes in the Editable Poly mode. You can press 1, 2, and 3 to cycle through Vertex, Edge, and Face, and press the same button again to go out into the general Unwrap UVW modifier. Press "Edit..." to bring up the UVW edit window we saw above. You'll want to generally always have this window open while doing your unwrapping work. ***For future reference, the UVW unwrap you see in the window by default would be the result of any unwrap if you select all and hit "Planar" in the command panel. There is an invisible eye in the sky that looks straight down on your object on the Z axis and throws a normalized (stretched to fit the blue square) version into the UVW edit window. Unless you're unwrapping a flat plane, this is not the look you'll want in the end, but it's just the default view. These are the options I use. Sometimes things change based on the need. You'll definitely want the render width and height to match your planned texture resolution. I "Always Bring Up The Edit Window" because unwrapping is useless without it, and it saves me the step of clicking "Edit..." every time. "Save Current Settings As Default" saves me time later, since I like my preferences and don't want to have to set them every time I apply an Unwrap modifier, which is very often. Let's move forward into actually unwrapping. With face mode selected, you'll want to select all your faces. By default, all the polygons are normalized/stretched to fill the UVW square. Draw a box or Ctrl A to select all polygons. You can also select your polygons on the model itself, but keep in mind "Ignore Backfacing" is enabled by default, so unless you uncheck that box in the "Selection Parameters" rollout, that method will only select polygons facing you in the viewport. There are a bunch of ways to tell the program how exactly to cut up your 3D model's wrapping and flatten it onto the table, but the way I'll show you right now is to go to Mapping -> Flatten Mapping and hit OK. Here is the resulting unwrap for me. Find the top. In face mode select the top of your object so you know which poly that will be in the edit window. Now in edge mode, select the edges of the top and press "S" to automatically stitch the polygons on the corresponding sides. You'll see in the GIF below that I'm quickly switching between move and scale, and I'm doing that using the W and R keys. E is for rotate. I don't remember if these are set by default, so you may need to check your options. Note: If selecting individual subobjects isn't working right, and it's selecting the entire element, try unchecking "Select Element" on the panel docked below the edit window. Tip: Unfold mapping might do this automatically for you with a box, but I did flatten mapping to show the principle of stitching, which is a real time saver with more complicated objects. Now to render this out as a UVW template to get into Photoshop, go to Tools -> Render UVW Template. It will only render inside the blue square. The main thing is to make sure Width and Height match the exact texture resolution you want to use. For W3D projects, we use 512*512 for small objects, 1024*1024 for medium objects, and 2048*2048 for high resolution, newer objects like APB's redone vehicles. Keep in mind you can also use multiple textures for your object, so that'll require multiple UVW templates. Once you hit render, you'll see your render map. If it's a bit larger, it'll be scaled down by default but you can use your mouse wheel to zoom in and examine your beautiful UVW template. Save UVW template and I usually just save as a PNG. Alpha not really necessary since it's used as a background layer. Now you can work with the layer in Photoshop. Put other layers on top of it. If you set them to "Screen" or "Lighten," you'll always be able to see the UVW template through your drawn pixels and use them as a guide for where your poly edges are. For more complicated objects, flatten mapping might not always be the way to go. You'll see there are a number of map parameter options in the command panel. You can use them as alternate ways to project UVW coordinates (the term I use to denote the connection between the polygon itself and its 2D counterpart in the unwrap). These tools are for more manual work. Select the faces you want to set UVW coordinates for, and then go to work. Each tool is self explanatory. Planar acts as an eye that looks on the X, Y, or Z direction (depending on which button you press). Cylindrical works well for cylinders. Box does guesswork and lays a good groundwork for stitching, in my opinion. A few tips. 1) Always uncheck "Normalize Map." This will stretch and distort the texture to fit exactly into the square edges, and you don't want that. You want uniform scaling. Whenever I uncheck it, my polygons and elements in the edit window get really huge. Make sure to scale them down later. On this long plank, that will mean the difference between: and You will see that in the first image, the long plank is forced into a square, whereas the second image, the UVW polys are much more consistent with the shape of their object (and that the UVW elements are HUGE). I usually wait until everything's been mapped to scale down, so all my elements get scaled down uniformly. If I scale a pipe down, but not as much as the thing it's attached to, they will have different texel densities, or resolutions, and look inconsistent. 2) Maximize your UVW space. Try to eliminate as much negative space as possible by filling up the blue square with UVW elements. Otherwise you will end up with unnecessarily wasted texture space that goes into the game. 3) Provide sufficient texel density. Pretty much a no-brainer, but probably should be covered anyway. Make sure your texture has enough resolution to actually look good ingame. If elements are small, obviously they won't need as much texture detail. If elements will be large and close up ingame, you will want them to have more texture detail. 4) Use unwrapping to fix existing errors. If existing stretching needs fixing, or seams don't look quite right, or you want to rotate that wooden plank so it's going down the board (example below), you can use an unwrap modifier to fix it. Something like this would be fixable by opening the edit window, selecting that face, then using the rotate and move tools to put it into its proper place. Further tweaking can be done to the individual UVW vertices. 5) If you collapse your modifier stack, you can always get your unwrap data back later by applying another modifier with Shift U. It even saves multiple channels. If you applied a UVW map modifier to terrain but wish to fix just one spot, collapsing the stack and then applying a UVW Unwrap is for you. You can look in realtime as you adjust vertices in the Edit UVWs window and see how it's affecting the texture in the viewport. 6) If you're wanting to show your texture in the Edit UVWs window, click the CheckerPattern dropdown near the top and select your texture (assuming it's been applied through the material editor). You may need to Reset Texture List to get it to show. 7) Check out the Tools available. In the Tools dropdown, see what else you can do, from welding to mirroring to breaking vertices to relaxing, it's all there and extremely useful. Play around with it and see what you can do! You've probably also noticed the buttons for Saving and Loading UVWs, which do seem to work as expected. If you save UVWs out to a file, you can Load them into a different Map Channel. I hope this tutorial has been helpful! Write here if you have questions or comments or tutorial bug reports and I'll do my best to answer or amend any issues.1 like
-
1 like
