-
Posts
5,437 -
Joined
-
Last visited
-
Days Won
121 -
Donations
60.00 USD
Content Type
Profiles
Forums
Events
Documentation
Bug Tracker
Downloads
Everything posted by moonsense715
-
Author: moonsense715 Skill level: 3 This video tutorial will show you: How to rig a Tracked Vehicle in 3ds Max for W3D. This includes making the track texture animate. How to add it in LevelEdit and set up its physics. How to add the vehicle to the War Factory purchase list. Watch in HD!
-
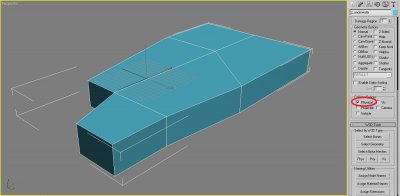
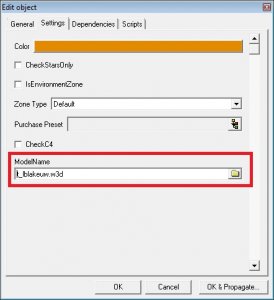
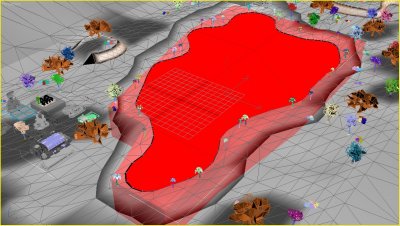
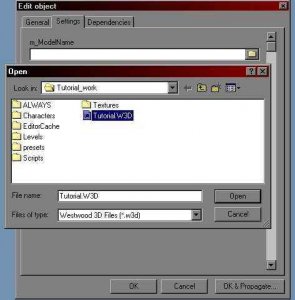
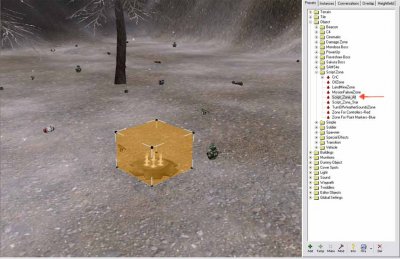
Author: moonsense715 Skill level: 2 This tutorial will show you how to create a custom shaped script zone because inside LevelEdit you can only create box shaped ones. In Reborn, this technique is used to define underwater zones and areas where Sub-APCs and Devils Tongue vehicles can not dig/surface. 1. Create the zone model Launch GMax-RenX or 3ds Max. Create a model that will be the shape of your script zone. It must be a convex shape. The faces can look inwards or outwards it does not matter. Here's mine: Tick Physical at Collision Options (Utilities tab -> W3D Tools). If your custom shaped zone is map specific, you must position it perfectly in 3d space to where it should be on your map. For example, I made an underwater zone and positioned it at the lake: Now export this single zone model (hide/delete everything else in the scene) as W3D format, Terrain type. 2. Add the zone in LevelEdit In LE, browse down to Object -> Script Zone, and Temp that or any other zone you prefer to copy initial settings from. Name it then switch to the Settings tab. Browse your script zone's model at ModelName and point it to the zone w3d file you just exported: The rest of the settings is up to you, along with the scripts tab if you wish to add extra script effects. Note that if CheckStarsOnly is enabled, the zone will only affect players and not bots. Up to you to tick it or not. Hit OK to finish creating/modding the script zone. 3. Placing the script zone Place the script zone by clicking Make. Set its position to the origin of the map by double clicking on the zone, going to the Position tab and changing the x, y, and z positions to 0. Then click OK. You don't need to change its rotation or size, the shape that appears when you hit Make will be replaced by the custom shape you created earlier. Have fun with your new custom shaped zone Note: from engine version 5.0 onwards, custom shaped script zones can be moved away from the origin (0,0,0) world location. This means they can be proxied by buildings and are not restricted to be exported individually on every map when buildings want to use them.
-
Here's a bunch of mods: http://web.archive.org/web/20090125062346/http://ren.game-maps.net/index.php?action=category&id=74 It's on a webarchive only though so you can't download any of them
-
Granted but now you have to work/spend time at school 14 hours per day and your body requires another 14 hours to regenerate at night. I wish houses/flats cleaned themselves.
-
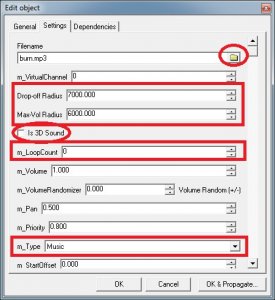
Author: moonsense715 Skill level: 1 This tutorial will show you how to add an mp3 format music to your level. 1. Add the music to the preset tree If you wish to use a music that is already on the preset tree, skip this step. Grab your mp3 music file and copy it into the LE folder of the level you want to add it to. Now start the Editor and browse the preset tree down to Sound. Click that and hit Temp. Name your sound preset to whatever you like and then switch to the Settings tab. Now browse your sound file from your project's folder. Make sure that Max-Vol and Drop-off Radius are really high values, and Max-Vol is always smaller than Drop-off Is 3D Sound is ticked OFF The m_LoopCount is 0 so that it will repeat m_Type is Music Here is an example settings page set up for music: Click OK and the music should appear on your preset tree. 2. Place the music on the level Click the music preset you wish to use (e.g. the one you just created) and hit Make to place it anywhere. (If you've set the Max-Vol and Drop-off Radious values on the preset high enough you can place them almost anywhere and everyone will still hear it. If those values are low, the music won't be heard from a longer distance away from the position you placed it.) Yes it's that easy to place the music, that was all. 3. Finish Export your map as mix/mod package and play it ingame. You should hear the music. Q & A Q: Why do I have to do all this, when Edit -> Background Settings has a Music tab where I can simply add one? A: That only works on single player maps and/or if you are the server/host. Other players in multiplayer will not hear the music if you set it up like that. Q: Help! My music is not repeating! A: Try importing your music into Audacity (free sound editor software) and reexport the music as mp3 from that. If it still doesn't work, change Options to export it at 128 kbps, that should work for sure.
-
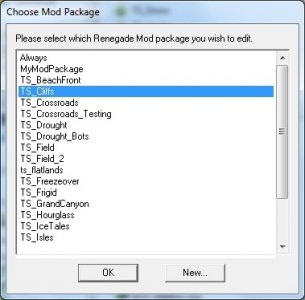
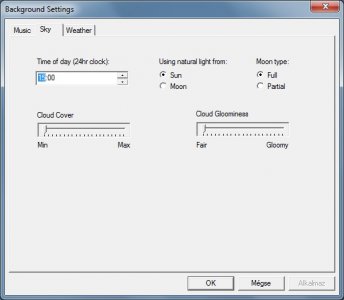
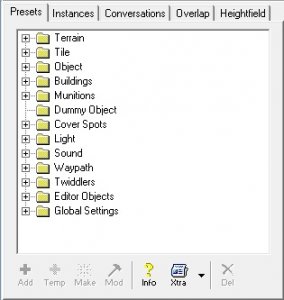
Author: moonsense715 Skill level: 1 1. What is Level Edit? Level Edit, also known as Commando Level Editor is an extremely important modding tool for the W3D engine. With it, you can manage all the assets imported from GMax-RenX/3ds max, give weapons to units, set up buildings, animations, scripts and so on. Secondly, what most people use it for is to set up maps/levels with it, hence the name Level Editor. That includes adjusting day and night, music, ambient sounds, snow or rain, placing base defenses, creating harvesting/mining zones just to name a few. 2. Choose Mod Package When you launch Level Editor, it will always ask which Mod Package you want to work on. It basically asks which unique workspace you wish to start editing, something that is present for every level and mod. These are folders on your hard drive in which you can place files specific to that mod/level. For example in TS: Reborn, there is a package called TS_Drought. If you start that and open the level file within, the terrain is loaded, building logic is activated on the (otherwise bare) building meshes, shadows are generated, etc. How to name your mod package If you are making a standalone, full conversion mod, it is necessary to have a project folder called Always where you put all the models and textures into, and define not map specific data, such as the Health/Armor and the weapon of a rifle soldier, the strength of its weapon, etc. This data will be shared between all maps that belong to this full conversion mod but that information goes beyond the purpose of this specific tutorial. When you just make a simple level, first check the name prefix each map has in the game you make it for. For example if you make a TS: Reborn map, the prefix is 'TS_' without the quotes. So for example, this is a valid map name: TS_Mymap.mix. If you don't use the prefix tag but still save it as a .mix map, it will not appear on the maps list you can choose from when you try to test it on LAN. If you create a special mod package but not a standalone, full conversion game, you can name it anything but export from Level Edit as mod package with the extension pkg. Here's an example package list from TS: Reborn: 3. The interface Let's go through some of the basic elements of the Editor's interface. The upper bar File Under File, you can clear the stage by New, load a previously saved level with Open, Save as/Save your current level, Save presets (used by an Always project and Mod packages) and Export to Mix/Mod Package, which will ask you to export your level/mod to a game's Data folder. This is very important, everything exported by the Editor has to go to the Data folder of any game! Typical usage: When you are done editing your level, save it and then export as mix to make it playable ingame. Edit Usual commands such as Copy/Paste/Undo can be found here. (Copy-pasting is used for objects you select in the scene.) The most interesting part here though, is Background Settings The Sky and weather tabs speak for themselves. Play around with them to see how they change your level's atmosphere. The Music tab is used for Single Player/Skirmish maps, do not use it for Multiplayer. At Level Settings, the most important and used thing is the Allow Flying Vehicles checkbox. If you have Helipads or other flying Aircraft that can be purchased by the players, this must be ticked! Note: this tickbox does not do anything from scripts 5.0 onwards and can be ignored. Lighting The most used settings here are Edit Sunlight and Compute Vertex Solve. You can move the sun around with Rotation/Elevation or change the sun's intensity and projection color. Compute Vertex Solve will generate basic shadows on the entire map, based on the sun's and other lights' placement on the level. Make sure you always tick Check Occlusion. Strings The Edit Table option is what you will always use. Here you can give names to every object, unit, weapon, etc. and change the text displayed in the menus and loadscreens too. As an example, for any Infantry or Vehicle, under their Settings tab (after you Mod them), you should see "TranslatedNameID". Clicking that will bring you to the list of strings here and you can pick any to change the name that appears for players when they target them ingame. If you want to localize the game, you can do that here as well by changing/translating every single string resource. Strings get saved into ALWAYS > TranslationDB > strings.tdb. There are several other buttons on the upper bar but I will not talk about all of them in this tutorial. The sidebar Presets On the Presets tab you can find objects that you can place by hitting Make (after selecting said objects in the preset tree). You can also add new objects to the preset tree by hitting Temp if you are making a single level and Add if you are making a full conversion or a mod package. Go ahead and expand some of the Nodes and check what is inside them. See what settings invidual presets have by selecting them and clicking Info. Note: not everything is suitable for Make. For example, Terrain and Tiles are usually placable but as a counter-example Munitions and Global Settings should never be placed. When you are making a single level, it is usual that you click on Terrain, hit Temp and add your exported W3D format terrain to the preset tree under Terrain as a temp preset (this means it only belongs to this level and can be exported as mix correctly). Instances Instances are objects you already placed onto the level. On this tab you can browse the placed objects and go to them by double clicking them (alternative: click Goto) or delete them. The other tabs on the sidebar are used rarely so I will not go into them but I'll mention that you can create a Heightfield map on the Heightfield tab (this is not recommended when making a Multiplayer map as Heightfield maps are not optimised and Undo does not work while editing it). That's it for the basics of the UI. 4. Camera navigation You might ask: "This is all very nice but my camera is still floating high up in the air! Help!" So let's talk about 3 ways to move around a level. Default camera mode You first need to enter this mode by hitting that button or F5. How to use it: Left-click and drag to rotate your camera. Left AND right-click drag to Pan around. Right-click and drag to zoom in/out. That's all there is to it. Selection orbit mode If you have something selected (in object manipulation mode, F6), you can switch to this mode by clicking the button or hitting F7. Now you can rotate your camera around the selected object with your mouse. Walk-thru mode Hit F8 or click that button to walk around the level as an infantry unit. If clicking the button does not do anything, hit ESC and click it again. Repeat until it works Note: looking up/down is reversed in Level Edit compared to ingame. Note2: if there is no Walk-Thru character preset set up under Object -> Soldier and you enter walk-thru mode, the editor will crash. This is because the editor is using this specific preset to enter this mode. Numpad-navigation The best navigation mode in my opinion is this. You need a numpad for it of course and make sure Num Lock is ON. If none of the number keys do anything still, click on the scene first. What each number does: 1 - move downward 2 - move backwards 3 - turn downward 4 - turn left 5 - reset camera to look forward 6 - turn right 7 - move upward 8 - move forward 9 - turn upward This will all actualy make sense once you start using them. Important: keep pressing CTRL to triple the speed of moving/turning with the numpad! It is very useful! 5. Moving objects You can move objects around in the Editor that you placed previously using Object Manipulation Mode (F6). Navigate to the object, select it then drag around to move it to the position you prefer. By clicking X, Y or Z, you can move it in that specific direction only. The red pyramid button, when enabled will position your object at your cursor by placing in on the ground under your cursor. This will only work if there is mesh under your mouse which has physical collision. To rotate an object, make sure Z is on and right-click drag. If Z isn't on, your model will rotate in stupid ways but you can undo that mistake under Edit. Alternatively, you can double click an object, switch to the Position tab and set the position/rotation to a specific number there. Note: terrain objects are not movable unless you tick Terrain selectable under Edit. And that is all for this Level Edit introduction. I hope you learned something useful from it. I recommend reading some other tutorials to create a new level and play it ingame ASAP!
-
The nod commando sunglasses still look like sleep-glasses. Can that be changed please?
-
Looking good! Reminds me that the Harvesters' lights aren't turned on, oh well. If you don't behave yourselv I will hire you
-
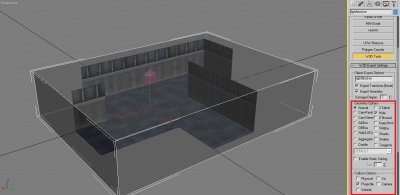
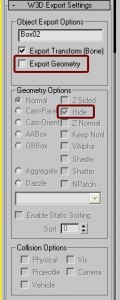
Author: Oblivion165, moonsense715, Jerad2142 Skill level: 2 This tutorial is designed to help you get better Lighting out of your buildings, or anything really. I'm sure you can see the difference. To accomplish this, simply make a box around your entire model. (Make sure you cut holes on the box so that it does not clip through any exiting corridors or you'll have projectiles/ammo get blocked on it!) Next, copy the W3d settings seen in the picture, and export. When you get in LE, generate a light solve, and you should have great lighting.
-
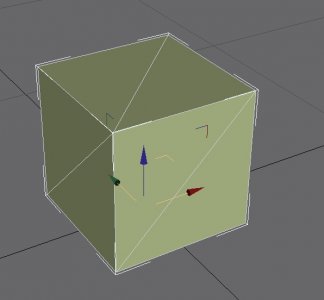
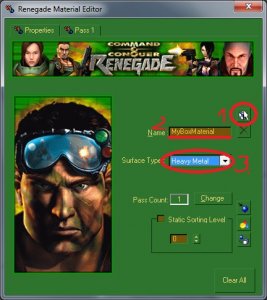
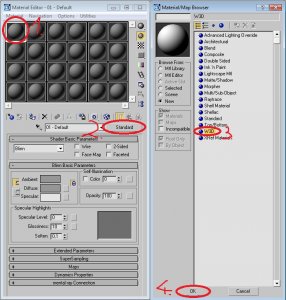
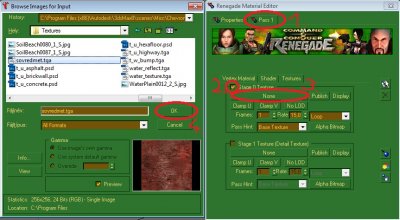
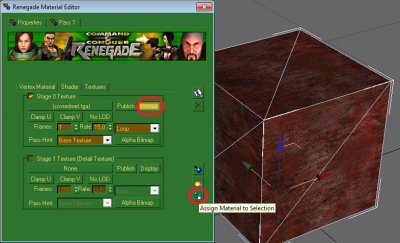
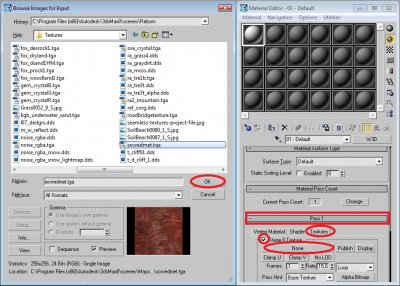
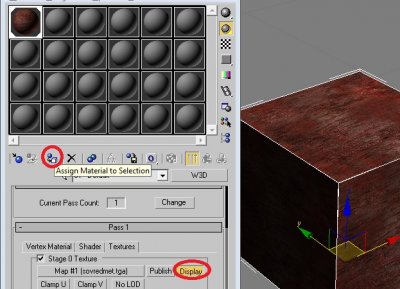
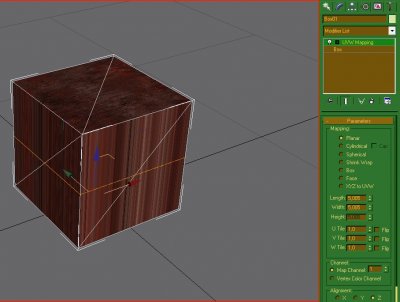
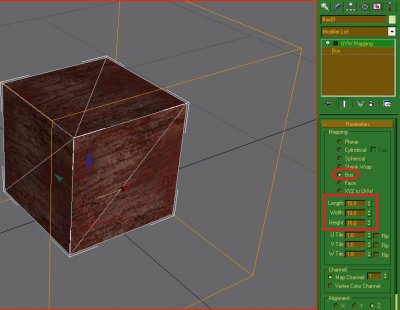
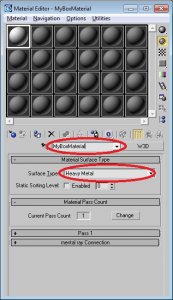
Author: moonsense715 Skill level: 1 This tutorial will show you how to apply a very simple texture to an object that the W3D engine can recognize using W3D materials. 1. Get your model Open GMax-RenX or 3ds Max. Create an object if you don't have one already. I created a box. 2. Apply the texture Select your object and hit "M" to bring up the material editor. In RenX Now if you are using RenX, click the Make New Renegade Material button, name it and select a surface type: Switch to the Pass 1 tab, tick Stage 0 Texture and click on None. Browse for a tga texture file you want to use and hit OK. Click Display to make the texture appear in the scene and click Assign Material to Selection (make sure your model is selected when hitting that button) Now close the material editor by pressing the X button in the top right of it. In 3ds Max If you are using 3ds Max, click on any material slot, click Standard and choose W3D and hit OK. Then name the material and at Material Surface Type, select a Surface Type from the dropdown. Expand Pass 1 if you can't see it and go to the textures tab. Tick Stage 0 Texture and click on None. Browse for a tga texture file you want to use and hit OK. Click Display to make the texture appear in the scene and click Assign Material to Selection (make sure your model is selected when hitting that button) Now close the material editor by pressing the X button in the top right of it. 3. Optional: Apply a UVW Map Modifier The texture might be stretching on your model or maybe you want it to repeat on the model. In this case you can use the UVW Map Modifier. With your model selected, apply the modifier. If you have a box model like me, your texture will suddenly stretch REALLY bad on your model, like so: That is because the Mapping parameter of this modifier is set to Planar. You can see the shape of the texture that is getting applied to your model with the orange shape that surrounds the model now that you have UVW Map Modifier on. Set it to Box and change the Length, Width and Height parameters to anything you like. I've set them all to 10. And that's all. Congratulations! You just applied a texture to your model!
-
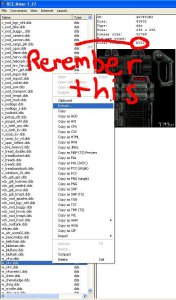
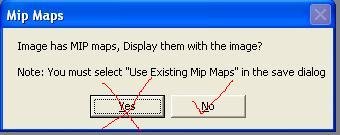
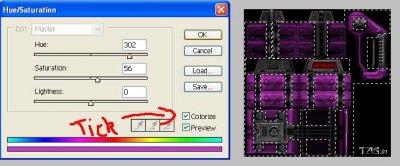
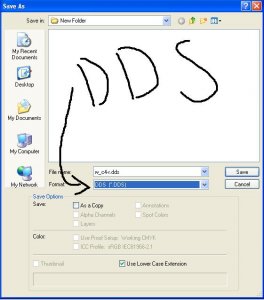
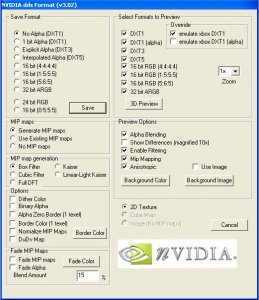
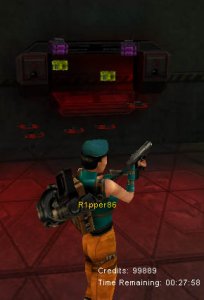
Author: Ripper86 Skill level: 1 This tutorial will show you how to modify a texture of any ingame W3D model. 1. Get the texture Extract a texture file (dds) from the always.dat file found in the Data folder of any game. I`ve chosen w_c4-r.dds, that`s Third person Remote C4 in Renegade. Important thing to remember, the pixel format, pending on what texture you mod it will change. Game objects will usually be DXT1, hud objects will usually be DXT5. 2. Modify the texture Open the file in Photoshop. On the popup asking to load Mip Maps, click no. Edit your texture to your taste, the easiest thing I do is change the Hue/Saturation. If you are doing this, use the marquee select tool to select what you want to change, then go to Image > Adjustments > Hue/Saturation, make sure you have Colorise ticked. Pick a colour using the hue bar then tweak the colour using the saturation bar and if needed the brightness bar. I have chosen the "Pimp" purple. 3. Save the texture Go to File > Save as Make the file save as a DDS and click save. Remember that important thing I told you to remember? now we`re using it. If it was DXT1 follow these options and click save. If it was DXT5 change save format to Interpolated Alpha (DXT5) and save. 4. Finish Now put your DDS file in your game's Data directory. This makes the engine use your new texture file here instead of the one in always.dat. If you want to use the original texture again, just move the file out of your Data folder or delete it. That`s it! Now the fun part, testing!! Heres my final result: Well I hope you learned something. Thanks for reading, Ripper86.
-
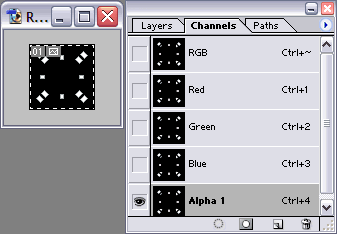
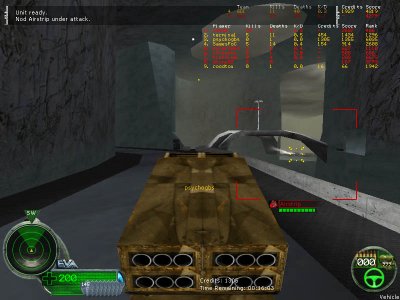
Author: Psychosis, Dayton Holt Skill level: 1 This tutorial will show you how to create your own reticle for W3D using Photoshop and its nVidia dds plugin (the plugin lets you save textures/images in dds format). 1. The first thing you do is to create a 64 x 64 pixel image. Now, draw your new reticle in black and white in the shape of a reticle, crosshairs, a dot, whatever, so it looks something like this: 2. Now, go to "Select" -> "All" (or press "CTRL + A") Go to "Edit" -> "Copy" (or press "Ctrl + C") Click on the "Channels" tab and at the bottom "Save selection as channel". The Alpha channel will appear, click on it go to "Edit" -> "Paste" (or press "CTRL + V") to paste your reticle into the alpha channel. (The alpha channel must be grayscale in alpha channel in order for W3D to get the transparency right, don't colorize it!) 3. You`re pretty much set. Now save your file as a DDS in the data directory of your Renegade/Reborn/Whatever game folder, make sure you save it as hd_reticle.dds, and make sure you save it as DXT5 with mipmaps. If the reticle you are making requires a custom center dot as well, create a new image file and do all the steps above the same except: Draw the center dot instead of the outer Reticle and the name should be hd_reticle_hit.dds. 4. That`s it basically. For a screenshot of the results:
-
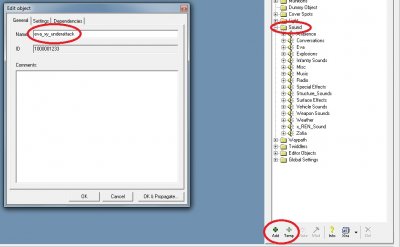
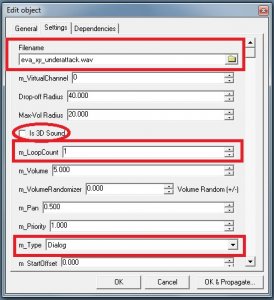
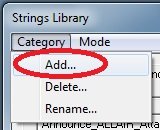
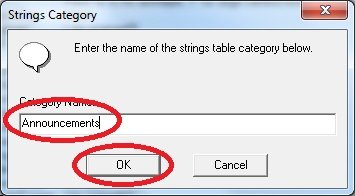
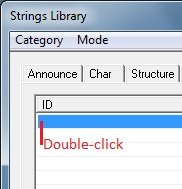
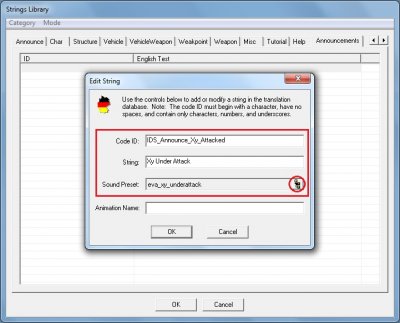
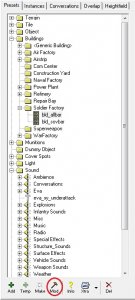
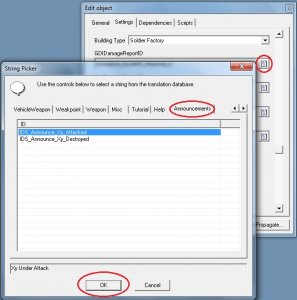
Author: moonsense715 Skill level: 2 This tutorial shows you how to add sound/text announcements to your buildings when they are under attack or get destroyed. 1. Creating the sound presets Open your Level Editor. On the sidebar Presets tab, click the Sounds "folder". Now click "Temp" if you are making a single map for an existing game or "Add" if you are making a simple mod/full conversion game. On the General tab, give your new sound preset a name. If you haven't done it already, move your under attack / destroyed sound files to your LE project's folder. Switch to the Settings tab and browse your sound file from your project's folder. Make sure that Is 3D Sound is ticked OFF The m_LoopCount is 1 m_Type is Dialog You can copy the other settings from this image but you don't have to touch anything else other than listed above. Once done, hit OK and your sound preset is complete. Do the same process to create a "Xy destroyed" preset. 2. Creating the string Find the Strings Editor and click it: Now you can create a new Category or use an existing one to add the new string to. I'll create a new one like so: In your chosen category, add a new string by double clicking an empty slot: Now give your string an ID. Then an actual text that will be displayed ingame when the building is under attack. Finally, click the preset browser button and browse your sound that you created in the first step so that it gets linked to this string. After done, hit OK. Your new string with sound is created. Do the same process to create the "Xy destroyed" announcement, make sure it has a different ID. If you want to have a different text or sound for the other team, you'll need to make additional strings (all the announcement strings can go into the same Category). 3. Link the announcement strings to your building Find your building controller under the Buildings "folder" and hit Mod: Switch to the Settings tab and scroll down to GDIDamageReportID (the GDI tag stands for team 1, and Nod for team 0 e.g in Apocalypse Rising GDI refers to Allies/Team 1 and Nod refers to Soviets/Team 0). Click on the String Picker icon and select your freshly created strings (find them under the category you used/created) and hit OK. Repeat this with the other 3 String Picker buttons to set up the Under Attack announcement for the other team and the Destroyed announcement for both teams. Press OK to close the edit object dialog. 4. Finish That's it, you have your announcements set up for your building! If this is a single map, export your map as a mod package and then rename it to .mix (or export as a mix but then you'll have to re-add strings.ddb from your project's \ALWAYS\TranslationDB folder to the map's mix file via XCC Mixer or RenegadeEx. Now get ingame and start wrecking it!
-
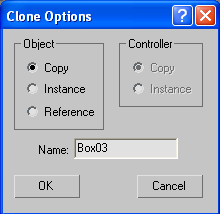
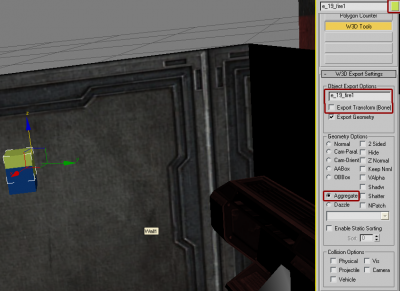
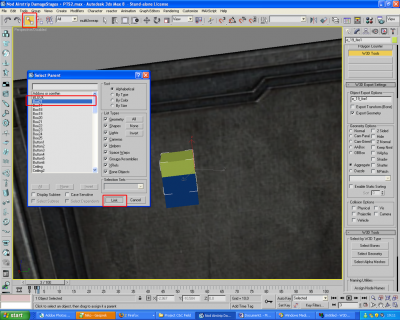
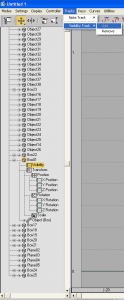
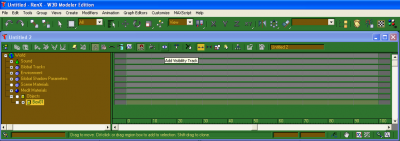
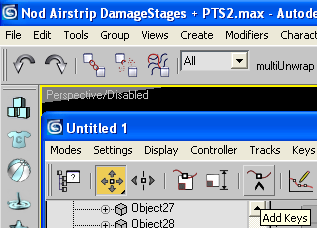
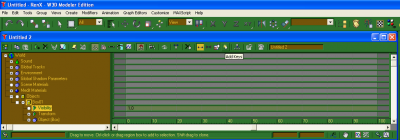
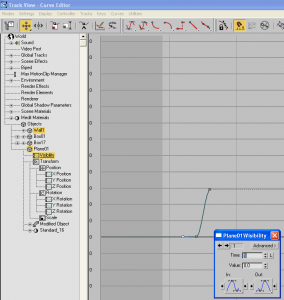
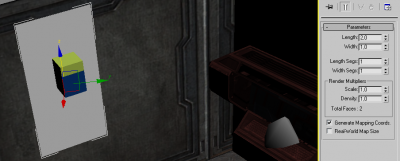
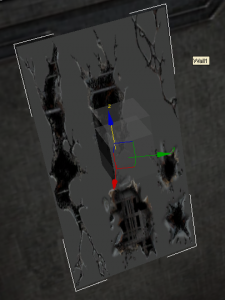
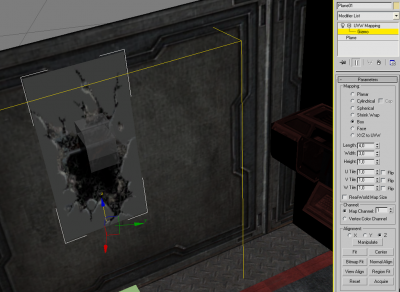
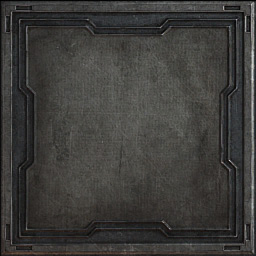
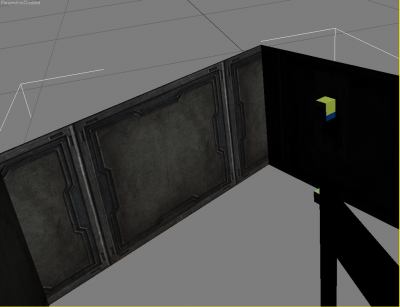
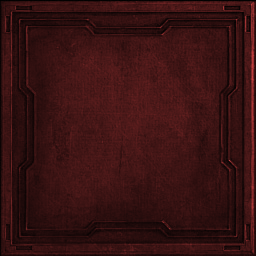
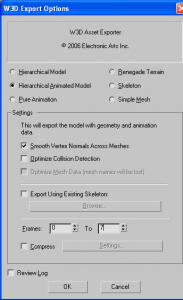
Author: Di3HardNL Skill level: 4 So you have made a building interior and/or exterior. But when you destroy it it looks exactly the same as first. What we are going to do in this tutorial : Add damage emitters to your building Add damage cracks textures to your building Change the texture (color) look when the building gets destroyed. In the Advanced Building Tutorial by Leaubi there was already explained how you could add damage emitters to your building, but it was not really clear how you could do it. My screenshots are shown in 3DS Max, but it works exactly the same in RenX. As sample I use my Airstrip interior. 1. Add damage emitters to your building This is very simple once you know how to do it. Create a box the size doesnt really matter but I use 0,3x0,3x0,3 Get this box in the position were you want to have an emitter for when the building is damaged. Select this box and go to W3d Tools First check the box Hide then Decheck the box Export Geometry Now clone this box (Tab Edit -> Clone) as Copy Name this box as the emitter you want to use. For example an existing emitter in Renegade e_19_fire1.w3d. First move the box a little up, replace its color so you can see difference between the boxes. Then apply the following settings Now link the box e_19_fire1 to the other box. Click the Link button then press H and select your box. In my case box01. Now you have an emitter set up. Now we must indicate when it pops up. Select your box (NOT EMITTERBOX) in my case box01. Then click on Graph Editors tab in top menu. Then click New Track View Now add a Visibility Track In 3ds Max like this : In RenX like this : Now you must select Add keys In 3ds Max / RenX: Now while Add Keys selected click anywhere in the graph track area. Click 3 times in different positions. For the first key select time 0 and value 0 For the second key select time 2 and value 0 For the third key select time 3 and value 1 (same screen for 3DS Max and RenX) The stock renegade buildings have 5 stages. Time 0 = 100 HP Time 5 = Destroyed Value 0 means invisible Value 1 means visible We selected for Time 3 value 1. So that means when the building is in the 3rd stage (nearly destroyed) the emitter will pop up. Now you know how to create an emitter and how to timeactive it for buildings! Down in this tutorial you will find how you have to export your building. Tip: If you want to use more then 1 emitter just select the 2 boxes and clone them again. The animation will be copied and it will keep linked to each other. The only thing you have to do is setting up the W3d Options (Tools) again. 2. Add damage crack textures to your building I simply use an existing crack texture provided by the makers of Renegade. It has an alpha channel which we need to keep. Open it in photoshop to see/modify it. its name is alpha_crack1.dds But you need a .TGA texture. HERE is the .TGA of it. If you want to edit it, make sure when you save it again save as 32 Bit, or else the alpha channel will be gone. Simply create a Plane with measurements 2 length 1 width. Place it as close as possible against the wall for your emitters (if you have any) Now put the texture on it, as we use alpha_crack1.tga now. You will see its kinda stretchy We can fix this by selecting the plane and go to Modifiers -> UV Coordinates UVW Map Select the following settings to have 1 crack. After you applied this settings select Gizmo And use the Move tool and use it by moving by the z Axis down. In materials of this crack make sure you set in Pass1 -> Shader -> Blend Mode : Alpha blend Now your crack texture is ready. For the trackview do exactly the same as we did for the emitter. So just scroll up and repeat the steps from Now we must indicate when it pops up Down in this tutorial you will find how you have to export your building. 3. Change the texture (color) look when the building gets destroyed. For this you need to have already existing meshes (wall, floor ceiling etc.) with textures applied. I use as a sample the wall i use for my Airstrip interior. This is the texture i use for the wall Open the texture in Photoshop and change its color. I use CTRL+ALT+U to replace colors. Result is this texture Now get back to your modeling program select your wall mesh and clone this wall, as copy. Now set your new texture to this clone. Now you have 2 meshes, but we have to indicate when they pop up again. You have learned how to use the trackview now, but these two meshes have different settings, since we want the new texture to pop up when the building is destroyed. Select the wall mesh for NORMAL texture and use the following settings in trackview: For the first key select time 0 and value 1 For the second key select time 4 and value 0 For the third key select time 5 and value 0 Select the wall mesh for DAMAGED texture and use the following settings in trackview: For the first key select time 0 and value 0 For the second key select time 6 and value 1 For the third key select time 7 and value 1 Thats it! Make sure all your meshes have Physical, Projectile and Camera selected. Now export as Hierarchical Animated Model Frames 0 To 7. Check out your result ingame. I have a video on youtube where i used these methods. Check it out here -> I hope I helped some people alot with this tutorial, if you got any problems send me a message or something! markreijrink@hotmail.com Happy modding!
-
Granted but I already changed it for you I wish I could finish the Airforce Command HQ interior in a day and make it look nice.
-
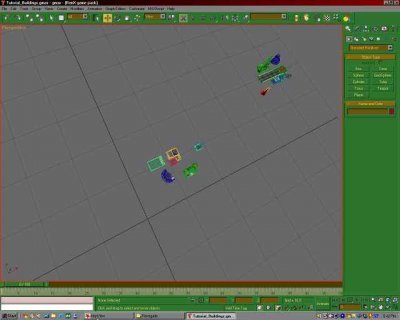
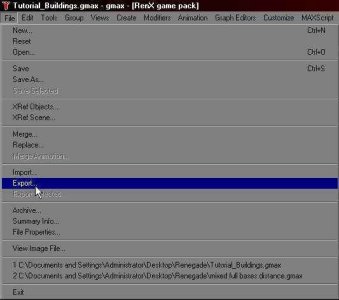
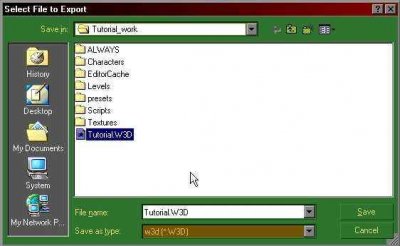
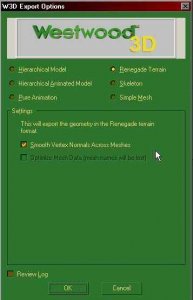
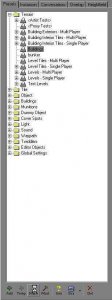
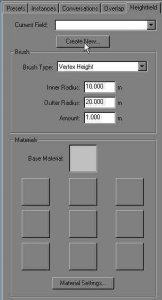
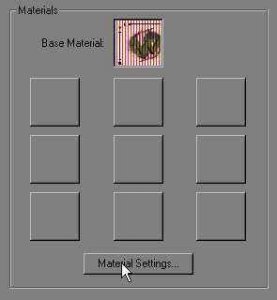
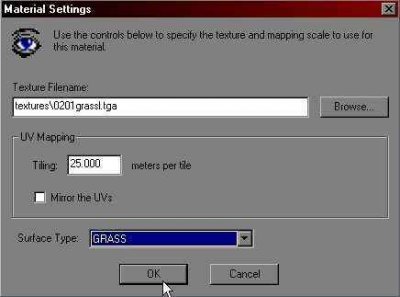
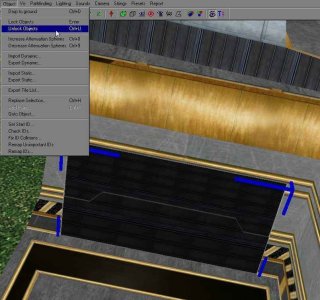
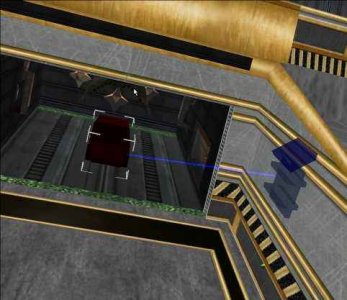
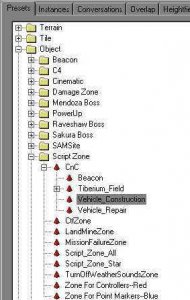
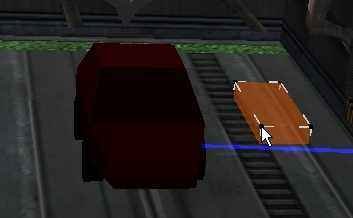
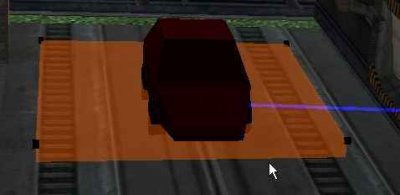
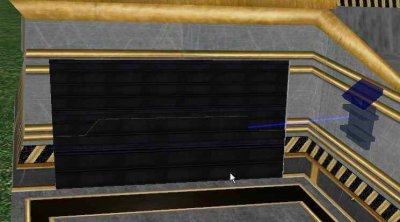
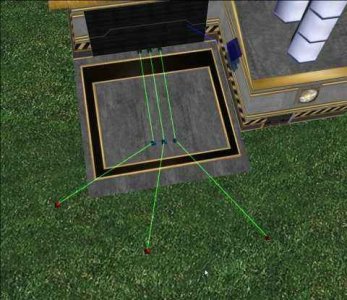
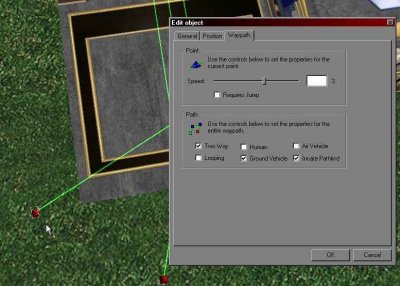
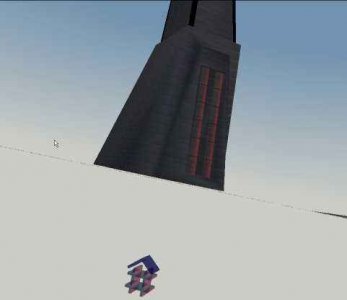
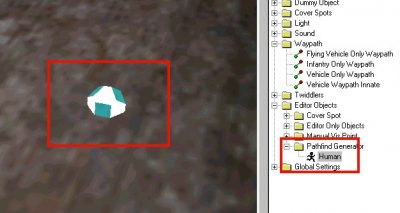
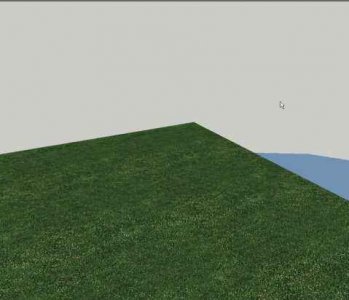
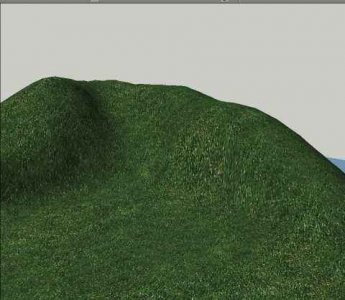
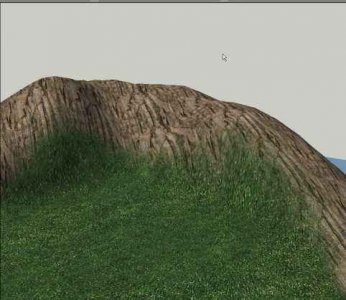
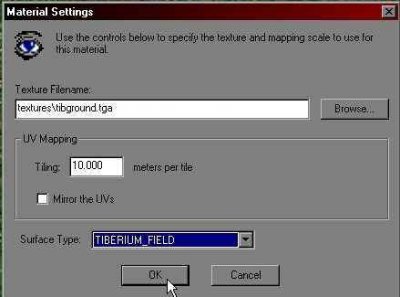
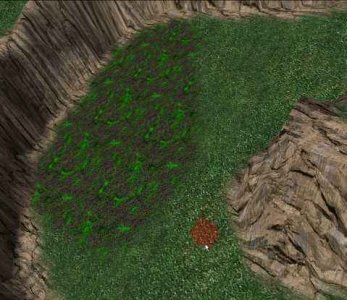
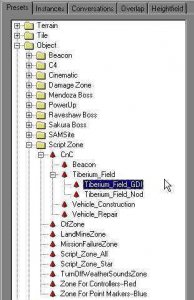
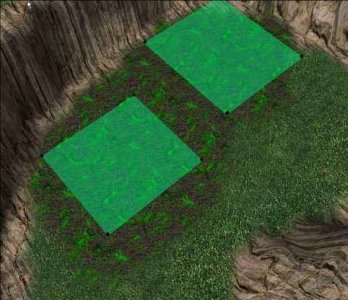
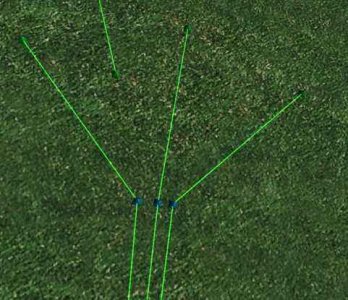
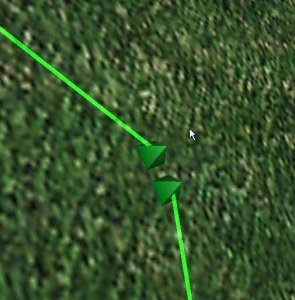
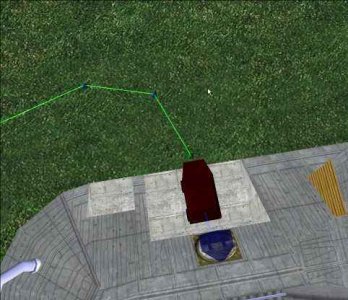
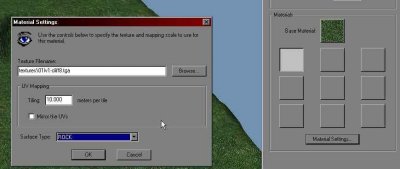
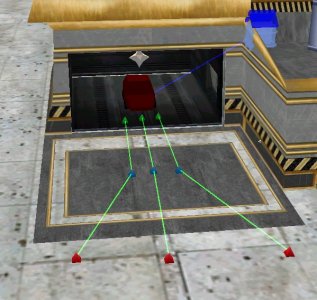
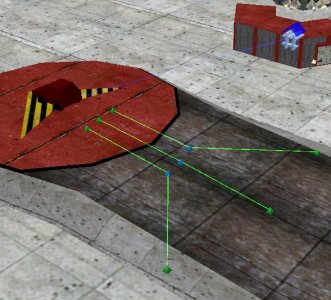
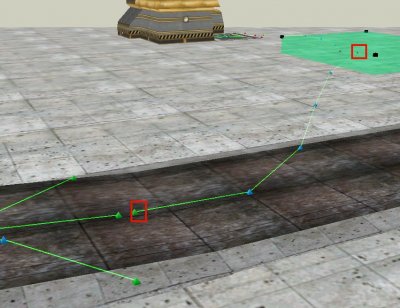
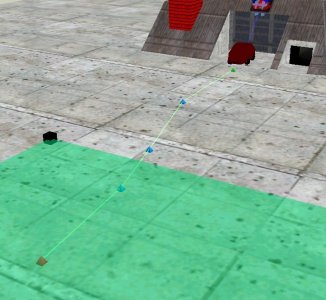
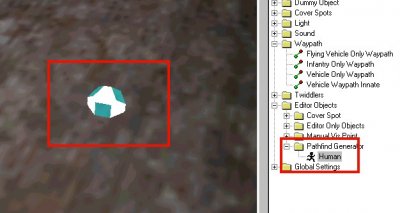
Author: Oblivion165, moonsense715 Skill level: 3 This tutorial will guide you through the generic steps to make a typical C&C mode map with buildings work. It does not cover how to model a map in GMax-RenX/3ds Max but does give an insight into Heightfield as an alternate way to shape a map. Placing your buildings To get buildings on your map you first need to position them in GMax-RenX or 3ds Max. For that you need to download the buildings. Renegade Buildings Reborn Buildings BROKEN LINK Merge them onto your map (File -> Merge, select the buildings, add to scene). It should look something like this: Now position them where you wish and modify your terrain around them to match their exterior's shapes (almost all of the building interiors have their own floor so make sure you have no terrain under them!) Note: if you wish to make your terrain in LevelEdit's Heightfield, you only need to position your buildings and not create any terrain here. Then Export the file, just like this: Save your File: (in your mod Directory IE C:\Program Files\RenegadePublicTools\LevelEdit\Tutorial_work). Make sure it is .W3D filetype. Click Renegade Terrain and hit OK Adding your buildings in LevelEdit Start Level Edit, and click on the Preset "Terrain" and hit Temp. On the popup window's General tab, name your new preset (e.g. myterrain, mybuildings, etc). On the Settings tab, click the directory icon next to m_ModelName and select the W3D file you just exported. Leave m_LightFilename empty and hit OK. Select your new preset and hit Make Optional: Add a Heightfield map If you did NOT export a map along with the buildings, you have to create a heightfield level. Otherwise, skip this part. Switch to the Heightfield tab and click Create New: Set your dimensions (or keep them as default) and hit OK. Click Material Settings Select a tga format texture file from your mods's Level Edit folder and make the settings similar to this then hit OK: Now your new heightfield terrain should appear under your buildings like so: Optional: Working with Heightfield If you haven't created a Heightfield for your level (because you created your map in GMax-RenX/3ds Max), skip this part. Creating hills NOTE: save before making height fields, you can't undo them. Save often, because if a mountain goes into a building, you'll never get it level again. Pick a spot, anywhere you want a hill: Make sure your setting are like this (Heightfield tab): Click this button to affect the Heightfield: Now click and hold your mouse to create cliffs/mounds. Right-click to decrease the height. Adding extra textures Use this same technique to add other textures to maps (switch Brush Type to Texture Paint). Make sure you use an empty material box for each texture. Tiberium Field Just add this texture, set it to tiberium field (it will damage people walking into it) Making the buildings functional Every building needs its own, unique building controller to function properly. (Building controllers are under the Preset tab -> Buildings in different "folders", usually named bld_name or mp_name. Click on the appropriate one and hit Make to place it. These are not visible ingame, only in the editor.) This example will show how to set up the buildings in Renegade but most of them work the same way in other games too. Advanced Guard Tower Put the building controller on top like this: The Advanced Guard Tower controller is under generic buildings, make sure you use the one called "mp_GDI_Advanced_Guard_Tower" on it. Barracks Power Plant Refinery Refineries are setup different. Placing the controller alone is not enough. Select the controller and hit CTRL+P to add and position the Car Marker: Weapons Factory The GDI Weapons Factory has a door that blocks you from placing the Car Marker inside. To move that out of the way, click Edit -> Terrain Selectable (must be ticked) Click on the Weapons Factory door and then Unlock it: Hold CTRL + SHIFT and the up arrow to make it move up, just hold shift and the up arrow to make it go up slower. Select the WarFactory controller, Hit CTRL + P again to make the Car Creator, and place it in the middle of the war factory, make sure its centered on all side so its in the middle. Now make a Vehicle Construction Zone: This makes it so people will die, if they are in this zone while a Vehicle is created (but the vehicle needs it too to drive out from the bay on its own so don't skip placing it!). Strech it out by clicking on the black box in the corner (Shift-drag to stretch it upwards). Put the door back (hit Enter while it's selected to lock it again), and also make the terrain un-selectable, by unchecking it under Edit. Create Waypoints They are under waypaths, and use the Vehicle Only Waypath, Hit make and draw three points, hit esc to stop drawing them. make three paths just like this: then slide the three nodes a little more under the door, make it close to the car maker. Double click one of the nodes, NOT the whole strand, just one node, and select these options. Obelisk Place the controller to the very top tip of the Obelisk and then double click it. On the Position tab, make the Z coordinate 41 meters smaller so it will appear UNDER the building. Airstrip Make the airstrip look like this, use the same technique as on the gdi side. Make sure the car maker is facing the way the arrow is. Also make the top 3 nodes closer to the carmaker than shown in my pic. Tiberium fields Now you need to place Tiberium Zones: Make one for GDI, and one for Nod. A tiberium field should be equal distance from each base, or make each base have its own. Make a waypoint from one of the paths coming out of the Weapons Factory and Airstrip. Make the waypath go to the tiberium field. (its only one way, you dont have to draw it there and back, only there). Also give this waypath the same settings as before, by double clicking one of the nodes. Now make a waypath from the Tiberium Refinery to the field. Again, only one way, you dont have to draw it back. And also give this path the same settings as before. Spawners and PTs TS: Reborn has the PTs and Spawners placed already from the imported w3d building files. So if you are making a Reborn map, you can skip this step. Go into a building, and find a pt. you have to do this for every Pt and Every Spawner, if you are setting up a Renegade map. Find the PT object on the preset list and hit Make: Position it over the PT model: Now place some Spawners to where the players will start (next to PTs): Position and rotate them so they face the PT object. This will make players face the PT immediately after they spawn. Now redo this step for every single PT in the level Generate Pathfind for AI Harvesters If you don't already have one, place a Human Pathfind Generator somewhere (preferably close to Refinery, you can also place one at both refineries) Now click Pathfinding -> Generate Sectors. This can take a long time depending on the map size, sit back or take a break until it finishes. Thats it, export your map and have fun!
-
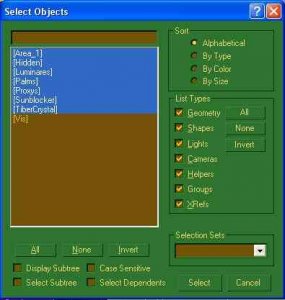
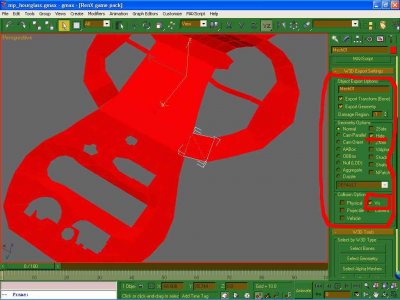
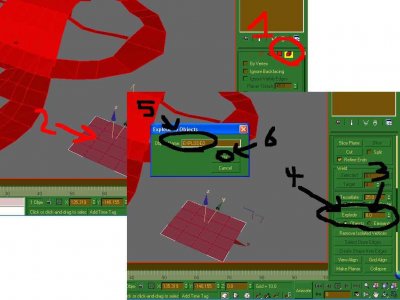
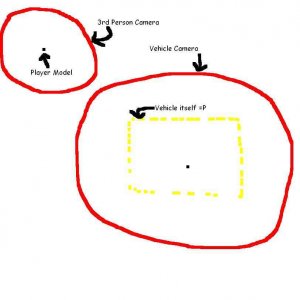
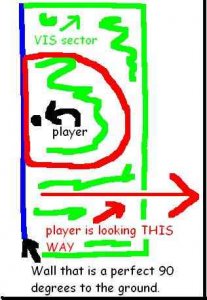
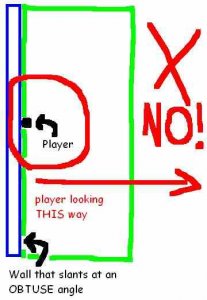
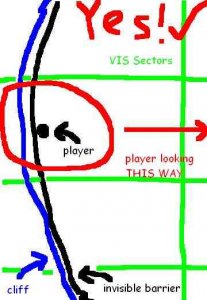
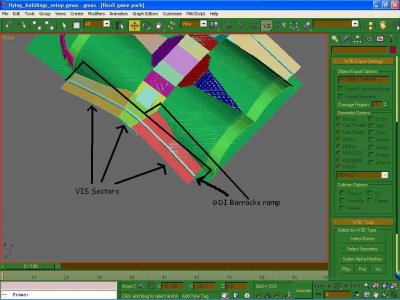
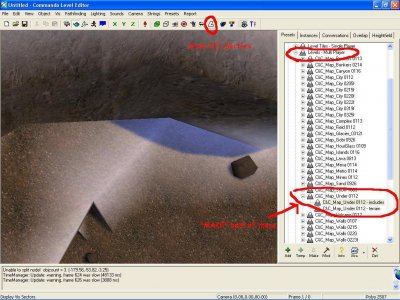
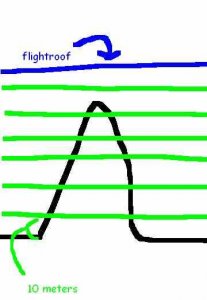
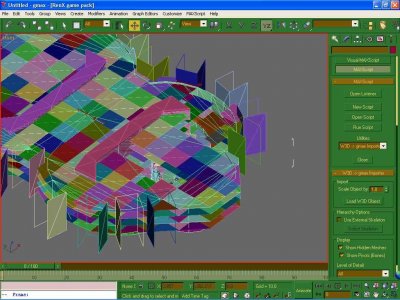
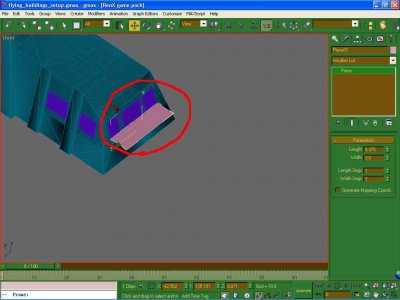
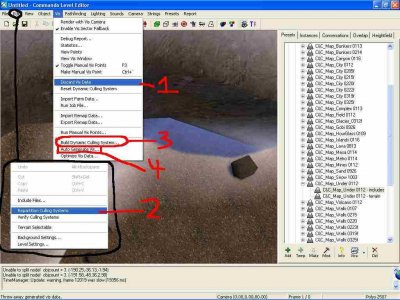
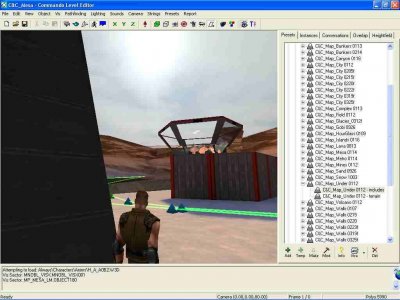
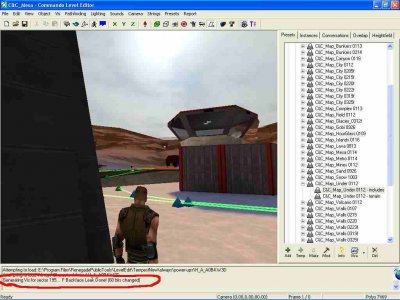
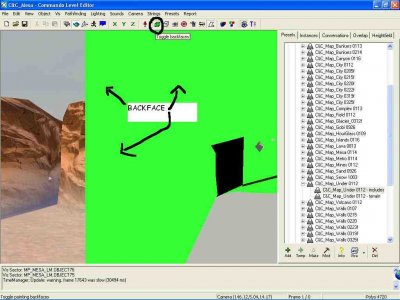
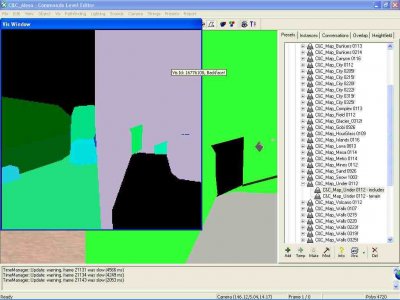
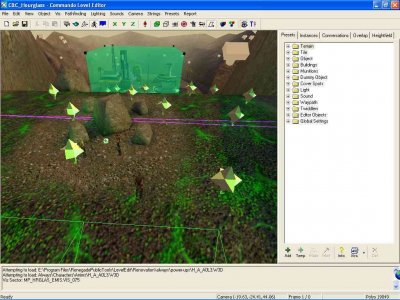
Author: YSLMuffins Skill level: 6 This tutorial shows you how to add VIS to your map (objects that the players can't see from certain angles will not be rendered for them, increasing the Frames Per Second for the players). Content: 1.1 Introduction 1.2 Getting Started 2.1 Getting the VIS sectors done 2.2 Important VIS sector notesTHE PLAYER in THIRD PERSON 2.3 Important VIS sector notesTHE PLAYER in a VEHICLE 2.4 VIS Sectors on a map with FLYING UNITS ENABLED 2.5 My personal VIS set up recommendations/known VIS issues 3.1 Getting VIS set up in the Commando Level Editor 3.2 Detailed Manual VIS point placement 3.3 VIS troubleshooting 3.4 Retouching VIS after the fact 4.1 Additional hints and tips 5.1 Credits 1.1 Introduction So youre creating a map and you want your map to be played by as many people as possible? Whats the best way to do this? Make sure that the map gives the best performance as possible! Whats one way to do this? Get VIS set up on your map! VIS is short for VISibility, as far as I know. Its Renegades way of speeding up performance on their huge single player levels and on their online multiplayer maps. By way of invisible meshes called VIS sectors located all over the map, each sector has its own data on what can and cannot be seen from that particular pointso for example, if youre inside the Hand of Nod your computer wont waste time rendering the inside of the GDI Barracks (with proper VIS data), or the barracks period if you cant even see it. The end result saves your video card and CPU from processing useless data and can leave it to focus on whats importantwhats right around you. Now, setting up VIS properly can be time consuming, and most smaller maps should do fine without it, says Greg Hjelstrom, lead programmer for Renegade. On bigger, higher poly maps, though, VIS is a mustand if there are parts of your map where the FPS drops dramatically, youll want to seriously consider setting up VIS for your map. Besides, all of WWs maps have a VIS system in place! 1.2 Getting started I assume youve downloaded the Renegade Public Tools. Navigate to your Program Files > Renegade Public Tools > HowTo > Multiplayer Maps > mp_hourglass folder. Open the mp_hourglass.gmax scene in RenX. Hit the Select by Name button and select everything in this diagram. Hide them after theyre selected. Everything thats left is the VIS group. Ungroup it. Here are the VIS sectors for the map Hourglass. Notice the important characteristics that these VIS sectors share: Most every POLYGON on the map has been cloned into separate individual VIS sectors. A VIS sector is basically a hidden mesh with the VIS option checked in the W3D options. See diagram. Each VIS sector is hidden. Each VIS sector is located a meter or two below the actual terrain. The VIS sectors are located in every place the player, whether on foot or in a vehicle, can move (actually, every place where the players CAMERA can movemore on this later). The VIS sectors are not one huge mesh. Study this setupyoull have to mimic this type of setup on your own map. 2.1 Getting the VIS sectors done This is probably the most tedious part of the processif you do it right. I personally recommend getting your VIS sectors done before you texture your terrain, as hundreds of tiny meshes with a material texture assigned to them take longer to load than hundreds of tiny meshes with NO textured assigned to them. The lazy way to do it would be to clone your terrain ground and Explode it. Select your terrain, clone it, select all of the faces of your mesh by hitting the ELEMENT selection button, click your terrain, scroll down to the Explode box in the Editable Mesh tab, set the number by the button to 0.0, and hit explode. Pick a name for your exploded meshes, and hit OK. See Diagram. Now, I no longer recommend this method because (1) you can end up with thousands of VIS sectorsmeaning thousands of unnecessary VIS sample points, and (2) WW doesnt do this. The Explode function separates a mesh, when set to 0, into individual triangle FACES, which are not only awkward VIS sectors, but unnecessary. Detaching your VIS sectors manually may take a lot more time, but it could save your VIS system from crumbling entirely when you try to Auto-Generate the VIS for your entire map (i.e., LevelEdit crashing when trying to Build the VIS sample points). If you notice on the Hourglass gmax scene, youll notice that WW did not explode their VIS sectorsthey selected a polygon or two, hit the DETACH button, and gave it a name. You could end up with hundreds of sectors, but not thousands upon thousands compared with using the explode method. Give your VIS sectors a unique name followed by a number, so when it comes time to Select them all you can easily assign the VIS sector W3d propertiesHIDE and VIS. Group all of your VIS Sectors, and lower them all by two meters along the Z-axis. 2.2 Important VIS sector notes - THE PLAYER in THIRD PERSON Its not where the player currently is thats important in the VIS culling systemits where the CAMERA is located. See diagram. When the Player is in first person mode, the camera is located exactly where the player is standing. When the Player is in third person or inside a Vehicle, that is no longer the case. By looking at the crude diagram Ive supplied, consider this: the camera is always BEHIND the player depending on the direction the player is looking and the camera swings around the player as the player moves the mouse. This may be obvious, but you may not have consciously realized this. Also consider these situations: First diagram: the player has backed up against a wall that has the PHYSICAL and CAMERA w3d characteristics checked. The players camera cannot move beyond the wall, so when the player is perfectly against the wall the player is also smashed against the camera so the players view is probably obstructed by the players character model. The VIS sector in green, in this case, is fine. This case also applies if the wall slants at an ACUTE angle against the ground. Second diagram: the player has backed against a wall that has the Physical and Camera w3d characteristics checked. The wall slants backwards against the ground at a degree greater than 90 degrees (pretend its a mountain or something). The VIS sector ends at the base of the wall, but since the wall slants backwards so that the players camera can move beyond the VIS sector, the VIS sector MUST be extended PAST the wall. As you can see by the Red camera circle in the diagram, the players camera has moved out of the VIS sector. Whenever the players camera stumbles outside of any VIS sector, nothing could happenor everything could turn invisible for the player (a VIS glitch). Third diagram: the player has backed against an INVISIBLE barrier that blocks the player from falling off the cliff, but the invisible barrier does (and should not) have the CAMERA w3d property selected. The players camera has moved past the invisible barrier and the cliff itself! However, because the VIS sectors extend past the cliff, the player should experience no VIS glitches when this situation is encountered in game. Now, in the gmax scene, we can put these situations to the test. Study this diagram. Get the picture now? 2.3 Important VIS sector notesTHE PLAYER inside a VEHICLE Fire up Level Edit, load the map UNDER, and click the SHOW VIS SECTORS button. See diagram. Enter walkthrough mode, change the camera to third person, and escape walkthrough mode. Click the Camera menu, and click on GDI_Mammoth_Tank. Enter the walkthrough mode againsee something different? This is how you can walk around the map in your own virtual mammoth tank, minus the model and the speed. When you make your VIS sectors, you must not only consider the FIRST and THIRD person camerasyou must also consider the VEHICLE cameras. If you remember from the crude Camera diagram, the vehicle camera travels around a much larger radius than the Third Person camera. Walk around the map Under with the mammoth tank Camera. You may also want to consider using the camera Nod_Apache if you have flying units on the map. It swings on the widest radius possible--so it is even larger than GDI_Mammoth camera. Youll notice the green highlighted VIS Sectors as you walk around. If you ever have a landmark ramp like on under, youll have to make sure your VIS sectors extend beyond the physical ramp beyond a much larger area, but ONLY if a vehicle can get up there. Youll probably only have to test using the Mammoth Tank camera, because I believe that is the camera that circles the largest radiusso if you have the Mammoth tank camera covered, you have the rest of the vehicles covered. (The Nod_Mobile_artillery camera appears to be larger, but it seems pretty obsolete since if you look up the Havoc model gets in your waythis was patched with the flying path.) Youll want to consider making sure the player cant get too close to the edge, or rely on the player not getting so close to the edge that they fall off! 2.4 VIS Sectors on a map with FLYING UNITS ENABLED When you have flying units enabled, you must have additional layers of VIS sectors in addition to the VIS sectors you have on the ground. Each VIS layer should be separated 10 meters on the Z axis. See diagram. Hopefully you wont have this many VIS layers, but you should get the idea. You should continue to have VIS layers until you hit the flight roof. The 10 meters number is directly dependant on the VIS Sample height that you can increase/decrease in Level Edit. 10 meters is the default, but increasing this number, while it can cut down on VIS layers, it will vastly increase the auto-generate VIS processing time. I recommend leaving the VIS sample height at the default. More on this later. Consider what WW did apparently on C&C_City_Flying. It was mostly likely because the team was short on time, but WW basically added square VIS sectors 30x30 each all over the map, even in areas where there were already VIS sectors. Since WW seems to have gotten this to work, perhaps you can too. According to the diagram, there are four layers of VIS sectors, each layer covering the entire map. The first layer seems to have been made from scratch, and each additional layer was cloned from the first. This could get complicated, but Ill leave it up to you to get things doneI dont have anymore specific advice on making VIS sectors for flying maps. 2.5 My personal VIS set up recommendations/known VIS issues The GDI/Nod Power plants need to have additional VIS set up on themthe default VIS sectors arefaulty. Even if you arent going to include flying units on your map, locate the FLYING_BUILDINGS_SETUP.gmax available on the WW FTP and merge the GDI and Nod Power plants onto your own map. They include the necessary VIS that youll need if you do not have terrain under your buildings (you have holes cut out of your terrain to specially fit each building, like WW does). I recommend adding VIS sectors outside of the windows of the Hand of Nod. They are common places for VIS glitches. See diagram, except do this for all the windows. 3.1 Getting VIS set up in the Commando Level Editor So youve finally gotten your VIS sectors done in gmaxnow youre ready for the work in Level Edit! Make sure youve generated your Pathfind sectors and whatnot, so the Human Pathfind Generator is already on the map. See diagram. First, go to the VIS menu and DISCARD VIS DATA. Next, go to the Edit Menu and REPARTITION THE CULLING SYSTEMS. Third, go back to the VIS menu and BUILD THE DYNAMIC CULLING SYSTEM. This step will take a little while. Fourth, go take a nap or something while this is chugging away. Go to the VIS menu, and hit Auto Generate VIS. In the dialog that pops up, set the Granularity to 5 (my personal recommendation). I recommend 5 because this could save you a vast amount of time while checking for VIS glitches Fifth, walk around the map, look for VIS glitches, and take MANUAL VIS point samples. 3.2 Detailed Manual VIS Point placement The auto-generate VIS function is not going to be perfectyoull have to walk around the map and check for VIS glitches. Over my experience here are common places where VIS glitches occur: The doorways at every building The Hand of Nod interior looking out through the windows The GDI Advanced Guard tower just as you enter through the doorway Tunnel entrances The roofs and ramps of the buildings on Flying maps When dealing with this places, hit CTRL + SHIFT + T to hide the doors of the base buildings so you can enter/exit freely and check for VIS glitches. When you find a VIS glitch, hit CTRL + ~ to take a manual VIS point sample. The invisible object that should be visible should become visible. See diagram. Here is before; notice the obvious VIS glitch? After hitting CTRL + ~, pay attention to the status window at the bottomhere is the after result: I think you should get the idea now. Run around the map, around the areas I suggested, and check for VIS glitches. 3.3 VIS troubleshooting Q: Im trying to fix this VIS glitch, but I keep getting a BACKFACE LEAK OVERFLOW ERROR! This means there is a BACKFACE at that particular point. Backfaces prevent the VIS sampling system from generating a VIS sample, because the VIS system thinks the player is in an invalid location (i.e., under a mountain) and wont generate a sample. See diagram. To show backfaces, hit the SHOW backface button. Everything that appears in BRIGHT GREEN is a backface. According to Greg Hjelstrom, the VIS system needs there for not to be any backfaces, or a very tiny amount, because this saves the VIS system from performing needless processing. To fix the backface problem, go to the VIS menu and hit VIEW VIS window. Try the manual VIS point sample againthis is when something should appear in the VIS window. Move the mouse around the window until you see BACKFACE! Go to the instances tab and locate the particular mesh that has the backface exposed. Clear the checkmark by it and try to do the VIS sample again. This should fix the VIS glitch. However, if this method cannot solve the VIS glitch, or if hiding that mesh with the backface makes something turn invisible that you dont want to turn invisible, you will have to go back to gmax and fix the problem manuallythis means youll have to start the VIS process in Level Edit ALL OVER AGAIN, so as you work, use the Toggle backfaces button often and be mindful of backfaces on the battlefield! Q: I keep getting a Vis Sample Rejected - No Vis Sector or Vis Sector ID not assigned! error! If the VIS glitch is severe, you will have to go back to gmax and add a new VIS sector to that location. You will have to start the VIS process in Level edit all over again. Study section 2 again, as this is probably most likely the culprit behind your VIS glitch problem. 3.4 Retouching VIS after the fact After exporting your map, and after youve closed Level Edit, should you find more VIS glitches in game, reopen your map in Level Edit and fix the VIS glitch. Before you save your level again, make sure you go to the EDIT menu and REPARTITION the CULLING systemsthis is very important, if you dont do this, the VIS data could be COUNTER-PRODUCTIVE and actually SLOW down the players FPS. Do this every time before you export your level again, and your arduous VIS work will pay off. 4.1 Additional hints and tips Use the wireframe mode as you move around, then hit F9 and toggle it back and forth before adding a VIS sample. You can totally customize the way VIS samples are taken this way, by making sure that only a needed sample is taken that doesn`t show more polygons than are actually visible to the player. Use wireframe because it can tell you when something is disappearing and lets you see how the VIS is working in the specific level. You can see things way off in the distance just become totally obscured by the VIS engine as you run around, and you can see the interiors of the bases start coming into view as you move towards each base. Use the other camera views, like varying tank views, so you can fix issues the same way with vehicles, too. Other points about hills. Say you`ve got a lot of hilly terrain on your map. It`s my theory that the VIS auto-generate sample seems to be based on the first person camera. If you open up Hourglass I think you`ll notice all of the manual VIS points high in the air over the hill. If you switch to the first, or even third, person camera while on the hill, you`ll notice you won`t see a lot from the hill. But change to a vehicle camera you`ll see a lot more--but apparently the auto-generate VIS sample doesn`t consider the vehicle cameras. It appears that VIS glitches are common with a land form like the hill on Hourglass, or even on a smaller scale, if you have a sharp, sudden rise in elevation several meshes over the hill might be accidentally turned invisible by the VIS sample. So, if you`ve got a lot of hilly terrain, like Hourglass, on a smaller scale, be sure to walk around with the vehicle camera and check for VIS glitches. If you move your view below the map, and "unhide" all the VIS layers, it seems to go MUCH faster with high settings on the granularity and flight ceiling. 5.1 Credits Written by YSLMuffins Additional notes by Dante and Aircraftkiller HTML Formatting by General Havoc
-
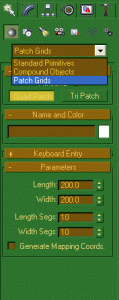
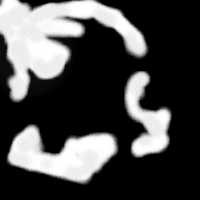
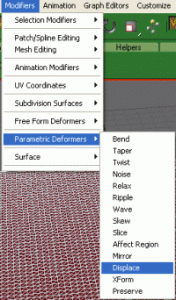
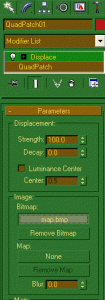
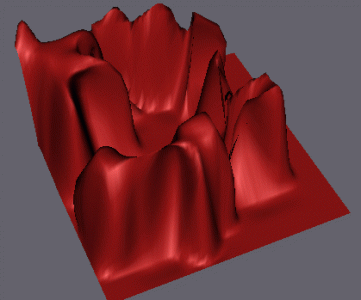
Author: Genocide Skill level: 2 This tutorial shows an alternate approach of shaping up the basics of a map in GMax-RenX/3ds Max. Make Terrain Without Modeling It! Bored of Making Maps/Terrain? Well Now With my Tutorial I Have Made It Sooo Much Easier, And It Dont Take An Expert To Do. This Tutorial Will Learn You How To Make Easy Terrain Just By Using Your Favourite Paint Package, PSP/Photoshop/Paint Or Whatever. Right Reset RenX/Gmax By File>Reset Right, Now Create a `Quad Patch` Object (In Standard Primitives Dropdown Box) For Example Create One 200X200 And Units With 10 Segs In Both The Length And Width. See Below: Now Its Time To Create The Terrain. Ok, Now Open Your Favorite Paint Program And Make A New Image It Doesn`t Need To Be Hi-Res For This I Used 200X200. Make Sure The Background Colour Is Black And Then Choose Your Brush Tool And Change Its Properties To The Lowest/Hardness And Opacity. Make The Brush Whatever Size You Want And Now Just Scribble Or Make A Really Detailed Picture, Up To You. This Is What I Made: Make Sure That You Save The File As A .BMP Now Under Modifiers Go Down To Parametric Deformers And Then Choose "Displace" Set strength to 100 and click the bitmap box (it should say none) now select the BMP file that you just saved Finished: And That`s It! Remember This is a beginners tutorial, keep practicing and mess around with the settings and maybe u could make some excellent map, without actually modeling it....anyway ..that`s it . moonsense715: Obviously, it's a very rough shape that you get. Try smoothing it out or relaxing the outstanding vertexes to make the "cliffs" look less extreme and you might have a good map start that you can continue working on after converting it to Editable Mesh/Poly.
-
Author: Oblivion165 Skill level: 2 This tutorial shows you how to add extremely basic bots to your map. 1. Open leveledit to your desired map. 2. goto (on your presets tab) Objects ~ Spawners ~ Object Spawners, Temp the "Object Spawners" 3. Name the new Temp, whatever you want to call your bot ~ then hit ok. Now goto Soldier ~ Soldier_Presets ~ and select any of the players to use as a bot. Temp the soldier, and name it whatever you want your bot to be. 4. Now you must make the bot angry, so under your "Temped" soldiers "Settings tab" Click this setting: Hit OK 5. Go back to: Objects ~ Spawners ~ Object Spawners, Select your temp you made ealier, Under the "Settings" tab, select your soldier as its preset. 6. Place the Object Spawner on a map, and your done. 7. Extras: To make a random spawner (to randomly, spawn different player types) temp different soldier types like before, and make a new Spawner for them, but as its preset, add all of the soldier types you made. Written by Oblivion165
-
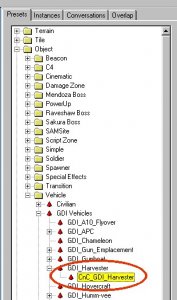
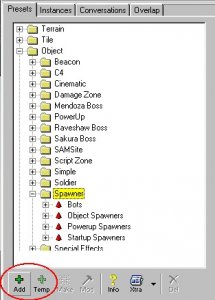
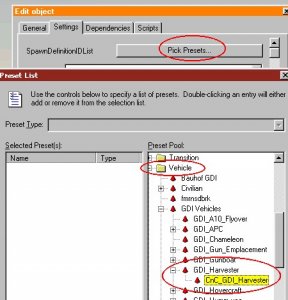
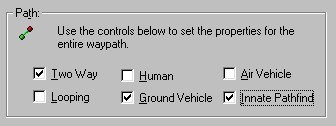
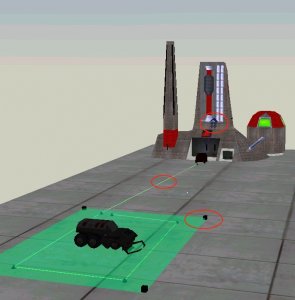
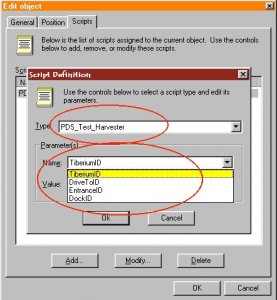
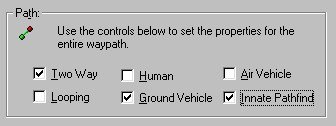
Author: Läubi Skill level: 2 This tutorial guides you how to place AI Harvesters and help them find their way from the Refinery to the Tiberium/Resource field when there is no Vehicle Production Facility present on the map that creates them. 1. Create the Harvester: There are two ways: I. If you only want to have a harvester that don`t come back if it is destroyed, just browse in the Presets to Objects -> Vehicles -> (Nod or GDI = xxx) -> xxx_Harvester - CnC_xxx_Harvester II. The second way is using a spawner, that means if the harvester gets destroyed, a new one will spawn. Goto Object -> Spawner If you making a map you must click to Temp, if you use this in a Mod use Add. Enter a name e.g. Nod_Harv_Spawn. Then go to the "Settings" tab and click "Pick Presets". Then select Vehicle -> xxx Vehicles -> xxx_Harvester -> CnC_xxx_Harvester. Double click the preset so that it appears in the left list. Press Ok. (two times, your now back at Commando Editor Screen) 2. Place the Harvester and setting up the envoirment: Select the Harvester on the preset list, click at Make, and move the Harvester somewhere in the Tiberium field. Also place a Tiberium field zone and waypath from the refinery to the Tiberium, with the two way, Ground vehicles and inniate pathfind options enabled. Now write down the following ID`s (doubleclick on the object) Tiberium refinery Controller WaypathID (not the ID from a waypoint! The wapath ID is needed!) Tiberium field 3. Setting up the harvester script: Double click an the Harvester and add the PDS_Test_Harvester script and fill in the following parameters: TiberiumID = ID of Tiberiumfielde DriveToID = ID of the waypath EntranceID = ID of the Tiberiumrefinery Controller DockID = ID of the Tiberiumrefinery Controller 4. Finish your work: Save your level. Also place a human pathfind generator on your map and then generate the pathfinding, then save again, and enjoy your work.
-
ts.w3dhub.com W3D Hub Game Night - Friday 20th
moonsense715 replied to OWA's topic in Community News
Me neither. -
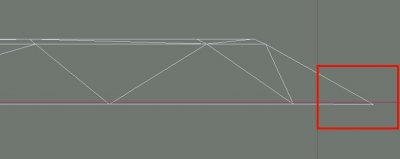
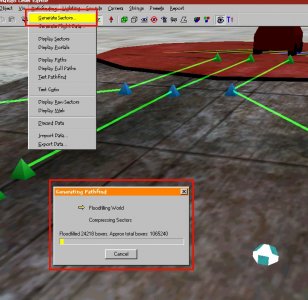
Author: Läubi Skill level: 2 This tutorial guides you how to let the AI Harvesters find their way from the Refinery/War Factory to the Tiberium/Resource field. X. If you are making a map for Renegade: Check in Gmax/RenX, that the airstrip building model sticks a little bit into the ground: 1. Export your Level and open it in Level Editor. 2. All waypathes you create for harvester must have the following settings checked: 3. Set three Waypathes for vehicle factories (for the nod airstrip, the vehicle must point to the direction of the arrow on the strip): (If you don't have the building controller or car marker placed yet, you can find the controller under Buildings > Airstrip / WarFactory. Place the controller and press CTRL + P to create and place the carmarker.) 4. Then one waypath must go to the tiberiumfield (no difference between GDI and Nod): 5. Now you must make a waypath from the refinery to the tiberiumfield: 6. You must set a pathfindgenerator at your map (named "Human"): 7. Now save your Level as it's time for generating pathfinding sectors. This next step can take some hours, depending on the size of your map and the speed of your PC. You should also check, that there is enough free disk space for the Windows swapfile, because this process sometimes need 500MB swapfile, depends on the size of your RAM. Goto Pathfinding > Generate Sectors. The the pathfinding generating will start. When the status changes from Floodfilling World to Compressing Sectors it may seem that your PC hang up! Don`t restart, just wait some minutes and the progress will continue. When the progress is done save your level and try it out ingame.
-
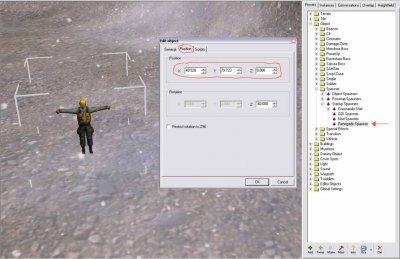
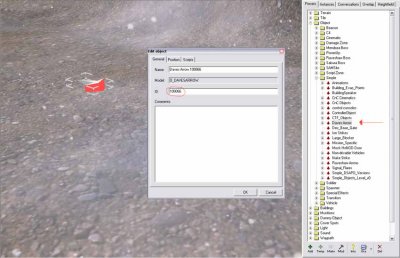
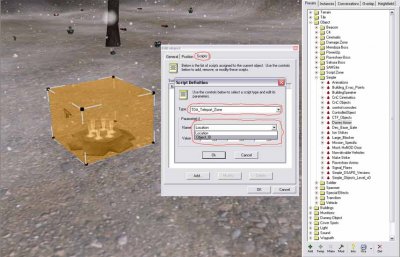
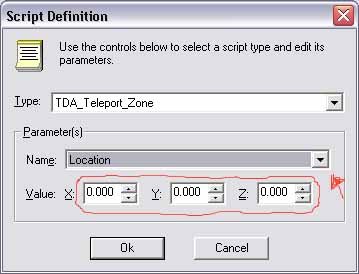
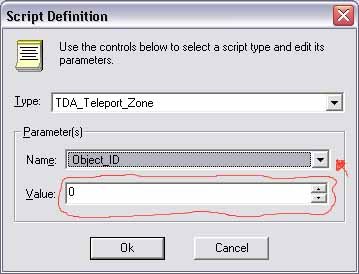
Author: General Havoc Skill level: 1 Getting Started This tutorial will guide you through making a working teleport on a map. After you have completed this tutorial you should have enough information to add a teleport zone to any map. I will guide you through each step of making a teleport zone. You may wish to skip some steps if you know what your doing. The teleport works using a custom script written by Dante that needs to be setup correctly for it to work. 1) Setting Up The Map Before we can begin to implement the teleport script we need to set up some objects to teleport to, these will be used in the script but not necessarily be seen in the game. First thing is to load up your terrain into the Level Editor. After you have loaded up your terrain into Level Edit we can start to add the objects required for the script to work. The fist thing you will probably want to do is add an object to indicate where the teleport zone is. You can either use a preset (e.g. a pedestal) or make your own model in gmax and import it into Level Edit or you can just leave it and use a feature of the map to indicate where the zone is (e.g. a doorway into something). This object has no function, it`s just to tell the player where the teleport is because the script zones are invisible in the game. Add your object to the map. The next step is to add a script zone that will indicate to the script the zone that any object goes within will be teleported. You will find the script zone under Object > Script Zone > Script_Zone_All. Make this object so it appears on the map, move the zone so that it covers the area you wish the object to be teleported in. You can size the zone using the back dots in the corners, holding shift will allow you to drag the zone upwards. it doesn`t have to completely cover the object or area, an it doesn`t need to be as tall as the object your teleporting. The next step is to set the destination for where you want to teleport to. This is the point where you choose what method to use. Dante`s teleport script has two parameters, only one of them should be used. The one tells the script to teleport the object to an XYZ location and the other one tells it to teleport the object to another object (using the objects ID). Each method is as effective as each other. This is the first method, this uses XYZ coordinates to teleport an object. The object that enters the script zone we made will be teleported to specific coordinates we pick. if your teleporting infantry you can use any object to get the coordinates, but if you want to be accurate then it`s best to use a model from the presets such as a spawner found under Object > Spawner > Startup Spawners > Renegade Spawner. Place the spawner somewhere on your map and it`s best to make sure its aligned with the ground when you move it (Ctrl + D) then after you have it in the correct place where you want your teleported object to go to double click the spawner on the map. A box will appear, click the position tab and note down the X, Y and Z coordinates for later use. After you have got the coordinates, delete the object. This is the second method, this uses an object`s ID to teleport an object. The object that enters the script zone we made will be teleported to this object that we add to the map. This allows use to see where we are teleporting to on the map but is no different in game to the first method. You may find that the different methods are useful for something. Place an object on the map, Daves arrows are probably the best thing to use as they don`t show up in game. There found under Object > Simple > Daves Arrows. Place the arrow on the map where you want to teleport to, make sure there is enough room for the object spawned to fit, you may have to adjust the object`s position later if you find that your being teleported into the ground. Once the object is placed double click the object and then note down the objects ID found in the box. Do not delete the object after you have it`s ID number. 2) Setting Up The Script The last stages are to setup the actual script so that it is linked to everything we have made so far. go back to the script zone we made earlier and double click it. Then got to the scripts tab and click "add" this will bring up a box similar to the one in the picture below. from the "type" list you should see a list of different scripts, if you don`t see them then you have not installed the scripts into your mod folder correctly, follow the process at the start and check to see if you did everything correctly. From the list of scripts scroll down until you find "TDA_Teleport_Zone" select that then you should see the same as below. You should see a section with the title "parameters", this is where you select the parameter according to how you set up the map. You must only use one of the parameters of the script or it may have undesired effects in the game. Select the "Location" parameter if you are using the XYZ to teleport to and the "Object_ID" parameter if your using another object to teleport to. If your using the "location" parameter fill in the X, Y and Z coordinates you noted down earlier in the three boxes on the window. After that click "ok" then it`s finished. If your using the "Object_ID" parameter then you have to fill in the object ID that you noted down earlier in this box. Remember you only use one parameter. 3) Testing Congratulations, you have successfully added a teleport to your map. You can now save it and test it in renegade. You may need to adjust it if it is not working as it should. Follow each step carefully again if you think you may have messed something up. Good Luck! 4) Credits This tutorial was written by General Havoc (Robert Hunt) I`d like to thank Dante for getting this script working and originally writing the script and may others. Also John Wilson for working on the scripts.dll. Also many thanks to the many people who help on the Westwood Mod Forums. Finally of course Westwood Studios for the excellent series of C&C Games. Let Westwood Live on!
-

Vehicle/Building/Infantry - Energy/Projectile creation - W3D
moonsense715 replied to Shnappz's topic in Community Creations
By the way projectiles can have emitters attached to them if a simple model is not enough. You create emitters in W3D Viewer using a texture to base your emitter on. Explosions can also use emitters if you want a big smoke or something similar. Muzzle flashes are a different table again. -
We add and fix a few more things then it should go live However there's no extra info about unwrapping there at the moment so you might as well ask further here. What we did with most of the AR vehicles is that we have split the whole vehicle across 2 separate unwraps/textures.
